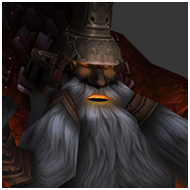
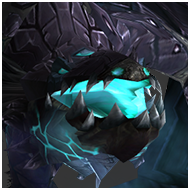
The Iron Assembly DPS and Parse Guide

iron assembly

Maximizing damage on this encounter revolves entirely around Rune of Power. Below are various strategies revolving around maximizing that uptime.

General Strategy

Phase 1: Brundir
Before the pull, employ a long (30 sec+) pull timer. When Brundir is at the right most point of his pathing, have your rogue(s) use Distract to keep him in place. Your casters should be setup on the right side of the room, ready to precast. When the pull timer hits 0, have a Death Knight use Death Grip on Brundir as an effective gap closer for your melee DPS.

The goal of Phase 1 will be to skip Brundir‘s AoE stun, Overload. This requires a lot of DPS, and just as much luck. Like most abilities on this fight, Overload operates on a Cooldown, and not a set timer. For this reason, it is possible to avoid this ability altogether. Have your Paladin’s HoJ Brundir 3x starting from when he hits ~30% health. If you are unable to meet this goal, it is advised to eat the Overload with a Divine Sacrifice rather than attempting to outrange the stun.

Phase 2: Molgeim
The conventional strategy for this phase is to have your entire raid spread out in the few seconds before Rune of Death comes off cooldown. This creates tremendous downtime for your raid, and if you are unlucky, it may nullify an entire Rune of Power.

To maximize uptime, instead of spreading for Rune of Death, stay stacked up. When Rune of Death spawns underneath you, have your raid use nitro boosts to a preassigned position. Use a combination of Divine Sacrifice, Shadow Aura + Aura Mastery, and raid-wide healthstones to negate the damage.

In an ideal world, your raids DPS will be perfect enough to secure a Rune of Power just before Molgeim dies. In practice, this is rarely the case. While this may make the DPS check in Phase 3 quite a bit higher, it is usually superior for the purpose of parsing to not stop DPS on Molgeim for more than a few seconds. If a rune of power is more than 5 seconds away from Molgeim‘s anticipated death timing, simply ignore it and continue executing Molgeim. Pop Bloodlust and hope your team can kill Steelbreaker with inferior Rune of Power uptime.

Phase 3: Steelbreaker
There aren’t many ways to optimize Phase 3. Stand still and blast, using your healers to soak Static Disruption instead of your DPS. Rotate raid cooldowns such as Divine Sacrifice as well as tank cooldowns like Pain Suppression in the beginning of the phase, to buy your tank time to slowly adjust Steelbreaker out of the Rune of Power without compromising melee DPS uptime.

Glyphs:
Heroic Strike
Whirlwind
Rend

Depending on your raid’s kill time and Rune of Power RNG, there are two different approaches you can take with Death Wish. At a maximum, you are going to be able to Death Wish twice. If your kill times are too fast (2 minutes 30 seconds or faster), then using Death Wish on the pull is the preferred option. If your kill times are a tad slower (2 minutes 50 seconds or longer roughly), then using Death Wish during the first Rune of Power would be better. The ideal scenario is that we line up our 2nd use of Death Wish to occur during the Rune of Power used to finish off Steelbreaker at the beginning of Phase 3, so familiarizing yourself with your kill time to know whether you should Death Wish on pull or during the first Rune of Power is important. 

If your raid calls to stop DPS on Molgeim until Rune of Power is cast, it is wise to stack Sunder Armor to 5 preemptively on Steelbreaker before Phase 3 begins. 

Although flipping trinkets pre-pull to line up with Rune of Power sounds tempting and with favorable RNG stands to be a DPS increase, it has a chance to backfire if RNG delays the Rune for too long. If you do choose to flip trinkets, flip them so that there is 10-15 seconds remaining on their ICD when initiating the pull.

It is also important to keep in mind that damage done to Molgeim + Steelbreaker in P1 and Steelbreaker in P2 is excluded from logs nor does it contribute to speeding up the encounter, so do not consider using Cleave.

Opener: Normal Pre-cast Opener

Pre-Pot: Potion of Speed

Glove Usage: On Rune of Power, Off CD, and Execute (2 or 3 uses)

2min Trinket Usage: *On Rune of Power Activation and Execute on Steelbreaker

*Kill Times are variable and may lead to increased or decreased Glove or Trinket uses. For parsing maximum uptime is king with the Rune of Power, but to ensure kill they are best used on Execute of Steelbreaker*

Talents: Default 55/0/16

Glyphs:
Quick Decay
Life Tap
Glyph of Haunt

Potion of Speed is the most optimal pre-pot due to needing to recast corruption after the Rune of Power spawns.

This fight is HIGHLY RNG dependent on Rune of Power and Rune of Death timings.

The most impactful thing for us as afflictions is making sure we have the strongest Corruption snapshot possible. With some good boss positioning we can get Rune of Power overlapped and gain buffs from both. Maintaining our 50% or 100% increased damage corruption is the key in this fight.

Whenever the first Rune of Power spawns it’s important to immediately use CDs and refresh all our amplified dots. We can cast Curse of Doom on our next kill target so that it can line up with our next target swap. The timing will vary based on how long it takes you to kill each respective Iron Council member.

Other than prioritizing keeping our corruption and dots refreshed from inside the Rune of Power it’s incredibly important to snap our Drain Soul inside of it as well, especially on Steelbreaker. This can allow for some insane Drain Soul DPS windows and push towards 1 or even 0 tank deaths in Phase 3.

Always try to re-snap Drain Soul after every tick inside of the Rune of Power so that we can get a full duration Drain Soul even if it expires.

Opener: Pre-Cast Shadow Bolt > Normal rotation > Curse of Doom Molgeim on first rune. 

Pre-Pot/Second Pot: Potion of Wild Magic. Potion of Speed near 50% hp Steelbreaker if zero tank death p3. During execute if 1 tank death p3.

Metamorphosis: Save until rune/lust on Steelbreaker if kill time is around 2:25 or less.

If kill time is 2:30 or more then Metamorphosis asap before first rune even and then on cooldown in p3.

Gloves Usage: Pop asap and on cooldown to squeeze in 3 uses.

If your kill time is around 2:10 or lower, then pop on first rune and in p3.

Nitro Boots Usage: If you are all booting out of Rune of Death then save for this.

The most important aspect to realize about Iron Council is that the Rune of Power and the Rune of Death timings are random after a cooldown for each ability and can heavily change how you will parse on this boss. But, in general you want to get as much uptime in runes (and maybe some double runes) as possible and hope that the timings line up to avoid movement in the fight.

The main tech you can do to squeeze a bit more damage out is to cast a Curse of Doom on Molgeim as first rune goes out to snapshot the damage, and when this pops you will cast another Curse of Doom on Steelbreaker (ideally in a rune as well).

Make sure to carry over some Soul Fire’s onto your next kill target after one of them dies.

Ideal Duration: 120-150s

The pre-pull:

Drop totems prior to the encounter right outside of pull range of boss (not fire elemental totem as we want to snapshot this). Pre-pot Potion of Wild Magic. Brundir should be Death Grip‘d and the three bosses tanked near each other.

Stormcaller Brundir and Molgeim opener and rotation:

Perform a standard single-target opener. Snapshot fire elemental totem when spell power is at a max, usually about 8 seconds into the fight. No reason to chain lightning or prioritize cleave here because only the boss that dies in each phase counts for parsing, and their health is healed to full after a boss dies.

Encounter specific notes:

  • A physical damage equipment set is best on this boss as there is no cleave as part of the parsing criteria.
  • Prioritizing cleave over single target will be a DPS loss. Use lightning bolt rather than chain lightning.
  • Be sure to stand in rune of power at all times to maximize damage.
  • If Steelbreaker kill time isn’t an issue use your Potion of Speed when able to line it up with other cooldowns, ICDs, and rune of power.

Cooldown Usage: There is a high variation in optimal CD usage depending on your group’s kill time; use your best judgment to maximize number of uses and alignment with each other and with runes of power:

  1. Pre-pot
  2. Watch for Rune of Power and move quickly to them. Hopefully your tanks will position the bosses that will allow you to receive the Rune of Power debuff (damage increase) while also being behind the target to prevent you from being parried.
  3. Save gloves and tricks for warlocks until the first Rune of Power. (While tricks doesn’t increase personal damage for parses, it will decrease the kill time which will lead to a higher parse in most cases). Then save gloves for the rune of powers.
  4. If the Rune of Power is about to end, don’t pool energy and instead use a non 4-5 point envenom.
  5. You can cast feint during your normal rotation to fish for poison/berserking procs, don’t try and save it for Overload as a Divine Sacrifice with cancel macro will keep you from having to run out of the rune for more uptime. 
  6. Save second potion and second wave of cooldowns for Bloodlust during the last Rune of Power.
  7. When spreading for rune of death, following the tank/Molgeim to keep more time/damage. It is highly likely that you will need to pause damage at some point due to the RNG of the fight and waiting for a fresh Rune of Power before killing Molgeim.
  8. The longer you must wait for the last rune from Molgeim to go out going into Steelbreaker will reduce how well you will parse.

Glyphs:
Glyph of Shadow
Glyph of Mind Flay
Glyph of Shadow Word: Death

Pre-pot: Potion of Speed

Potion: Potion of Speed

Opener: Standard

Iron Council requires a bit of luck and excellent snapshotting to maximize damage.

Refresh DoTs on the kill target whenever you are affected by rune of power.

Prioritize refreshing Shadow Word: Pain first, then Vampiric Touch and Devouring Plague.

Anytime two runes overlap each other, then you can double dip on the damage bonus.

If your kill target is about to die and you’re still in a rune, then apply Shadow Word: Pain and Vampiric Touch to the next target to ensure that you maintain the empowered DoT damage for as long as possible.

Ideally your raid group will Bloodlust in a rune just before swapping to kill Steelbreaker; this is the optimal time to use 3 minute CDs and your Potion of Speed.

Seal: Seal of Vengeance

Glyphs:
Glyph of Judgement
Glyph of Seal of Vengeance
Glyph of Reckoning

The most important thing you can do for your dps here is to get as much rune of power and boss uptime as possible.

  • Flip your trinkets before the pull so that they go off about 10-15s into the pull and align with the first rune of power. Once you are in the rune and your trinkets are active, pop wings.
  • If your guild isn’t doing the stun brundir to avoid Overload strat, then I recommend popping a consecrate just before his ability goes out so you don’t lose any dmg uptime on the boss.

Coming Soon!

The pre-pull:

●     Pre-pot haste potion

Stormcaller Brundir and Runemaster Molgeim opener and rotation:

●     Boot into position near Molgeim, as he will be the one dropping the Rune of Power buff that you will be using for the majority of the encounter. Multi bombing for Hot Streaks or focusing solely on Brundir is an option, as there are logs supporting both methods with some varying rate of success. Personally recommend just focusing on Brundir if your guild has a good kill time.

Encounter specific notes:

●     Any of the bosses that heal to 100% (after each death) does not count and will be removed from the logs. There is no cleave as part of the parsing criteria.

●     Be sure to stand in Rune of Power at all times to maximize damage.

●     Can Ice Block Brundir’s overload right before it goes off to help maintain uptime.

●     If Steelbreaker kill time isn’t an issue, use your haste potion when able to line it up with other cooldowns, ICDs, and Rune of Power. HOWEVER, spell stealing the shield off Molgeim should be a priority if you are looking to parse. You can use the rune of death to pop the shield right before transitioning to Steelbreaker and popping lust. This can lead to a very significant DPS increase!

Cooldown Usage (high variation in CD usage depending on your group’s kill time; use your best judgment to maximize number of uses and alignment with each other and with runes of power):

●     Line up gloves and cooldowns with Rune of Power as long as you aren’t sacrificing a use (e.g. if fight length is 2:30 consider using gloves on pull rather than saving for first rune so you get 3 uses [2 of which should be with Rune of Power up])

●     Use Combustion on first Rune of Power and with whenever your group uses Bloodlust, likely being the P3 Steelbreaker burn.

●     The Shield of Runes spell steal and actually popping the shield gives a 50% damage buff for 15 seconds.

Opener:
Drop an Explosive Trap before the pull. Ideally you have a Death Knight using Death Grip to get brundir into position, and into our Explosive Trap.

Encounter tips:

Glyphs:
Glyph of Insect Swarm
Glyph of Starfall
Glyph of Starfire

Pre-pot: Potion of Wild Magic

Potion: Potion of Speed or Potion of Wild Magic

Opener: Standard

Maximize the time you spend in the rune of power and try to snapshot every Starfall, aside from your opening cast, inside of one.

Anytime two runes overlap each other, you can double dip on the damage bonus.

Ideally your raid group will Bloodlust in a rune just before swapping to kill Steelbreaker; this is the optimal time to use Summon Treants and your Potion of Speed.

Use a potion of speed if you can line it up with a lunar eclipse in the rune of power or a Potion of Wild Magic if not.

Recommended Talents & Glyphs

150s Ideal Duration

Overview

The Iron Council is a short-to-medium length encounter that can be rather finicky. A few mechanics need to be respected, there’s a hard positioning check, and a strict timing requirement.

Mechanics Briefing

  1. Overload – If not enhanced by Rune of Power, use Barkskin and tank it.
  2. Rune of Death – Use a Dash, Nitro Boosts, or Feral Charge – Cat.
  3. Rune of Power – Stand in this to maximize your damage.

Pre-Pull Checklist

The Encounter
Begin by performing a single-target non-Berserking opener and single target non-Berserking rotation on Brundir and Molgeim. Near the death of Molgeim, it’s ideal that he dies just after placing a Rune of Power. Steelbreaker must be oriented around this with his back facing toward it. Once this happens, perform a single-target Berserking opener and rotation on Steelbreaker

Conclusion
Parsing on the Assembly of Iron is a combination of rotational cleanliness, boss kill time, boss positioning, and some luck regarding Rune of Death and Rune of Power. Use your Innervate before Steelbreaker is the only one left. Prioritize non-Feral Druids if Innervate or Rebirth is needed. Absolutely maximize your Rune of Power uptime and stay behind and within range of the boss.

Glyphs:
Glyph of the Ghoul
Glyph of Death and Decay
Glyph of Dark Death

Encounter notes:

  • Do not Gargoyle in the opener
  • OK to prepot here since Gargoyle won’t be used until only Steelbreaker is left
  • Good to use Pestilence for blood runes within your rune cycle, the splash damage from Wandering Plague can hit the target that counts on logs
  • Summon Gargoyle and Army in the last rune that is dropped before blasting Steelbreaker


About the Author

lettara

World of Warcraft veteran of 18 years. Ex world first raider and rank 1 healer. Slayer of dragons. Lover of cats.
Subscribe
Notify of
guest

0 Comments
Inline Feedbacks
View all comments
Scroll to Top