Blood Prince Council – Icecrown Citadel (25)


Having been slain once already, this trio of Darkfallen royalty seeks revenge, imbued with the power of both the Lich King and the queen of the San’layn, Lana’thel.
This guide will offer a detailed, step-by-step tutorial on how to deal with the Blood Prince Council and their combined elemental mastery.
Role Summaries
- Keep an eye on your distance from other players, ideally maintaining 12 yards at all times.
- Run away from the Ball of Inferno Flame when targeted.
- Try to direct it through ranged players as you do.
- Avoid Shock Vortex.
- Don’t let Kinetic Bombs hit the ground.
- Avoid taking Dark Nucleus from the tank unless requested.
- Dispel Glittering Sparks to avoid unnecessary damage.
- Mass Dispel works great if several players get hit.
- Avoid taking Dark Nucleus from the tank unless requested.
- Steer into the Ball of Inferno Flame when possible.
- Move towards the back wall during Empowered Shock Vortex, spreading as much as possible.
- Make sure you have sufficient stacks of Dark Resonance for Keleseth.
- Do not exceed 6 stacks.
- Call out Empowered Shock Vortex casts.
- Call out Conjure Empowered Flame casts.
- Call out Phase transitions.
- Call Glittering Sparks targets.
Abilities
Prince Valanar
Prince Taldaram
Prince Keleseth
Raid Composition & Preparation
Heroic vs Normal
Shadow Prison will not be active on Normal.
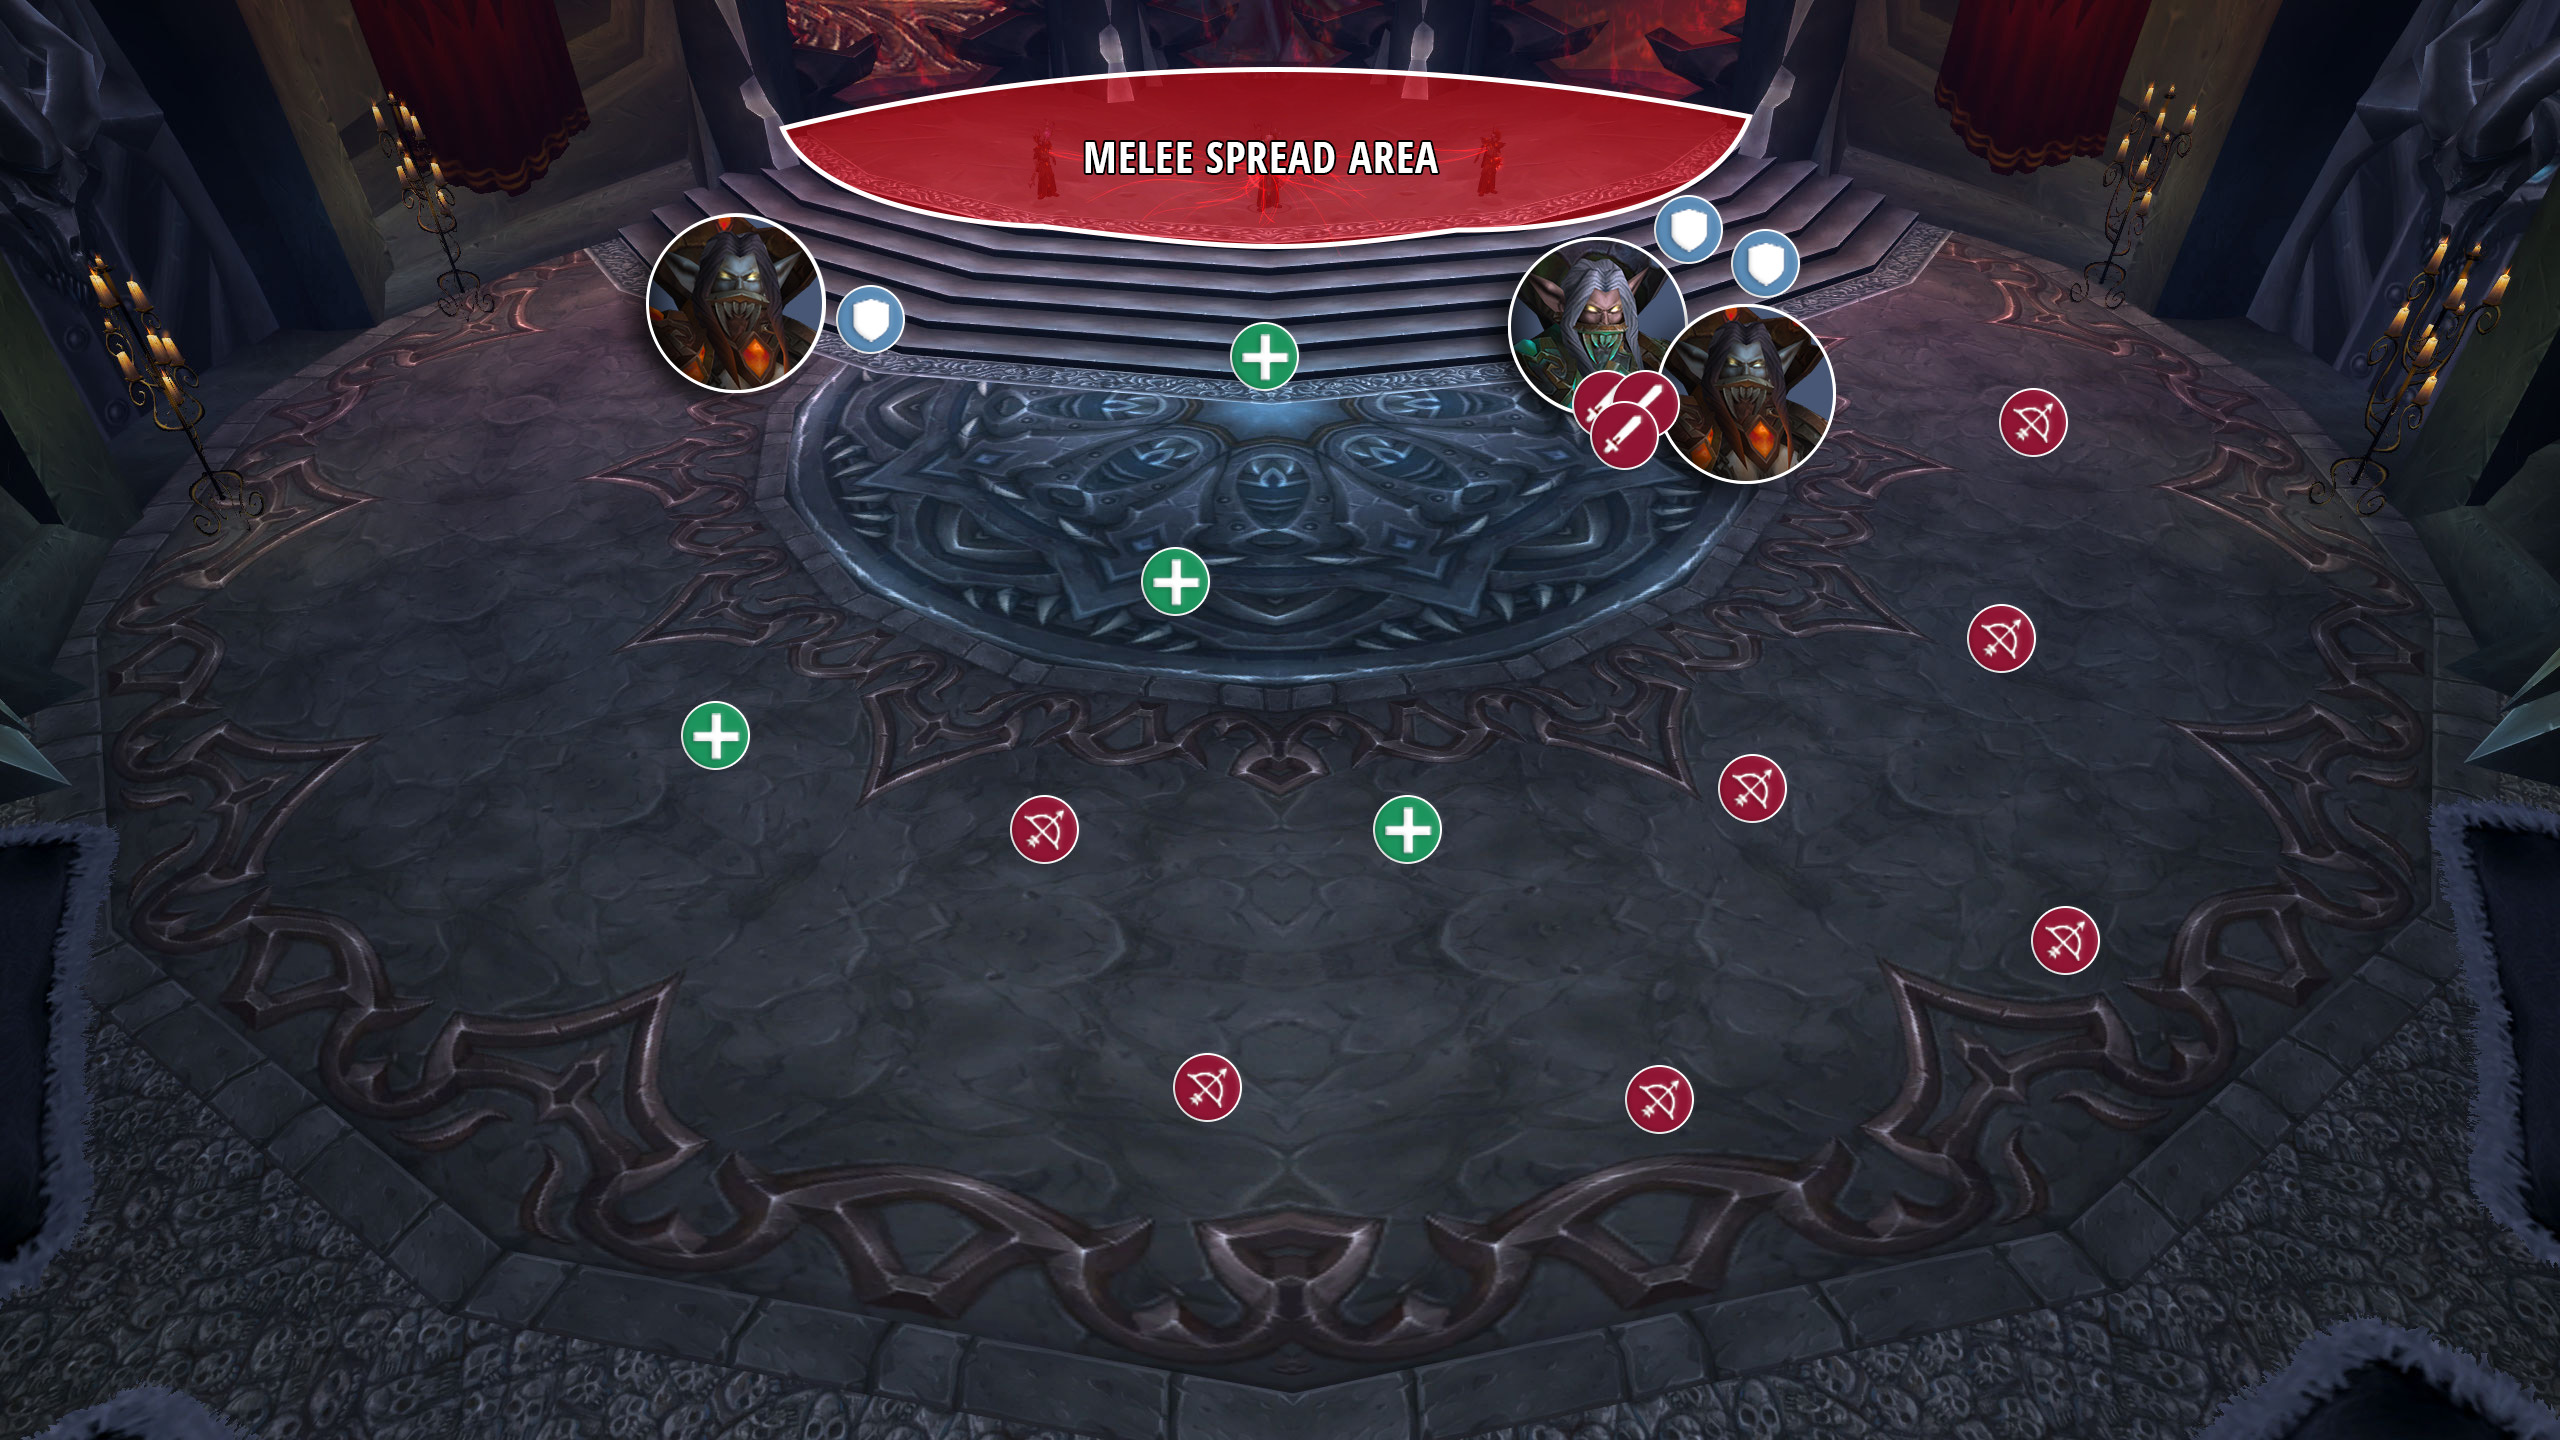
The Pull
To best handle this fight, groups will want to pick spots ahead of time for both Keleseth and the other two Princes. The council can be done with either 2 or 3 tanks. One tank should be able to manage 2 Princes simultaneously, but having 3 does relieve some pressure on healers, as well as allowing for significantly simpler target swaps.
The Fight
This council fight consistently swaps which Prince is attackable, requiring your raid to focus on one target at a time. This target will swap every 45 seconds, marked by Invocation of Blood giving the Prince additional abilities.
The fight will begin with Prince Valanar being empowered and will have looped back to him after around 2 minutes.
Prince Valanar
Kinetic Bombs are a constant threat from Valanar. These will be created roughly every 30 seconds, with the first spawning 18 seconds into the fight. Each Kinetic Bomb will drift down from the sky, exploding when it hits the ground. This deals heavy Physical damage as well as knocking back everyone within 50 yards of the explosion. Kinetic Bombs are “juggled” by damaging them, so a player should always be assigned to juggle the Kinetic Bombs. This role is typically covered by a Hunter, as they can use both instant shots and their pet to juggle effectively. Alternatively, you could have three dedicated pets targeting Kinetic Bombs at all times. As long as these pets are kept alive, they will passively juggle the bombs with no interaction needed.
Valanar will also cast a Shock Vortex every 20 or so seconds. These will deal heavy Physical damage every second to everyone within 12 yards, as well as knocking them back. Players will need to be constantly mindful to avoid these, and tanks may have to reposition the boss if one is too close to them or the melee stack.
While empowered by Invocation of Blood, Shock Vortex will become Empowered Shock Vortex. This causes him to create a vortex on top of every player, dealing medium Physical damage to every player and knocking them back. Empowered Shock Vortex has a 4-second cast time, giving players a decent amount of time to quickly scatter and spread 12 yards away from each other. It is important that all players spread effectively to avoid taking multiple hits from Empowered Shock Vortex. Melee will also need to scatter from the boss, running towards the wall opposite the ranged.
Prince Taldaram
Every 25 seconds, Taldaram will target a random player with a cone of Glittering Sparks, dealing a small amount of upfront Fire damage, followed by a slow and damage-over-time for 8 seconds. This can be dispelled, or Mass Dispelled in the case of several players being hit. Your group should ideally be decently spread to avoid this hitting more targets than necessary.
Roughly every 20-30 seconds, Taldaram will Conjure Flame, launching a Ball of Flame after a random non-melee player. Once it reaches them it will explode, dealing heavy Fire damage to everyone within 15 yards.
While empowered by Invocation of Blood, Conjure Flame will become Empowered Conjure Flame. This launches a Ball of Inferno Flame after a player, dealing massive Fire damage on impact to everyone within 15 yards. As the Ball of Inferno Flame travels, it will burn any player nearby with Empowered Flare. Each time it burns someone, the explosion damage will be reduced. For this reason, it is important that the Ball of Inferno Flame travels close to as many players as possible, otherwise surviving the explosion will be impossible. Melee players should attempt to adjust to make sure the ball passes right by their stack, and ranged players may want to shuffle into the path as necessary.
Prince Keleseth
Keleseth is entirely a caster, foregoing auto attacks for Shadow Lance spam. This deals heavy Shadow damage to his current target every 1.5 seconds. Some groups may opt to tank Keleseth with a Warlock, but for most groups, this will be unnecessary.
Every 10 seconds, Keleseth will spawn a Dark Nucleus. These orbs will attach themselves to the last player to directly attack them, channeling Shadow Resonance on them. This deals a small amount of Shadow damage every 3 seconds but grants the target 35% reduced Shadow damage taken. Multiple Dark Nucleus can channel on the same target, stacking Shadow Resonance, but they will slowly die over the course of the fight.
For this reason, Keleseth’s tank will want to grab all currently available Dark Nucleus to stay alive when Keleseth becomes empowered. You want to aim for 6 or fewer stacks of Dark Resonance, as any more than that can cause the ticking damage over time to become overwhelming, negating the benefits of Dark Resonance.
Keleseth will also debuff the entire raid with Shadow Prison. This causes all players to take Shadow damage for every second they move, stacking infinitely. After standing still for 10 seconds, stacks will be reset. This adds constant pressure to the raid, in addition to punishing poor positioning and movement. Make sure that all movement is deliberate and considered!
While empowered by Invocation of Blood, Shadow Lance will become Empowered Shadow Lance, dealing colossal Shadow damage each cast. This damage is made manageable by stacking Dark Resonance, making Keleseth by far the simplest of the trio. The Keleseth phase has the least to keep track of in general, making it the preferred time for Bloodlust.
Here are some of the main things that can typically go wrong in this fight:
- Players fail to spread for Empowered Shock Vortex.
- Players fail to soak Ball of Inferno Flame.
- Glittering Sparks is not dispelled.
- Too many, or too few stacks of Dark Resonance.
- Poor positioning, forcing more movement for Shadow Prison.
- Someone drops the Kinetic Bomb.
Congratulations on defeating the Blood Prince Council! Proceed up the curving ramps, taking you to the Blood-Queen herself.
Author

I love MMOs of all shades, especially the nitty gritty numbers parts of them. You might recognize me from the Shadow Priest discord, otherwise I play a little bit of everything, especially games with support roles available.