- Author: Furious
- Date: October 19, 2019
- Updated: October 10, 2020
- Expansion: WoW Classic
Welcome to our WoW Classic raiding guide for the bug-infested Ruins of Ahn’Qiraj! The Ruins of Ahn’Qiraj (AQ20) serve as the easier of the two raids in Ahn’Qiraj, with the tougher Temple of Ahn’Qiraj (AQ40) found close nearby. AQ20 is very similar to Zul’Gurub, in terms of player numbers (20 raid members), overall difficulty (fairly easy), and the fact that it features a token system.
Because the Ruins of Ahn’Qiraj is classified as an outdoor area, you can mount and ride around throughout most of the zone. AQ20 will be a quick raid for you group to clear once you understand the mechanics, which is quite nice considering the good quality of loot that can be found here. This guide will cover strategies for every boss, how to access and navigate the ruins, and a rundown of the token system and corresponding reputation. You’ll probably come to appreciate and enjoy the fights within Ruins of Ahn’Qiraj quite a lot, so let’s get started!
For a full list of items that can be acquired please see our WoW Classic AQ20 Loot List!
Raid Preparation
- Before anyone on your server can enter the raid, a massive server-wide event known as The Gates of Ahn’Qiraj must be completed. This will require thousands of supplies and consumables from both factions and will likely take several weeks, if not months, to complete.
- The Scepter of the Shifting Sands must also be completed, which requires completion of an extremely long questline and will send players into Blackwing Lair multiple times, including the requirement of killing Nefarian.
- AQ20 itself is a small step up from Zul’gurub, meaning a raid group with primarily blues shouldn’t have too much of an issue. Having a few epics will definitely help.
- Your raid composition should include: 2 tanks, 5-7 healers, and a mixture of ranged/melee DPS with an emphasis on casters/ranged. Having at least one hunter, and a combination of 3-4 priests/warlocks is highly recommended for Moam.
- Nature resistance is very helpful for reducing overall damage intake, but is not an outright requirement.
- Having Free Action Potions will make the Ossirian encounter less frustrating to handle.
Reaching the Entrance to the Ruins of Ahn’Qiraj
Finding the entrance portal to AQ20 is fairly simple considering that the main road through Silithus will lead you straight to it. If you already have the flight path for Cenarion Hold, go ahead and fly there and follow the road south to Ahn’Qiraj. If you don’t have the flight path yet, you’ll need to make your way to Silithus through the northwest path out of Un’Goro Crater. Un’Goro can be accessed by heading to the western side of Tanaris.
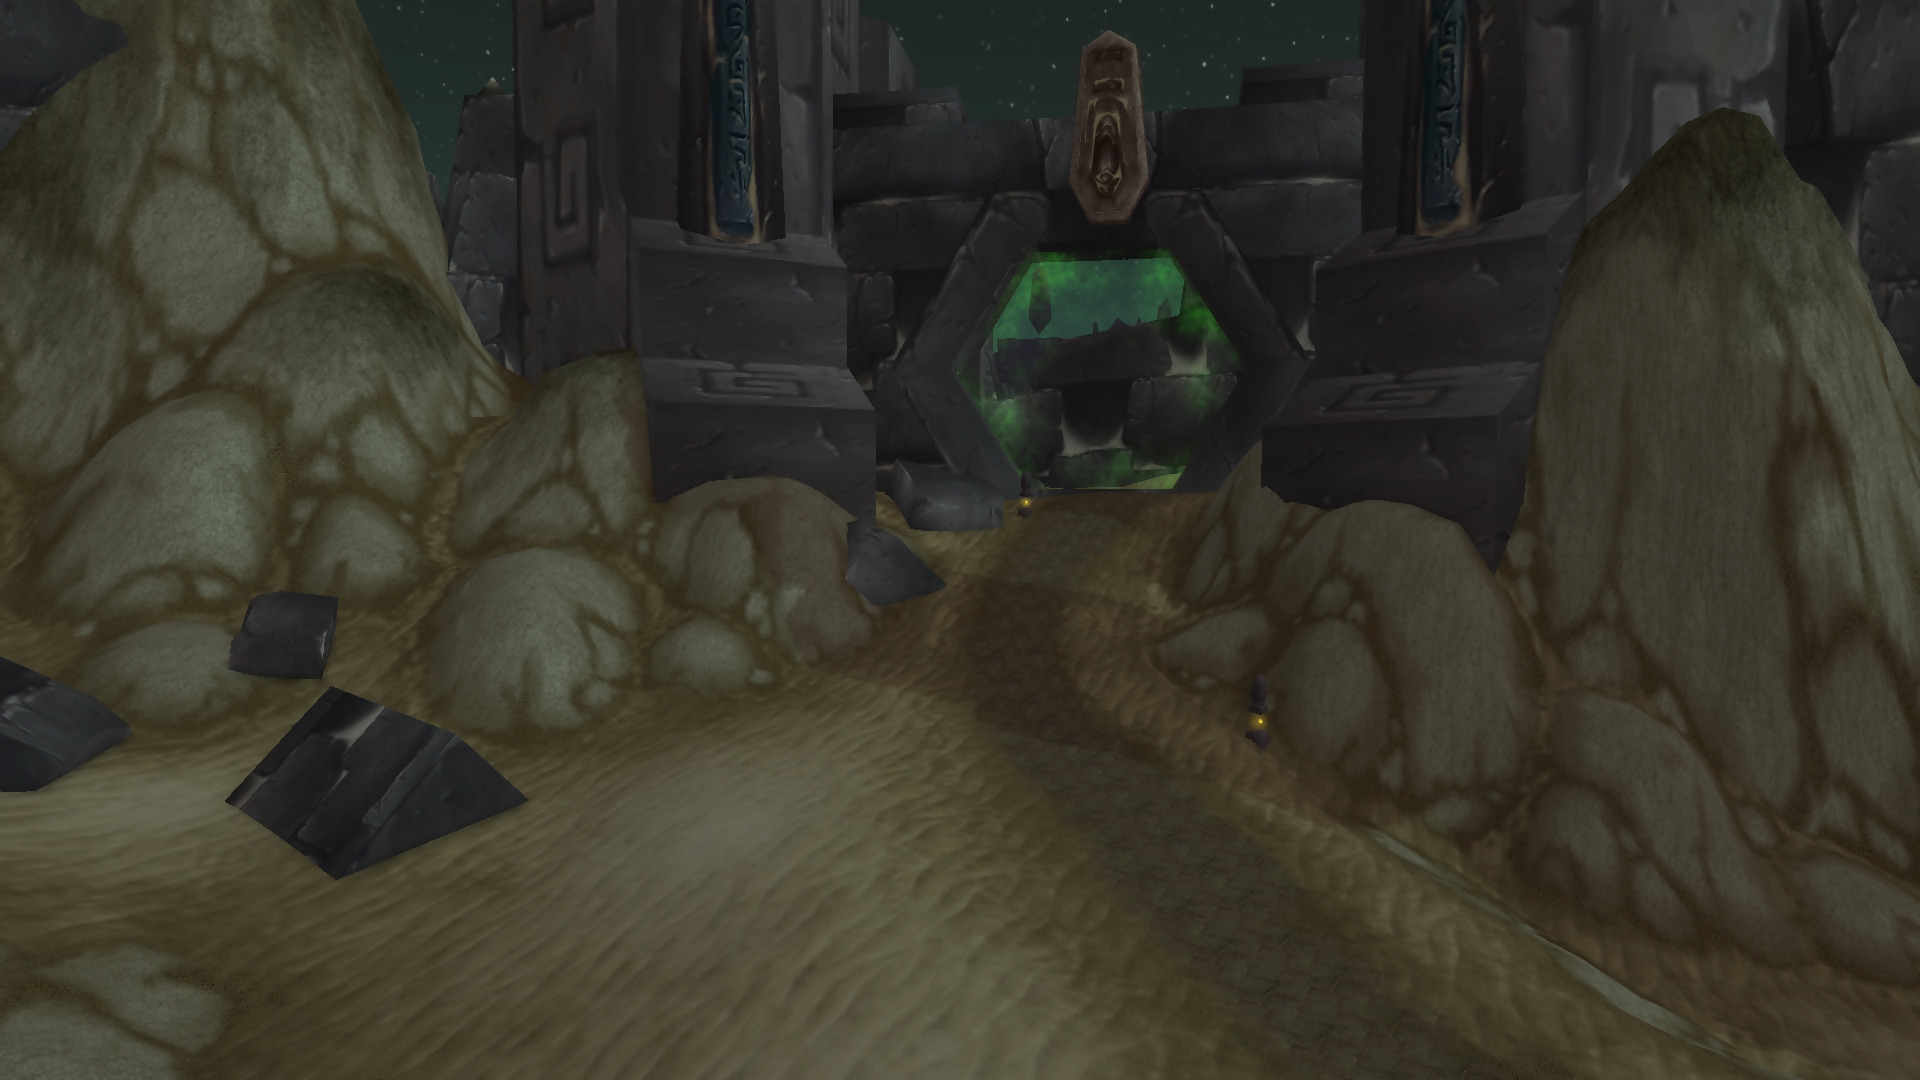
Once you reach Ahn’Qiraj, enter the first entrance that you see. The other path leads to the Temple of Ahn’Qiraj, which is significantly harder and requires 40 raid members. The entrance for AQ20 should look like the image below.

Navigating the Ruins (Clearing Routes)
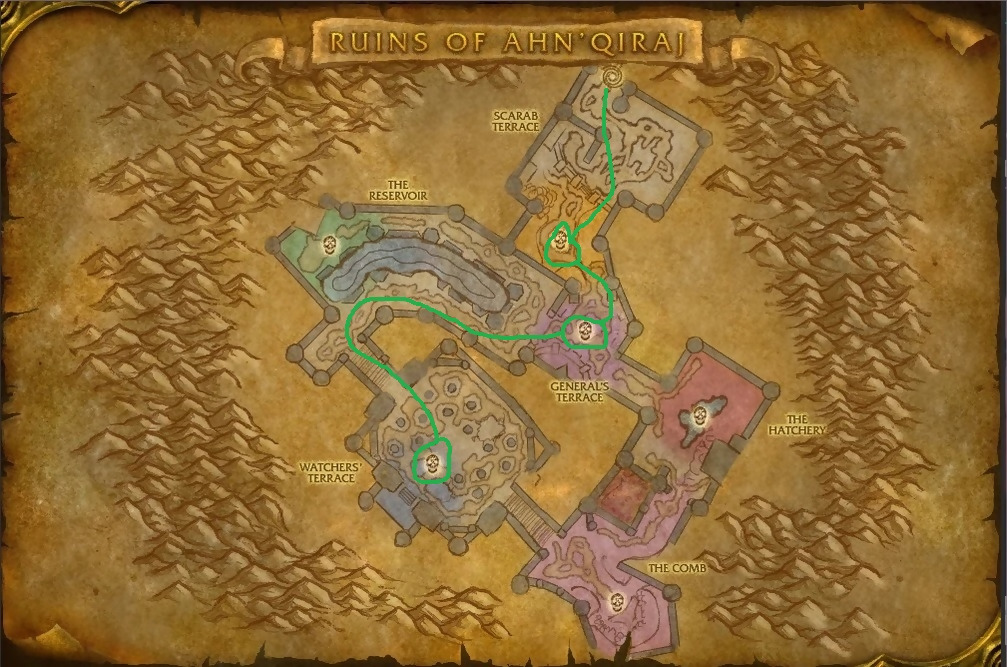
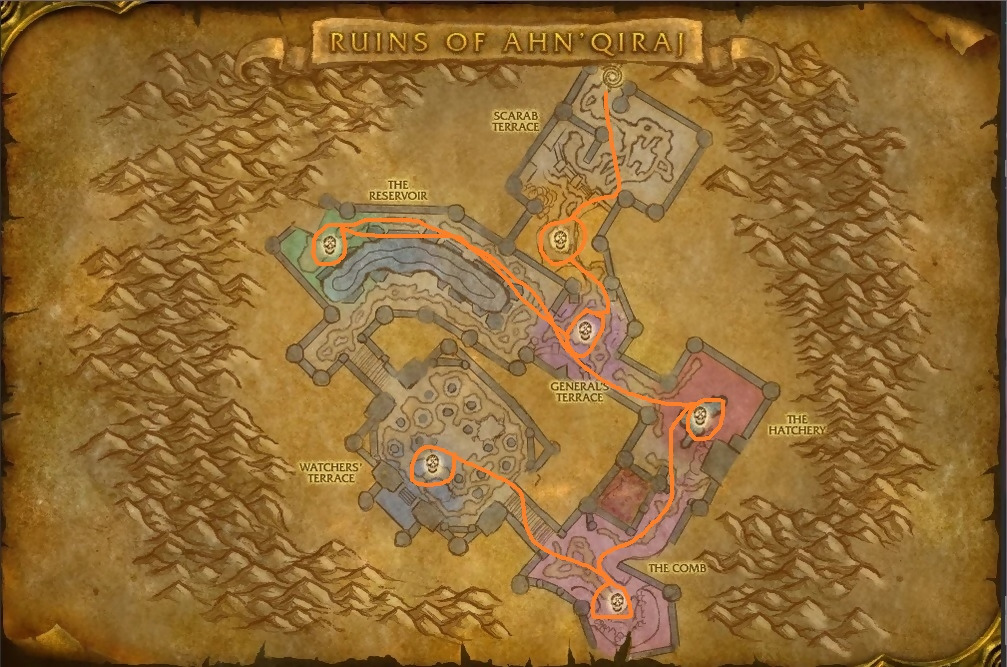
After entering the raid, there is only one path forward until you kill the second boss, General Rajaxx. At this point, you can either head straight to the final boss, Ossirian, or you can clear out the optional bosses as you please. Included below are two clearing routes; one for an efficient clear and the other for a full clear. Keep in mind that you can always skip any of the bosses after killing Rajaxx, so don’t fret if your raid group can’t kill Moam, Buru, or Ayamiss.
Efficient
Kurinnaxx > Rajaxx > Ossirian
Full Clear
Kurinnaxx > Rajaxx > Moam > Buru > Ayamiss > Ossirian
Token Loot System
The token system of AQ20 is almost identical to how Zul’Gurub’s Paragons of Power (coins, bijous, and hakkaris) used to work in Vanilla WoW. There are three different types of token pieces you can acquire within the Ruins of Ahn’qiraj, including scarabs, idols, and Qiraji pieces. Each class will need to collect two sets of 5 specific scarabs in addition to two specific idols to pair with a specific Qiraji piece to exchange them for a set piece.
These tokens can be exchanged for the 3-piece Cenarion Circle armor set featuring a ring, cloak, and weapon. Each armor piece also requires a certain reputation level with the Cenarion Circle, with rings available at honored, cloaks offered at revered, and finally a weapon as your grand prize for exalted. We’ll cover more on reputation in the section just below.
Collecting the necessary scarabs, idols, and Qiraji pieces is fairly simple, although it may take a little bit of time to get the correct ones you need for your class quest. Scarabs are fairly common drops from trash mobs throughout the raid, and idols can also rarely be looted from them as well. You can also find various Scarab Coffers throughout the instance, which can be opened with Scarab Coffer Keys also dropped by trash mobs.
Coffers are a much more reliable way of actually finding idols, but you will also acquire a Scarab Bag containing a nice variety of scarabs. Qiraji items are only dropped from bosses, but any Qiraji item can drop from any boss with that token’s loot table within the Ruins of Ahn’Qiraj. This means that you can’t depend on a specific piece dropping during any given lockout.
Reputation
The primary faction associated with AQ20 is the Cenarion Circle. They are a large pack of druids that have two significant outposts; Cenarion Hold and Valor’s Rest. Killing trash and bosses within the Ruins of Ahn’Qiraj (and AQ40) will grant reputation with them. You will need to reach exalted with them to complete your 3-piece Cenarion Circle armor set.
Fortunately, there is an alternative way of actually raising your reputation with them. In addition to the AQ raids, you can also kill Twilight Cultists (Avengers, Geolords, Stonecallers, etc) within Silithus, which will grant 10 reputation per kill. You can also hand in sets of 10 Encrypted Twilight Texts, which are dropped by those cultists.
Beyond the Cenarion Circle, you will also receive a small amount of reputation with the Brood of Nozdormu whenever you kill a boss in AQ20. They are the primary faction associated with AQ40 and you’ll need reputation with them to work towards the 5-piece Brood of Nozdormu set should your guild ever enter the Temple of Ahn’Qiraj. For the Ruins of Ahn’Qiraj alone, you’ll really only be worried about reputation with the Cenarion Circle.
Scarabs
- Bone Scarab
- Bronze Scarab
- Clay Scarab
- Crystal Scarab
- Gold Scarab
- Ivory Scarab
- Silver Scarab
- Stone Scarab
Idols
- Alabaster Idol
- Amber Idol
- Azure Idol
- Jasper Idol
- Lambent Idol
- Obsidian Idol
- Onyx Idol
- Vermillion Idol
Qiraji Pieces
- Qiraji Ceremonial Ring – Moam, Rajaxx, & Kurinnaxx @ a 25% drop rate, Ayamiss and Buru @ 17%
- Qiraji Magisterial Ring – Moam, Rajaxx, & Kurinnaxx @ a 25% drop rate, Ayamiss and Buru @ 17%
- Qiraji Martial Drape – Rajaxx & Kurinnaxx @ a 25% drop rate, Ayamiss and Buru @ 17%
- Qiraji Regal Drape – Rajaxx & Kurinnaxx @ a 25% drop rate, Ayamiss and Buru @ 17%
- Qiraji Ornate Hilt – Ossirian @ a 50% drop rate, Moam @ 25%, Ayamiss and Buru @ 17%
- Qiraji Spiked Hilt – Ossirian @ a 50% drop rate, Moam @ 25%, Ayamiss and Buru @ 17%
Cenarion Circle Set Requirements
Druid: Symbols of Unending Life
- Ring (Honored): x5 Bronze Scarabs + x5 Ivory Scarabs + x2 Alabaster Idols + Qiraji Magisterial Ring
- Cloak (Revered): x5 Bone Scarabs + x5 Silver Scarabs + x2 Vermillion Idols + Qiraji Regal Drape
- Weapon (Exalted): x5 Crystal Scarabs + x5 Stone Scarabs + x2 Jasper Idols + Qiraji Ornate Hilt
Hunter: Trappings of the Unseen Path
- Ring (Honored): x5 Clay Scarabs + x5 Gold Scarabs + x2 Amber Idols + Qiraji Ceremonial Ring
- Cloak (Revered): x5 Crystal Scarabs + x5 Stone Scarabs + x2 Lambent Idols + Qiraji Regal Drape
- Weapon (Exalted): x5 Bone Scarabs + x5 Silver Scarabs + x2 Azure Idols + Qiraji Spiked Hilt
Mage: Trappings of Vaulted Secrets
- Ring (Honored): x5 Clay Scarabs + x5 Gold Scarabs + x2 Azure Idols + Qiraji Magisterial Ring
- Cloak (Revered): x5 Crystal Scarabs + x5 Stone Scarabs + x2 Alabaster Idols + Qiraji Martial Drape
- Weapon (Exalted): x5 Bone Scarabs + x5 Silver Scarabs + x2 Obsidian Idols + Qiraji Ornate Hilt
Paladin: Battlegear of Eternal Justice
- Ring (Honored): x5 Bone Scarabs + x5 Silver Scarabs + x2 Vermillion Idols + Qiraji Magisterial Ring
- Cloak (Revered): x5 Clay Scarabs + x5 Gold Scarabs + x2 Obsidian Idols + Qiraji Regal Drape
- Weapon (Exalted): x5 Bronze Scarabs + x5 Ivory Scarabs + x2 Amber Idols + Qiraji Spiked Hilt
Priest: Finery of Infinite Wisdom
- Ring (Honored): x5 Bone Scarabs + x5 Silver Scarabs + x2 Obsidian Idols + Qiraji Ceremonial Ring
- Cloak (Revered): x5 Clay Scarabs + x5 Gold Scarabs + x2 Jasper Idols + Qiraji Martial Drape
- Weapon (Exalted): x5 Bronze Scarabs + x5 Ivory Scarabs + x2 Lambent Idols + Qiraji Ornate Hilt
Rogue: Emblems of Veiled Shadows
- Ring (Honored): x5 Crystal Scarabs + x5 Stone Scarabs + x2 Onyx Idols + Qiraji Ceremonial Ring
- Cloak (Revered): x5 Bronze Scarabs + x5 Ivory Scarabs + x2 Azure Idols + Qiraji Martial Drape
- Weapon (Exalted): x5 Clay Scarabs + x5 Gold Scarabs + x2 Vermillion Idols + Qiraji Spiked Hilt
Shaman: Gift of the Gathering Storm
- Ring (Honored): x5 Bone Scarabs + x5 Silver Scarabs + x2 Vermillion Idols + Qiraji Magisterial Ring
- Cloak (Revered): x5 Clay Scarabs + x5 Gold Scarabs + x2 Obsidian Idols + Qiraji Regal Drape
- Weapon (Exalted): x5 Ivory Scarabs + x5 Bronze Scarabs + x2 Amber Idols + Qiraji Spiked Hilt
Warlock: Implements of Unspoken Names
- Ring (Honored): x5 Crystal Scarabs + x5 Stone Scarabs + x2 Jasper Idols + Qiraji Ceremonial Ring
- Cloak (Revered): x5 Ivory Scarabs + x5 Bronze Scarabs + x2 Amber Idols + Qiraji Regal Drape
- Weapon (Exalted): x5 Clay Scarabs + x5 Gold Scarabs + x2 Onyx Idols + Qiraji Ornate Hilt
Warrior: Battlegear of Unyielding Strength
- Ring (Honored): x5 Bronze Scarabs + x5 Ivory Scarabs + x2 Lambent Idols + Qiraji Magisterial Ring
- Cloak (Revered): x5 Bone Scarabs + x5 Silver Scarabs + x2 Onyx Idols + Qiraji Martial Drape
- Weapon (Exalted): x5 Crystal Scarabs + x5 Stone Scarabs + x2 Alabaster Idols + Qiraji Spiked Hilt
Trash Mobs
Much like the 20 man raid of Zul’Gurub, trash mobs found within the Ruins of Ahn’Qiraj are fairly straightforward to deal with. If you make use of CC whenever you can and pull just one pack a time, your raid group shouldn’t have any problem clearing trash packs leading up to bosses. AQ40 is a slightly different story, but fortunately you won’t have to deal with any of those challenges in AQ20!
Boss Encounters
There are 6 total boss encounters within the Ruins of Ahn’Qiraj, including the final boss of Ossirian the Unscarred. Before fighting Ossirian, there are only 2 bosses that must be killed prior to beginning the encounter; Kurinnaxx and General Rajaxx. We’ll split boss strategies into two parts, with one section for required bosses and the other for optional bosses.
Required Bosses
Kurinnaxx
Kurinnaxx is quite a simple fight and won’t require much coordination at all. As far as positioning goes, the main tank should face the boss away from the raid group and melee members should attack from behind. This is because he will use Wide Slash, which hits all targets in front of him.
You will need an offtank ready to take aggro periodically because he will also cast Mortal Wound, a stacking debuff that reduces incoming healing. To manage this, have your offtank taunt around 5 stacks. When the duration fades, the main tank can take over again.
The rest of the raid will need to pay attention to their feet while they DPS. Kurinnaxx will spawn several Sand Traps, which will explode after a short duration. If a raid member is caught in the blast, they will receive damage, become silenced, and have their hit chance obliterated by 75% for a whole 20 seconds.
During the fight, he will summon a single group of flying adds which will need to be quickly picked up by the offtank (or main tank if he is waiting for Mortal Wound stacks to disappear). Ranged DPS and casters should immediately switch to and focus them before hitting the boss again.
The last mechanic to be aware of is his permanent enrage that begins after he reaches 30% health. Any longer cooldowns should be saved for this phase so that he can quickly be burned down before killing the tanks.
General Rajaxx
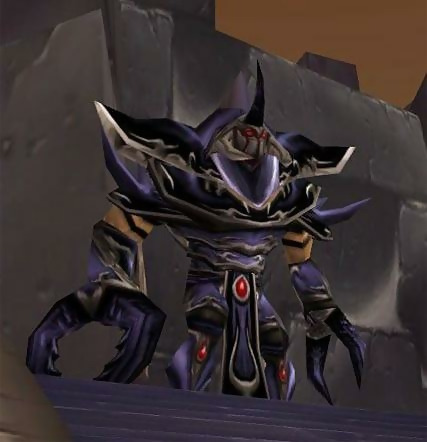
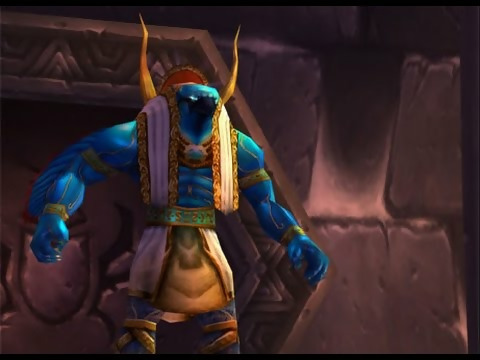
General Rajaxx isn’t particularly challenging either, but your raid group will need to be sharp with crowd control, particularly with the use of Polymorph. The encounter doesn’t begin until you speak with the nearby npc, Lieutenant General Andorov.
Andorov and his four nearby Kaldorei Elite allies will help you during the fight and will serve as a major help. Your healers should make an effort to keep them alive because they will make the fight much easier.
Once you speak with Andorov, you will begin a gauntlet lasting seven waves. Each wave of seven will feature a multitude of two smaller enemies, Swarmguard Needlers and Qiraji Warriors. There will also be a larger Captain with each wave, which is significantly stronger than the other two mobs.
A mage in your raid group must immediately sheep the Captains when they appear, and keep the effect applied until the other two types of enemies are dead. The tanks should pick up aggro on other adds as the rest of the raid focuses them down, using any stuns available to help mitigate damage. Entangling Roots is particularly helpful for keeping mobs away during the gauntlet.
Once the smaller enemies are dead, the raid group can then focus down the Captain. The next wave will come upon their death until 7 Captains have been killed. If a raid member does die during any wave, they can release spirit after a Captain dies and rejoin the fight. Once you’ve killed the final captain, General Rajaxx will join the fight.
Rajaxx himself is fairly straightforward. He will periodically use Disarm on your tank, which is really more annoying than it is difficult. His main ability is Thundercrash, which knocks the raid backwards quite a ways, but it also reduces current health of all raid members by 40-50%. This ability alone will never kill anyone, but it becomes troublesome when health pools get quite low because eventually a single auto attack will kill your tanks.
If you kept Andorov and his allies alive, this won’t be much of a challenge. Otherwise, the fight is purely a DPS race, and not too demanding of one at that. Just make sure to keep the tank topped off so that a Thundercrash doesn’t place them dangerously low to get one-shot.
Ossirian the Unscarred
Ossirian the Unscarred serves as the final boss for AQ20, but the encounter isn’t really that difficult. He may look intimidating at first glance due to his super buff, Strength of Ossirian, which will triple his damage output. However, this is easily removed by dragging him to crystals that appear throughout the room.
When Ossirian reaches a crystal, he will become weakened for 45 seconds, forcing him to deal normal damage. He will also become vulnerable to one of the five different magic types, granting your mages or warlocks a nice extra window of damage. The spawn location for these crystals are quite random, so you should assign at least one (two if your DPS is high enough) melee member to stay mounted and run around the room and exclusively look for crystals.
Ossirian must always be debuffed throughout the fight, so whoever is tanking must be quick about dragging him to new crystals when one is about to fade. A mage should be assigned to using the crystal with a quick Blink because doing so would dismount your melee lookout(s). This does take a few seconds, so don’t time it so closely that the boss regains his buff before the cast ends.
As far as tanking goes, threat must be manually built because the boss is immune to taunts. The raid group should give the main tank and offtank several seconds to build aggro before going all out. Periodically, Ossirian will also cast Enveloping Winds on the tank, stunning them for 10 seconds. This can be avoided with a preemptive Free Action Potion.
The rest of the fight is fairly simple for healers and DPS. There will be tornadoes that appear throughout the room, but these can be dodged. Being hit by them will slow their target while also dealing damage. The boss will also cast War Stomp, which does an AoE knockback and also stuns anyone hit for 5 seconds, but there shouldn’t be many players around the boss in the first place. Curse of Tongues will also be placed on random targets, so it must be decursed ASAP.
Keep moving Ossirian to new crystals, always preventing him from buffing up and the fight shouldn’t be too hard if raid members are good about avoiding tornadoes.
Optional Bosses
Moam
Moam is unlike any other fight in AQ20 because his fight focuses on a different type of DPS; mana draining. The boss will continuously leech mana from your raid group via Drain Mana. The hunter in your group should use Viper Sting, while priests use Mana Burn and warlocks cast their own version of Drain Mana.
It is crucial to keep this mana draining rotation up during the fight, otherwise he will reach full mana and cast Arcane Eruption. This will likely cause a wipe if it is allowed to cast. Keep this up until 90 seconds into the fight, at which point Moam will turn into stone and become invulnerable. When this happens, 3 Mana Fiends will spawn.
Fortunately, these little elementals are quite easy to deal with. Your warlocks can use Banish on 2 of them so that you only need to fight a single Mana Fiend at anytime. Quickly focus them down because the boss will come alive after 90 seconds.
After this, the rest of the fight is a repeat of the initial 90 seconds of the pull. Have warlocks, priests, and a hunter use their respective mana draining abilities to prevent Moam from mana capping and burn him down. The biggest challenge in the fight will be managing mana pools, so any mana potions are very useful here.
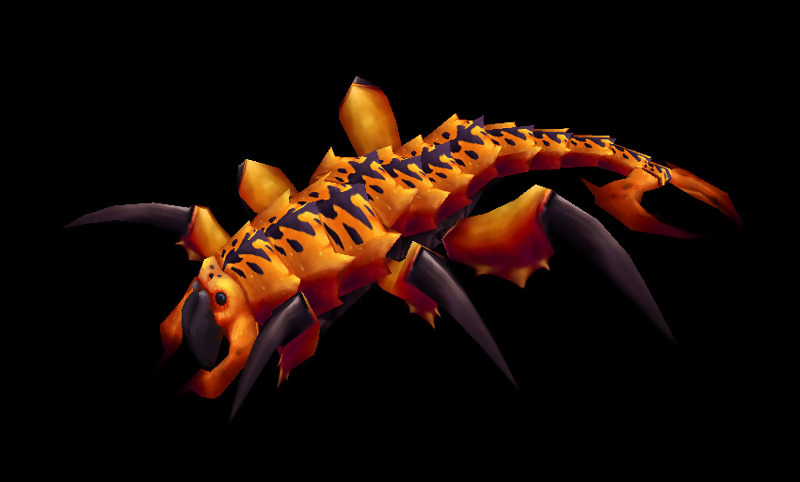
Buru the Gorger
Buru the Gorger is another interesting fight due to the fact that you won’t actually be attacking him for a majority of the encounter. He is extremely resistant to damage and hitting him will make him move faster, which makes the main mechanic of the fight quite difficult. Since you won’t be DPSing Buru directly, you’ll instead deal indirect damage by making him destroy the eggs found around the room.
Speaking of eggs, damaging one is how you will start the encounter. To make him actually destroy one, you simply need to have him run into it. During the fight, Buru will randomly target raid members and chase after them. Whoever is the focus of the boss should immediately run to the opposite side of an egg so that he will hit it. You will need to keep doing this until he reaches 20% health, at which point he will become susceptible to player damage.
Whenever Buru does destroy an egg, it will deal splash damage to anyone nearby and will also hatch a Hive’zara Hatchling. These are quite weak and should be quickly burned down. Anyone who becomes targeted by the boss must immediately get in position for him to destroy another egg. The first part of the fight is fairly straightforward and is more time-consuming than anything.
Once he does reach 20% health, the rest of the fight is a pure DPS race. This is because he still cannot be taunted and attacks whoever he wishes. To make matters worse, he emits Creeping Plague, which continuously deal damage and ramps up in strength the longer that you are fighting him. Save all DPS cooldowns for this phase and blow him to pieces.
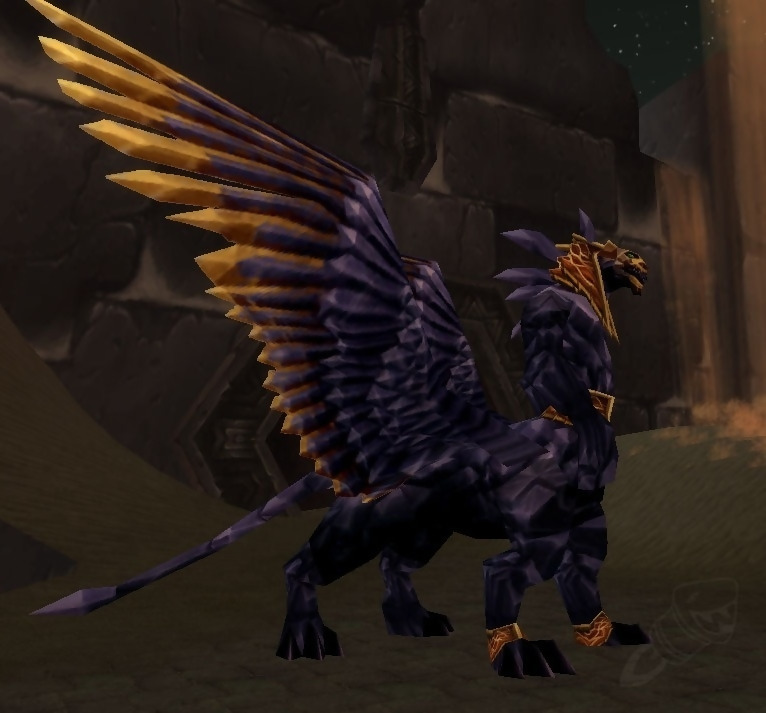
Ayamiss the Hunter

Ayamiss the Hunter poses one of the bigger threats in the Ruins of Ahn’Qiraj due to being a two-phase fight and having an extremely lethal mechanic. Phase one involves the boss staying in the air and focusing attacks on whichever ranged DPS/caster has the highest threat. She will also damage the entire raid with Stinger Spray. Melee DPS should stay near the altar while ranged DPS/casters deal DPS on the boss.
Whoever she is targeting will benefit from having some nature resistance to allow them to caster-tank the boss. Otherwise, they must be careful to not always be the target so that they don’t die from a stacking debuff. Whoever Ayamiss is attacking will receive Poison Stinger, which doesn’t do a ton of damage by itself, but can quickly ramp out of control without nature resist.
During phase one and the rest of the fight, Hive’Zara Swarmers will appear to attack the raid group. They are quite easy to kill via AoE damage, but your tanks must be diligent about picking them up because they pack a punch.
Making matters much tougher is Ayamiss’ iconic mechanic. She will pick a random raid member and bind them to her altar for sacrifice. When this happens, a Hive’Zara Larva will spawn on either side of the altar and head for the bound raid member. Melee DPS must immediately focus the larva down or else whoever is bound will die. This will also spawn a powerful add, which makes the fight unnecessarily more difficult.
Once the boss reaches 70% health, phase two will begin. At this point, Ayamiss will land, which allows melee DPS to damage her and for tanks to actually hold aggro. Allow a few seconds for the main tank to pick up the boss and keep her near the altar.
The rest of the fight is identical to phase one, so make sure everyone switches to larva when spawned and that smaller adds are quickly AoEd down. It is beneficial to have an offtank take over when Poison Stinger stacks get high, but not an outright requirement if the main tank has high nature resist.
About the Author