Zul’Gurub (ZG) Raid Guide – Season of Discovery (SoD) & Classic Era
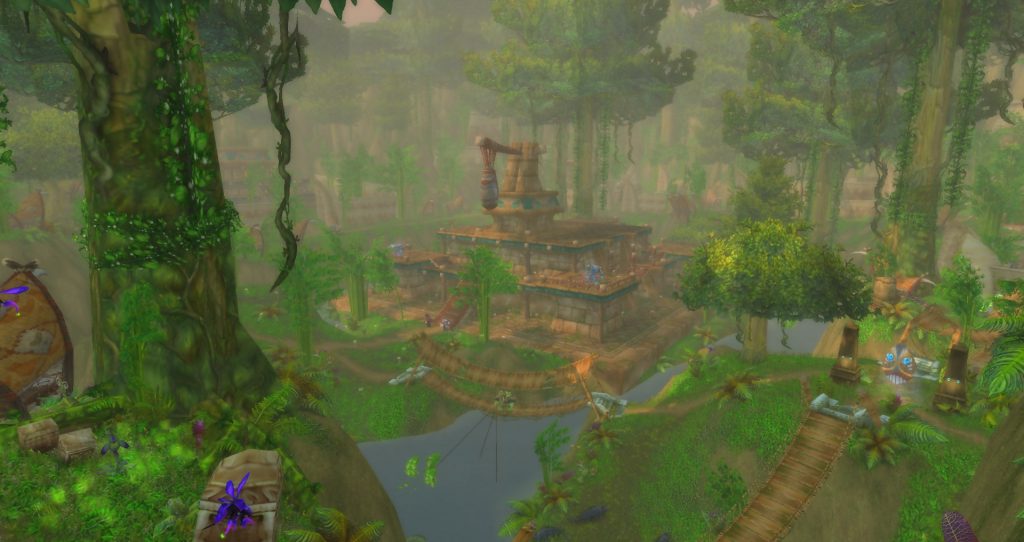
Welcome to our Zul’Gurub raid guide for WoW Classic! The troll-infested zone of Zul’Gurub is found within Stranglethorn Vale and serves as an excellent entry point for raiding. ZG is a 20 man raid and has a short 3 day lockout. Anyone above level 58 is able to participate and zone in. It is also considered an outdoor area, meaning that you can ride mounts as you traverse the large jungle-like biome.
There are a total of 10 boss encounters within the raid, although four of them are considered optional. The final boss, Hakkar, has a unique mechanic in which she will receive extra abilities if all five priest aspects are not killed first. This does mean that you can technically skip everything and go straight to the boss, but she will be near-impossible to kill with her extra powers. Instead, it is far more worth your time and effort to kill all bosses that your raid group can to acquire gear and tokens for extra power and survivability.
This guide will cover simple strategies for every boss encounter to make this easier. We’ll also go over the best routes for clearing the zone and the Paragons of Power reputation system associated with the Zandalar Tribe. Many encounters are not terribly difficult if your raid pays attention to mechanics, which means Zul’Gurub can be a quick loot fiesta if everyone is on their game!
For a full list of items that can be acquired please see our WoW Classic ZG Loot List!
Season of Discovery Changes
In Season of Discovery, Zul’Gurub has been retuned for teams of 10 players, with up to 20 allowed inside the instance. The raid will reset twice weekly. Most loot has been revamped and new versions of the shoulder enchants have been added for every specialization.
There are also some changes to the raid itself. Each of the Priest bosses offers a special buff once killed, and Hakkar offers special challenges and rewards when faced without defeating his Priests first. Groups are also able to choose which Edge of Madness boss they wish to summon each reset.
New Priest Buffs
When the five Priests die, their spirit loas appear, and you can talk to them for a unique buff. You can only have one priest’s blessing at a time.
- Blessing of Hethiss: Blessed by the Loa of Snakes. Chance on attack or spell cast to deal nature damage to all nearby enemies.
- Blessing of Bethekk: Blessed by the Loa of Panthers. Gain stealth and bonus damage on next attack or spell after being out of combat for 5 seconds.
- Blessing of Shirvallah: Blessed by the Loa of Tigers. Attacks and spells invoke Shirvallah to apply a powerful bleed to your current target. (dot does not appear to stack with other players)
- Blessing of Shadra: Blessed by the Loa of Spiders. Chance on attack or spell cast to summon spawns of Shadra.
- Blessing of Hir’eek: Blessed by the Loa of Bats. Heal yourself for 5% of all damage dealt.
Raid Preparation
- 20 total members between level 58 and 60 (60 recommended) with: 3 tanks, 6-7 healers, and heavy focus on ranged DPS.
- Level 60s with decent gear (blue and up preferably) are a necessity for Jin’do the Hexxer.
- Nature resistance gear and consumables are helpful for lightening the load on healers
- 350 fishing (with lure) and 300 alchemy (or purchased potion) are needed to spawn Gahz’ranka and Edge of Madness bosses respectively.
Accessing the Entrance to Zul’Gurub
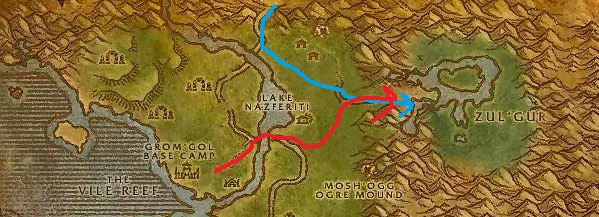
To find the entrance of ZG, you will need to head to Stranglethorn Vale. The raid is located in the northeastern part of the zone. This makes Darkshire in Duskwood the closest flight path for Alliance players and Grom’Gol Base Camp in STV the nearest for Horde players.
Clearing Routes
When it comes to picking a clearing route, there are two different ways you can approach it. Your first few lockouts will probably be efficient clears, but eventually you’ll want to try full clears of Zul’Gurub just so that you can pick up extra gear and work towards powerful trinkets for your raid group. Not only is an efficient clear faster, but it is also much easier than killing every boss in the zone.
Efficient Clear
If you’re looking for the most efficient path through ZG, then you can actually skip a few bosses. Bloodlord Mandokir, Jin’do the Hexxer, Gahz’ranka, and Edge of Madness are all optional encounters because they do not empower Hakkar if they are left alive.
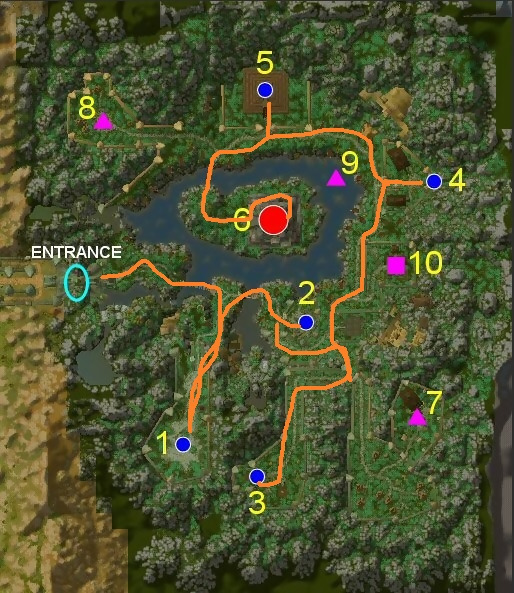
Because of this, you only need to kill the five High Priest/Priestesses before taking on Hakkar. This makes the clearing path a little easier. You should complete each encounter in the following order:
High Priestess Jeklik > High Priest Venoxis > High Priestess Mar’li > High Priest Thekal > High Priestess Arlokk > Hakkar the Soulflayer
Full Clear
If you’re interested in completing a full clear of ZG, then prepare for a lengthier raid duration. In addition to the five priest aspects and Hakkar, you’ll incorporate the four optional encounters. Completing a full clear of ZG is significantly harder than an efficient clear because Bloodlord Mandokir and Jin’do the Hexxer are fairly difficult fights. Jin’do in particular is often considered to be the toughest boss to kill in the entire raid, the main reason why he is so often skipped.
Before beginning, it is important to keep in mind that two of these fights (Gahz’ranka and Edge of Madness) have profession requirements to even start their encounters. We’ll cover more on each boss requirement in their respective section, but Gahz’ranka requires a total of 350 Fishing (lures are required) and someone will need to have 300 Alchemy for Edge of Madness.
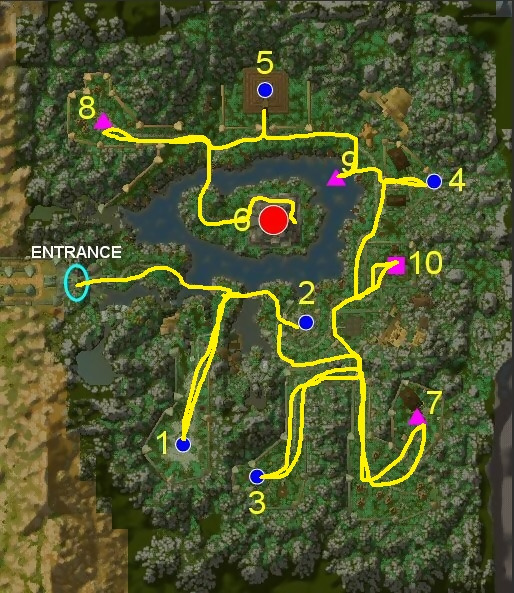
Assuming you satisfy all requirements, you can clear the raid following this route:
High Priestess Jeklik > High Priest Venoxis > High Priestess Mar’li > Bloodlord Mandokir > Edge of Madness > High Priest Thekal > Gahz’ranka > High Priestess Arlokk > Jin’do the Hexxer > Hakkar the Soulflayer
Paragons of Power
One of the most interesting features within Zul’Gurub is the reputation and rewards system. As you kill enemies throughout the raid, you will slowly gain rep with the Zandalar Tribe. In addition, you will also receive various coins, bijous, and hakkaris as drop items. These are the Paragons of Power, ancient collectable relics from the Gurubashi Empire.
The sole purpose for these items are to increase your reputation with the Zandalar Tribe, but you should try to hold off on handing them in until you reach halfway through Revered. The reason for this is that enemies within ZG will stop giving you rep at 10,500 towards Exalted. At this point, you will only be able to raise your reputation through handing in coins and destroying bijous.
All coins, bijous, and hakkaris will be used on Yojamba Isle, found in the northwestern region of STV. Once you reach different levels of rep (friendly, honored, and revered), the primal hakkaris you receive can be exchanged for epic armor pieces. Coins are definitely the most common drops, followed by rarer bijou drops, and finally the primal hakkari items.
Coins of the Tribes
Within the raid, you will find a total of 9 different coins. To exchange any coins for reputation, you will need to complete a set of three different coins to complete a set. You only need one coin of each type in a set to turn it in. You will receive 25 reputation with the Zandalar Tribe for handing them in, but you will also get a Zandalar Honor Token granting you 50 reputation upon use. This makes each coin set worth 75 rep.
Here are the three coin sets and corresponding quests used to hand them in:
- Gurubashi Coin, Vilebranch Coin, and Witherbark Coin – Gurubashi, Vilebranch, and Witherbark Coins
- Sandfury Coin, Skullsplitter Coin, and Bloodscalp Coin – Sandfury, Skullsplitter, and Bloodscalp Coins
- Zulian Coin, Razzashi Coin, and Hakkari Coin – Zulian, Razzashi, and Hakkari Coins
Hakkari Bijous
Like coins, there are also 9 different types of bijous that you can find inside Zul’gurub. The key difference is that you only need one bijou to receive reputation. Bijous are differentiated by color, but this doesn’t make a difference anymore. You can destroy a bijou of any color regardless of your class. The very first time that you destroy a bijou, you can speak to Vinchaxa to accept and complete the quest: A Bijou for Zanza.
The quest grants 350 reputation and also grants an honor token. Afterwards, destroying a bijou at the Altar of Zanza on Yojamba Isle will grant 75 rep with the Zandalar Tribe, but you will also receive a Zandalar Honor Token worth an extra 50 reputation afterwards. This means that each bijou is worth 125 rep.
Here are all the different colored bijous you can find:
- Blue Hakkari Bijou
- Bronze Hakkari Bijou
- Gold Hakkari Bijou
- Green Hakkari Bijou
- Orange Hakkari Bijou
- Purple Hakkari Bijou
- Red Hakkari Bijou
- Silver Hakkari Bijou
- Yellow Hakkari Bijou
Primal Hakkaris
The final Paragon of Power within ZG is the primal hakkari. These only drop from the five priest aspect bosses and the two optional troll bosses (Bloodlord Mandokir and Jin’do the Hexxer). They are fairly rare drop items, but they offer excellent rewards when handed in. There are also 9 different hakkaris that you can find, each used to receive an epic piece of equipment.
Unlike coins and bijous, hakkaris are restricted to a specific class type. Additionally, the armor piece you receive may differ depending on the class that you play. For example, a Primal Hakkari Aegis can be turned in by a rogue for chest armor, but a hunter could also turn it in to receive shoulder armor. Exchanging hakarris for armor is gated behind reputation requirements (friendly, honored, and revered).
One last thing to note is that they can also be used to create a powerful enchant for your head or legs. This does require a few extra items found within Zul’gurub, but you only need to be friendly with the Zandalar Tribe to receive it. There is a good chance that none of your raid group will actually get any of these enchants for a while because it is generally more valuable to purchase an armor piece instead.
Here are all of the primal hakkaris, corresponding class requirements, and armor rewards:
Friendly
Armsplint, Bindings, Stanchion (Wrists)
- Armsplint: Rogue (Wrist), Shaman (Wrist), Warrior (Wrist)
- Bindings: Hunter (Wrist), Mage (Wrist), Paladin (Wrist)
- Stanchion: Druid (Wrist), Priest (Wrist), Warlock (Wrist)
Honored
Girdle, Shawl, Sash (Waist or Shoulder)
- Girdle: Rogue (Shoulder), Shaman (Waist), Warrior (Waist)
- Shawl: Hunter (Waist), Mage (Shoulder), Paladin (Waist)
- Sash: Druid (Waist), Priest (Waist), Warlock (Shoulder)
Revered
Aegis, Kossack, Tabard (Chest or Shoulder)
- Aegis: Rogue (Chest), Hunter (Shoulder), Priest (Shoulder)
- Kossack: Mage (Chest), Warlock (Chest), Warrior (Chest)
- Tabard: Druid (Chest), Paladin (Chest), Shaman (Chest)
Enchants (Friendly)
(Leg or Head) also requires class specific Punctured Voodoo Doll and a Primal Hakkari Idol. Turn in location is with Zanza the Restless within ZG. He can be found atop the pyramid behind The Venom Pit, which is where the road splits to reach Mandokir or Thekal.
- Aegis: Warrior – Presence of Might
- Armsplint: Warlock – Hoodoo Hex
- Bindings: Druid – Animist’s Caress
- Girdle: Mage – Presence of Sight
- Kossack: Rogue – Death’s Embrace
- Sash: Shaman – Vodouisant’s Vigilant Embrace
- Shawl: Paladin – Syncretist’s Sigil
- Stanchion: Hunter – Falcon’s Call
- Tabard: Priest – Prophetic Aura
Trash Mobs
Zul’Gurub is extremely forgiving in the sense that the trash packs you find throughout the zone are extremely easy to deal with. The raid allows characters of level 58 and above inside, so the only real challenges are with the boss encounters. So long as you pull slowly (one pack at a time), trash mobs are trivial.
Boss Encounters
Boss encounters will be split into three sections; one for the five priest aspects and Hakkar, with another section to cover the four optional bosses of the raid.
Priest Aspects
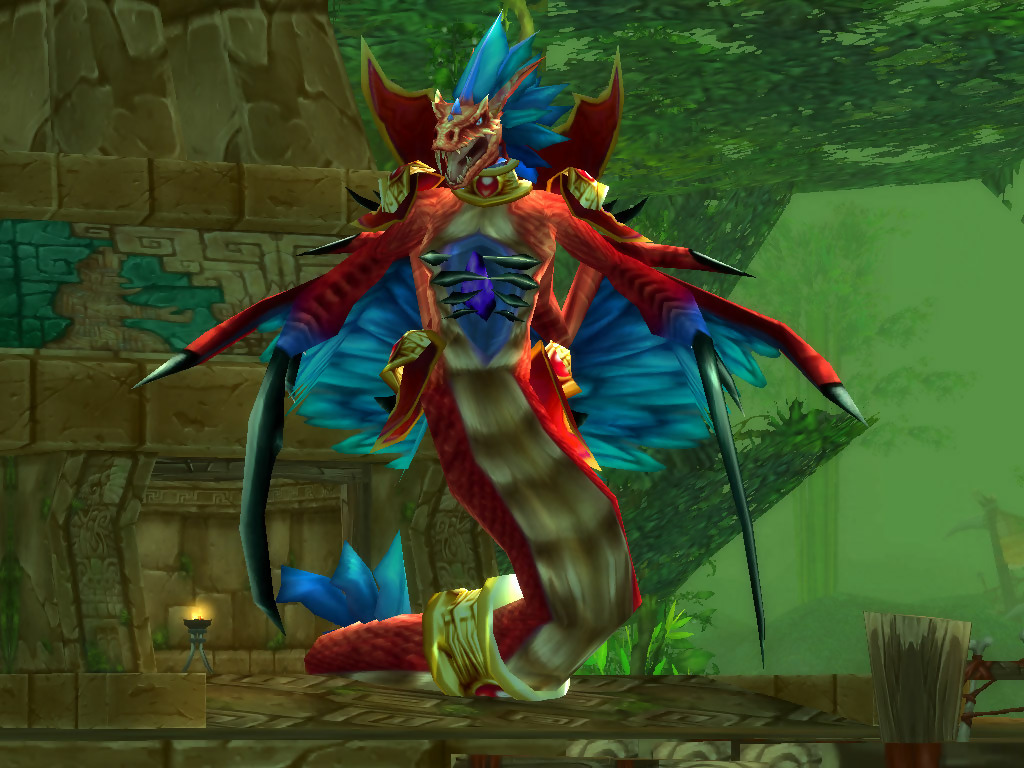
High Priestess Jeklik (Bat)
Start the fight by pulling Jeklik to the hill on the right. Keep most of the raid as far away as possible from the tanks (while still in range to cast) to avoid her AoE damage. Position one ranged DPSer (preferably a hunter) in between the raid group and tanks to soak up her charge ability, which does around 1,000 damage to all nearby enemies and also silences for 5 seconds.
Focus on damaging Jeklik down to 50% health. During this time, waves of bats will spawn every minute (starting a minute into the fight). These should be immediately AoEd down by mages in the group. Prioritize DPSing the boss, but don’t let bat spawns go unkilled.
Once Jeklik is at half health, she will switch into phase two. There are now two important spells you will need to be watching out for and interrupting before they cast. One is a heal that restores around 25% of her health, and the other is a mind flay that chains to multiple targets. Both can easily ruin an attempt if they are not interrupted.
Continue DPSing Jeklik until bats begin to drop bombs on your raid group. Your tank should continuously move in a circle so that the bats are unable to properly aim. Make sure to immediately move out of the fire that appears where the bombs land. Fire resistance buffs from shamans and paladins are quite helpful here.
Keep damaging the boss, paying careful attention to spell casts and fire on the ground until she falls.
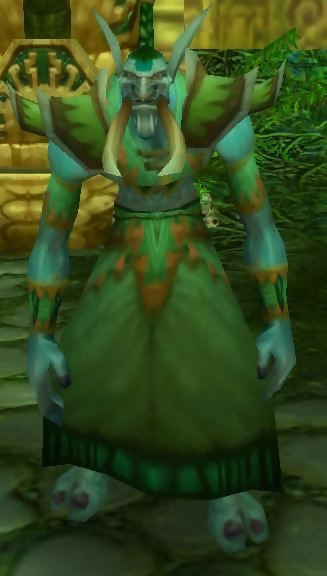
High Priest Venoxis (Snake)
Venoxis is fairly simple, but you will need to clear out the entire room he is in (besides his adds). Position the raid outside his room, but send in your tanks and at least three characters with strong CC (mage, hunter, rogue). Have the offtank pull to start the encounter, which will make the adds focus him.
Your main tank should then make Venoxis focus on him and head towards the bonfire for good positioning. The offtank should run the adds to the raid group, but use crowd control here to make sure only one add is attacking at a time. Kill all of the adds one-by-one until they are all dead. Once the adds are dead, the raid group can join the main tank inside the room.
Now the raid should slowly deal damage, but not with any melee attackers. Do not use mana intensive spells or abilities here. Your focus is now to drain all of Venoxis’ mana. You can do this with a hunter, warlocks, and priests using their respective mana draining abilities. Once the boss is completely out of mana, melee DPS can then briefly join the fight.
Continue DPSing Venoxis until he reaches just above 50% health. Now all melee attackers should run far away (at least 25 yards) and won’t deal damage for the rest of the fight. At half health, the boss will turn into a snake and form clouds of poison around him. This is why you don’t want melee DPS nearby.
Healers will need to repeatedly remove poison and heal the main tank so that he doesn’t die. When Venoxis transforms into a snake, you can now start using caster mana. Ranged DPS should use any cooldowns to try and drop the boss as quickly as they can. Keep this up until he dies.
High Priestess Mar’li (Spider)
To begin the fight with Mar’li, you should have a priest in the raid use Mind Control on the speaker add next to her. Then use the speaker to attack the boss. Aside from the main tank, have the rest of the raid immediately kill the four spider adds that appear. Shortly afterwards, the speaker will die and your main tank should pick up the boss.
Melee DPS can begin attacking the boss and all ranged/healers should clump up a distance away from Mar’li. Your offtank should stay with the ranged and healer group, not attacking the boss for right now. Throughout the fight, she will transform into a spider and will cast Enveloping Webs, which will affect all melee members including the main tank. When she does this, she will immediately head towards the ranged group, at which point the offtank should pick up aggro.
After the offtank has the boss attacking him, he should head back to where the webbed melee are. The previous main tank should run to the melee group to swap when Mar’li webs the melee again. Another important thing to keep an eye on is a spider add that spawns. This must immediately be killed, otherwise it will rapidly grow in size and strength. The ranged group should switch and focus on the spider when it appears.
The last thing to focus on is interrupting Mar’li when she uses her life draining ability. Melee members will need to keep a sharp eye out to notice when she is using the animation. If not interrupted, she will heal for a large amount. Repeat this until she dies.
High Priest Thekal (Tiger)
Thekal is a two-part fight that requires some careful coordination during the first phase. In addition to the boss, there are two zealot mobs (Zealot Lor’Khan and Zealot Zath) that must also be killed. However, Thekal and the two zealots must be killed within 10 seconds of each other.
The easiest way to handle this is to split the raid into three groups with an even distribution of DPS in each. Have two tanks grab the zealots and run a decent distance away while the main tank picks up the boss. Your three groups should form a triangle. For Zealot Zath, you should have either two tanks on him or a mage that holds high threat.
By far, the most important thing to keep an eye on is interrupting Lor’khan when he tries to cast a heal. Occasionally Zath will use Blind and Gouge, which is when you’ll need an offtank to pick him up or a mage to quickly Blink away. Lor’Khan can also be stunned, which should be used on cooldown to save mana for the healers. Both zealots are also disarmable, which should also be used whenever it is available.
Once Thekal and both zealots are at 10%, have all three tanks run to the middle of the formed triangle and have all DPS AoE them down so they die at the same time. Once all three die within 10 seconds of each other, the next phase will begin. Thekal will transform into tiger form and the main tank should pull him to the left of the cage in the area.
All the ranged DPS and at least one offtank should then enter the cage and attack the boss until tiger adds begin to spawn. Melee should be behind the boss. Throughout the phase, there will also be tigers that ranged should immediately switch to. Polymorph is very useful here so that only one is actively attacking at a time.
When Thekal uses his AoE stomp, Force Punch, an offtank will need to run in and pick up aggro on the boss. Continue DPSing the boss down, remembering to kill tigers ASAP, until he falls over for good.
High Priestess Arlokk (Panther)
For Arlokk, the entire raid should group up around the gong. The main tank should stay in the middle of the room to aggro the boss. Melee DPS are ineffective throughout a majority of this fight because Arlokk uses a powerful cleaving ability when in cat form. While in caster form, they can deal damage, but this is only for the first part of the encounter.
While Arlokk is still in her normal form, she can also use gouge. When this happens, an offtank will need to run in and pick the boss up and bring her back to the center. During the entire fight, there will be several weak panthers that spawn and focus on marked targets. Do not kill them immediately, instead wait for when Arlokk disappears. Use the AoE fears of both warlocks and priests to keep overall damage down.
Once Arlokk does vanish, at this point all of the panthers should quickly be AoEd down. The main tank should stay in the center of the room. When the boss reappears, she will be in cat form. Melee should be nowhere near the boss at this point. The main tank needs to aggro the boss again and pull her to the center of the room.
Rinse and repeat the cycle of fearing the adds while Arlokk is visible, AoEing them down when she disappears, and bringing her back to the middle when she reappears until she dies.
Hakkar the Soulflayer
Assuming that you’ve killed all five priest aspects, Hakkar is a relatively straightforward fight. You will need three tanks for this encounter. This is because she will periodically cast Cause Insanity, which controls the main tank and makes them significantly stronger. They will need to be immediately CCed via Polymorph until the effect ends, after which they should be dispelled.
When a tank is being controlled, an offtank should quickly pick up the boss. Any warriors in the group need to use Intimidating Shout on cooldown so that they don’t fear your raid when they are controlled. When you actually initiate the pull, you should make sure ranged members are spread out so that they don’t spread Corrupted Blood. This effect needs to be cleansed, which will make the fight almost impossible if several raid members are getting hit at a time.
The most important part of this fight is the use of Blood Siphon, which occurs every 90 seconds after the pull. This stuns everyone in front of Hakkar while also draining their life, but it can also be used to damage the boss if raid members are affected by Poisonous Blood. This is applied by entering a poison cloud that spawns when you kill a Son of Hakkar, found to the platforms left and right of the boss.
To manage this properly, a son should be pulled at the beginning of the fight and CCed via Hibernate or Polymorph. The add should be quickly killed before a Blood Siphon is cast, at which point all raid members should enter the cloud and acquire the effect. When all members are poisoned, Hakkar will take significant damage and will remove the poison effect. A new son should be pulled and CCed immediately afterwards.
Don’t forget to spread out after a siphon is cast to avoid spreading Corrupted Blood. Keep up the cycle of spreading out and DPSing the boss, making sure to sheep and dispel a controlled tank, then killing a son to make a cloud and acquire the poison effect before a siphon cast until she dies.
Optional Bosses
Bloodlord Mandokir
Mandokir is a unique fight, but isn’t extremely difficult if you carefully pay attention to two mechanics. The first of these is Threatening Gaze. When this happens, he will focus a random raid member. They must immediately stop all actions and stay still until the boss is done looking at them. If they continue DPSing, they will get swiftly killed. In the event a main tank is targeted, DPS should slow done so aggro is not lost.
The other important mechanic is his Charge ability. He will use this on any raid member located by themselves away from the rest of the raid group. This is easily managed by grouping the entire raid except for one member (preferably a hunter) kept away from everyone else. The tougher part is that this also removes threat from the main tank, at which point DPS will need to stop entirely so that he can regain control of the boss.
Those abilities aside, Mandokir also has a raptor companion that is quite deadly. You will need both offtanks to handle him because he has a stacking sunder effect that can quickly make an offtank die. When an offtank has at least 4 stacks, the other offtank should pick the raptor up. It is easiest to kill the raptor before Mandokir because then your healers will not need to pay attention to healing the offtanks.
Killing Mandokir’s raptor, Ohgan, will send the boss into a minute-long enrage that vastly increases his damage. Any major defensive cooldowns should be saved for this enrage, but the fight is very easy after this. There are a few more things to keep in mind before actually beginning the fight.
First, dying during this encounter is very bad. You can resurrect with full health thanks to the spirits surrounding the arena, but your death will grant the boss experience. When three raid members have died, Mandokir will level up and take less damage while dishing more out. This is why it is critical to avoid actions during Threatening Gaze. Second, melee attackers must be vigilant about running away from his whirlwind ability when it happens, but make sure to strafe away. Finally, make sure to kill the speaker add when you start the encounter.
Once Ohgan is dead and Mandokir’s rage passes, the fight becomes fairly smooth sailing. Remember not to move if you are being watched and give the main tank time to regain threat and the boss should die without too much of a struggle.
Edge of Madness (300 Alchemy Required*)
Before you can even start the fight, you will need to deal with the imps in the area. These do a lot of damage, but they can be enslaved or banished by a warlock. When they die, a portal will appear that spawns two voidwalkers. These voidwalkers cannot be enslaved or banished and they also have an aura effect that deals damage. To effectively deal with them, kill one imp at a time, then focus on the voidwalkers when they appear until all imps are dead.
The Edge of Madness encounter is quite different because there are four total bosses that can appear, but only one of them will spawn during each raid lockout. These bosses do follow a spawn calendar, which means that it will take six weeks to see all four of them. To begin the encounter, a Gurubashi Mojo Madness must be used to extinguish the brazier that is in the area.
*This can be bought on the auction house, but it is unlikely that you will find one for sale. Instead, an alchemist with 300 skill level can use the tablet near the brazier to learn the recipe for the potion. Crafting it requires 6x Powerful Mojo, a Black Lotus, a Massive Mojo, and a Blood of Heroes. Use it to extinguish the flame and make one of the four bosses appear.
Wushoolay
Wushoolay is basically a tank and spank fight, but there are a few things to keep in mind. First, he will need to have his mana drained by hunters and warlocks. Second, he will spawn lightning clouds that nobody should stay standing in. Third, ranged attackers should spread out to minimize raid damage. Fourth, your tank should keep the boss faced away from the raid as best as possible while also moving from lightning clouds. Finally, nature resistance is a huge boon here for your main tank because he has an aura of poison. Aspect of the Wild is recommended for the fight.
Renataki
Renataki is very simple. It is easiest to have the raid (aside from melee) group up because he will Gouge all nearby targets, then casts Vanish. He will then attack a random raid member, dealing a good amount of damage. If he targets a caster, they will likely die. Stealth can be disrupted by the use of AoE damage. Just DPS him down until he dies.
Hazza’rah
In comparison, Hazza’rah is definitely the toughest of the four bosses. His health pool is not very large, but his abilities can be overwhelming if not quickly dealt with. Casters and healers should stay away from melee range so that they are not affected by his AoE sleep ability. Use HoTs on the main tank so he doesn’t immediately die. The boss will also create illusions that deal massive damage, but have very little health. These must be focused by single target attacks so that they don’t one shot raid members.
There should be at least three or four dedicated players focused on killing illusions. It is best if these are ranged DPS so that none of them are asleep. The last mechanic to deal with is a chaining mana burn, which can quickly render your healers useless. To deal with this, have hunters and warlocks use their mana draining abilities. When he has no mana, he can’t use the ability. Focus on illusions and keeping the main tank alive and Hazza’rah will fall.
Gri’lek
Gri’lek is also very simple. Keep the casters and healers spread out and proceed with the fight like a typical tank and spank. Periodically he will grow in size and deal much more damage. When he does this, any threat will disappear and he will start to fixate on various raid members. He is quite slow when this happens, so anyone with aggro should stay out of range so they don’t get one shotted.
The only other thing to be aware of is that he will root raid members, which must be quickly dispelled so they aren’t caught out when fixated. If you are careful with threat, you can bounce him between two separate raid members who will never take a single hit during his big phase.
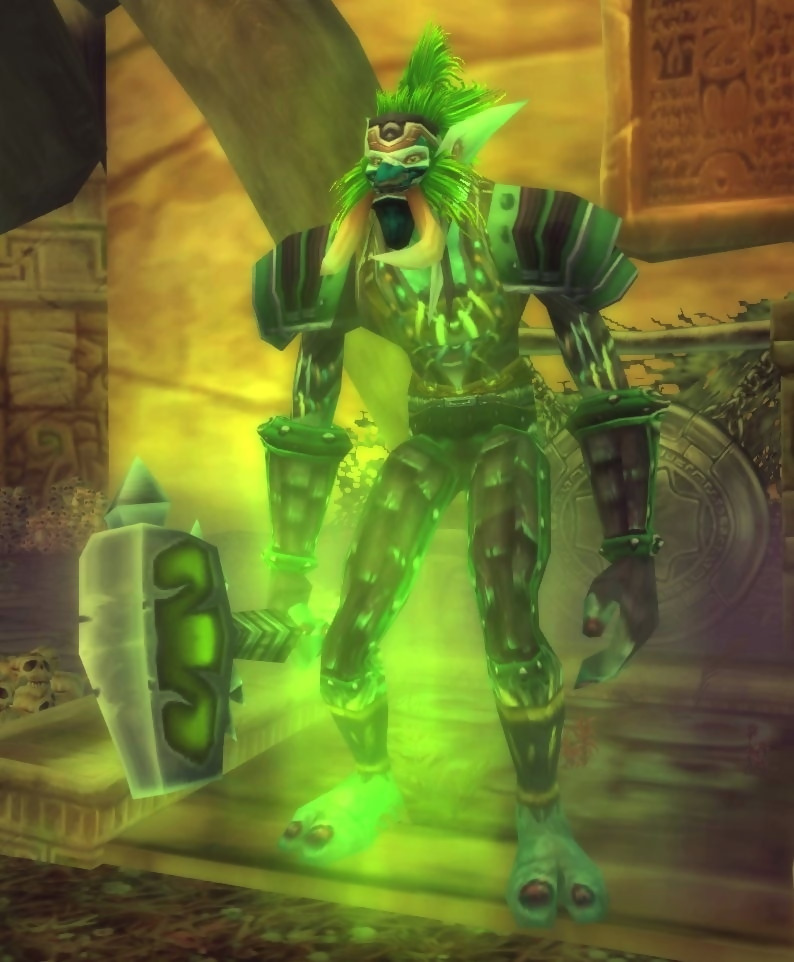
Jin’do the Hexxer
Jin’do is the toughest encounter in all of Zul’gurub and will require coordination from all raid members. Before you even pull, make sure to use any AoE fear cooldowns (warriors and priests) and use them on cooldown because there will be plenty of mind controls throughout the fight. Make sure to stock up on shadow resistance, including Prayer of Shadow Protection. An arms warrior or rogue with Wound Poison IV is very helpful to negate any heals that do happen.
Preparation aside, there are multiple adds during the fight and a few totems. The top priority during the fight is quickly dispatching any Shades of Jin’do that spawn. However, these can only be killed if you have the Delusions of Jin’do curse active on you. Because of this, Delusions of Jin’do should not be removed. Anyone with the curse should always prioritize and look for shades to kill because they interrupt spellcasting. They can only be damaged by single target abilities.
When there are no shades alive, the next priority is Jin’do’s Powerful Healing Ward. Without healing debuffs, this will restore around 3% of his life for every tick. This can be somewhat combated by using mana draining abilities because he won’t spawn the totem if he has no mana. If shades and healing totems are dead, then the raid must watch out for Brain Wash Totems. This will mind control a nearby raid member, but this effect ends as soon as the totem dies.
Your raid group should only DPS Jin’do when there are no shades or totems active. This means it is a very slow fight, most of why he is so difficult to deal with. Another mechanic to be aware of his teleportation ability, during which he will send a random raid member into a skeleton pit. You should have at least one, preferably two mages nearby to quickly AoE these adds down.
Finally, your offtanks will need to watch for when Jin’do hexes the main tank. This needs to be dispelled, but the boss will focus the next-highest raid member on his threat table. Even if you follow all the mechanics perfectly, your raid group just may not have enough DPS to kill the boss between managing shades and totems. If you do have a decent amount of time between spawns to put some damage in, Jin’do will slowly but surely die.
Gahz’ranka (350 Fishing Required)
To summon Gahz’ranka, you will first need to earn the ability to do so. This requires picking up Nat’s Measuring Tape, which can be found at Nat Pagle’s fishing spot near the water west of High Priest Thekal. Whoever picks it up should have 300 fishing. They will then need to travel to Dustwallow Marsh and speak to Nat Pagle to hand the quest in.
After doing so, a Mudskunk Lure can now be purchased from Nat. Head back to ZG and fish inside the pools of Muddy Churning Waters. Once 5x Zulian Mudskunks are caught (with 350 fishing), they can be added to the lure. Once added, the lure will immediately be cast into the water and will spawn the boss (you must be at Nat’s fishing spot).
Killing Gahz’ranka is very easy if you take the fight to the water. This will completely negate any fall damage. Before initiating the fight, make sure to clear out the fish in the nearby moat where you will fight the boss. Everyone beside the main tank should be grouped up behind the boss so they are in range for his Massive Geyser. This will let the main tank quickly regrab threat after the ability is finished.
Simply DPS Gahz’ranka down until he dies, making sure to give the tank time to regain control of the boss after each knockup.
Author
If I'm not working or spending time with the family I'm probably gaming. Some of my favorite recent games I've played are Far Cry 5, World of Warcraft Classic, and 7 Days to Die.
