- Author: Nevermore
- Date: July 6, 2024
- Updated: July 6, 2024
- Expansion: WoW Classic
Welcome to the WoW Classic Rhok’delar guide! This guide will teach you all you have to know about the famous living bow and what steps you must pursue to acquire one of the best Hunter weapons in the game! This epic journey will task you with venturing into many dangerous locations such as Onyxia’s Lair and the Molten Core, visiting the corrupted forest of Felwood, and even hunting powerful disguised demons all on your own.
Rhok’delar in Season of Discovery
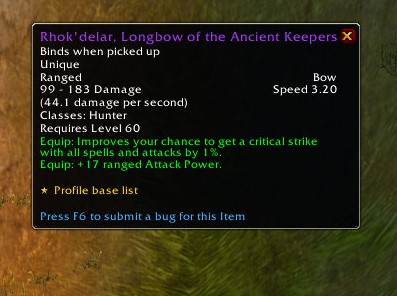
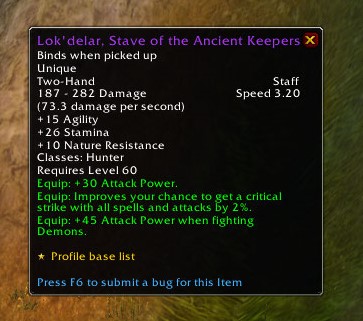
Season of Discovery brings forth some exciting changes for Hunters, as it updates both Rhok’delar, Longbow of the Ancient Keepers, and Lok’delar, Stave of the Ancient Keepers. The new versions receive better stat adjustments with Rhok’delar receiving increased Weapon Damage while Lok’delar now grants Agility and extra Attack Power!
While the items have had their stats revamped, there was no specific mention of a different acquisition method, meaning that in the Season of Discovery, both weapons will be acquired just like in the Classic Era.
Ancient Petrified Leaf Questline
The iconic Hunter Weapon, Rhok’delar, involves a rather long quest line that can be very difficult to complete. The journey will task you with venturing across multiple zones of Azeroth, fighting minions of Ragnaros, killing Onyxia herself, visiting Felwood and its corrupted forest, and finally hunting demons as a form of revenge. However, while the task is certainly difficult and one of the most iconic quests in WoW Classic, the quest line grants multiple rewards among which you will receive: Rhok’delar, Longbow of the Ancient Keepers, Ancient Sinew Wrapped Lamina, and Lok’delar, Stave of the Ancient Keepers!
The first step on this journey will take place inside the Molten Core and it involves killing Majordomo Executus. Looting the Cache of the Firelord will grant you the chance to acquire the Ancient Petrified Leaf, which is the prerequisite for starting the quest line. Keep in mind that the Ancient Petrified Leaf has a 50% drop chance, meaning that multiple runs might be required to obtain it.
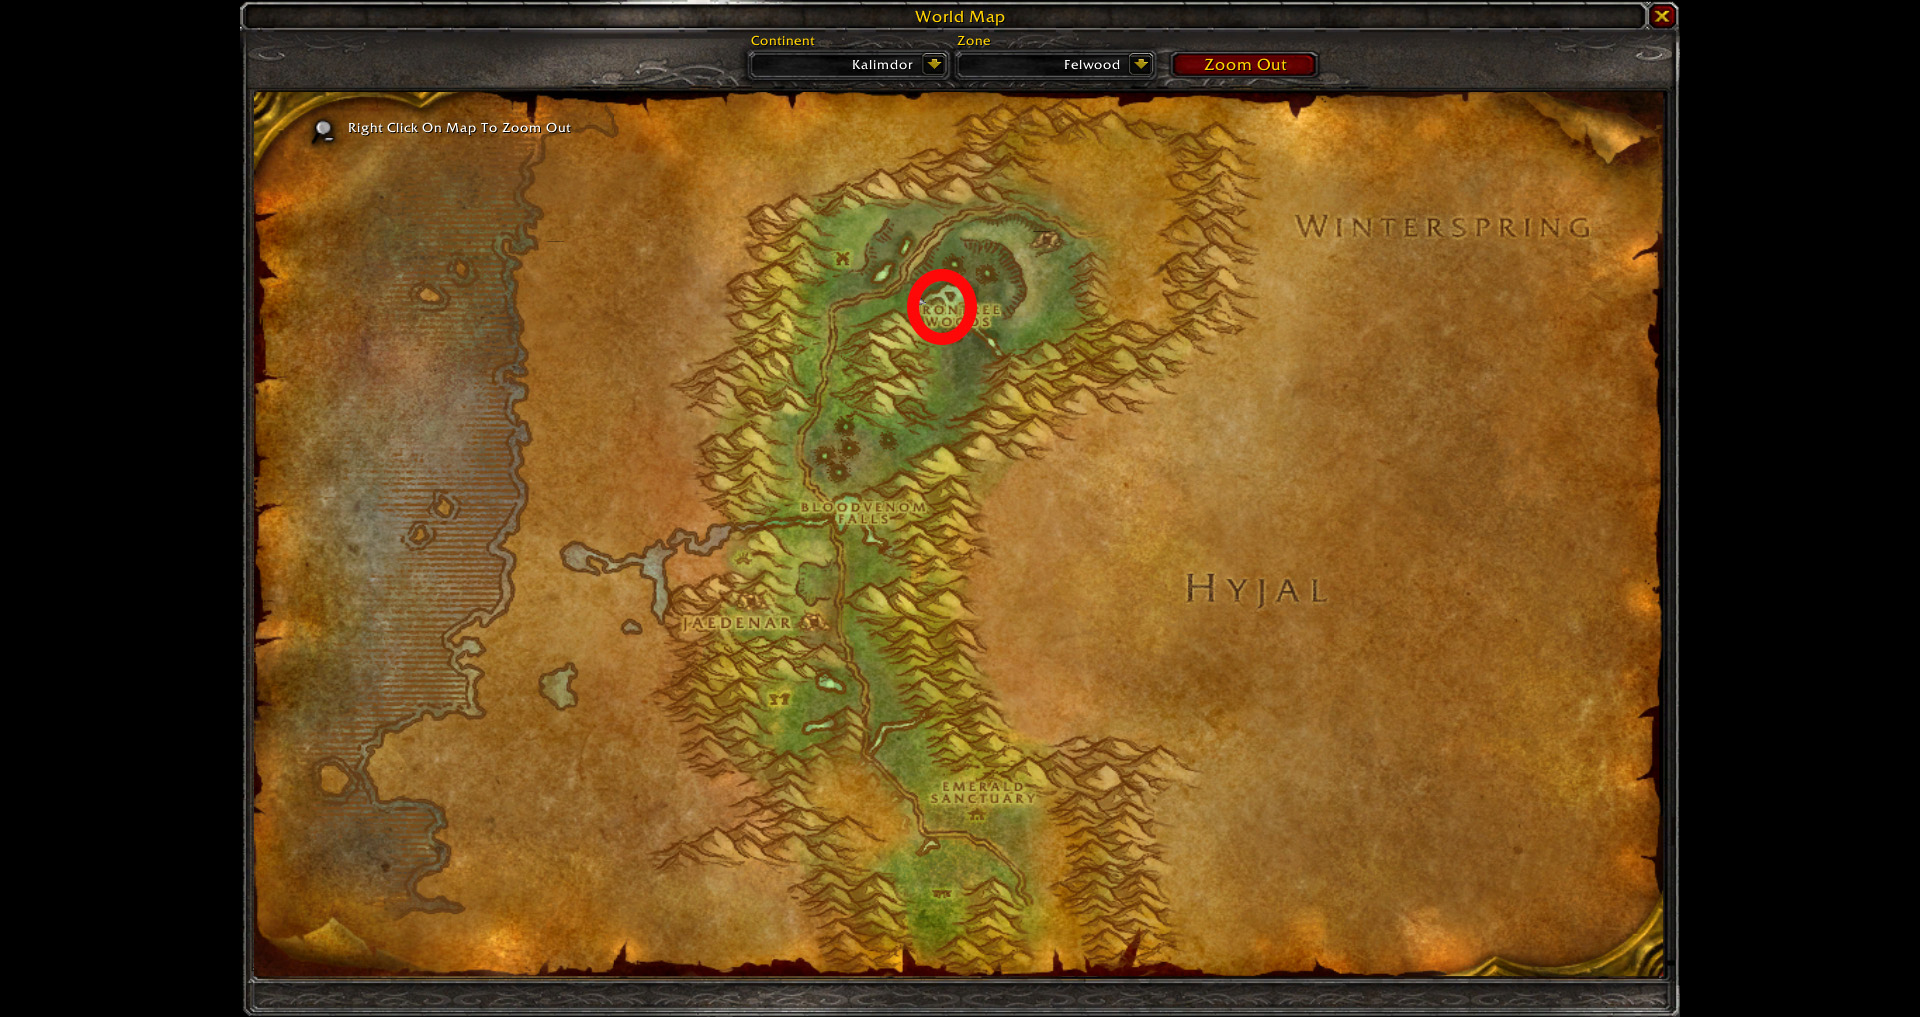
Clicking the item will start The Ancient Leaf quest, which tasks you with venturing into Felwood and finding Vartrus the Ancient. He can be found on the north side of Felwood, specifically in the Irontree Woods. The Ancient can be found in a petrified state next to his fellow brethren. Once the player approaches the petrified ancients and climbs to the top of the small hill in the middle of the islet, their spirits will appear, with Vartrus the Ancient offering a dialogue option.
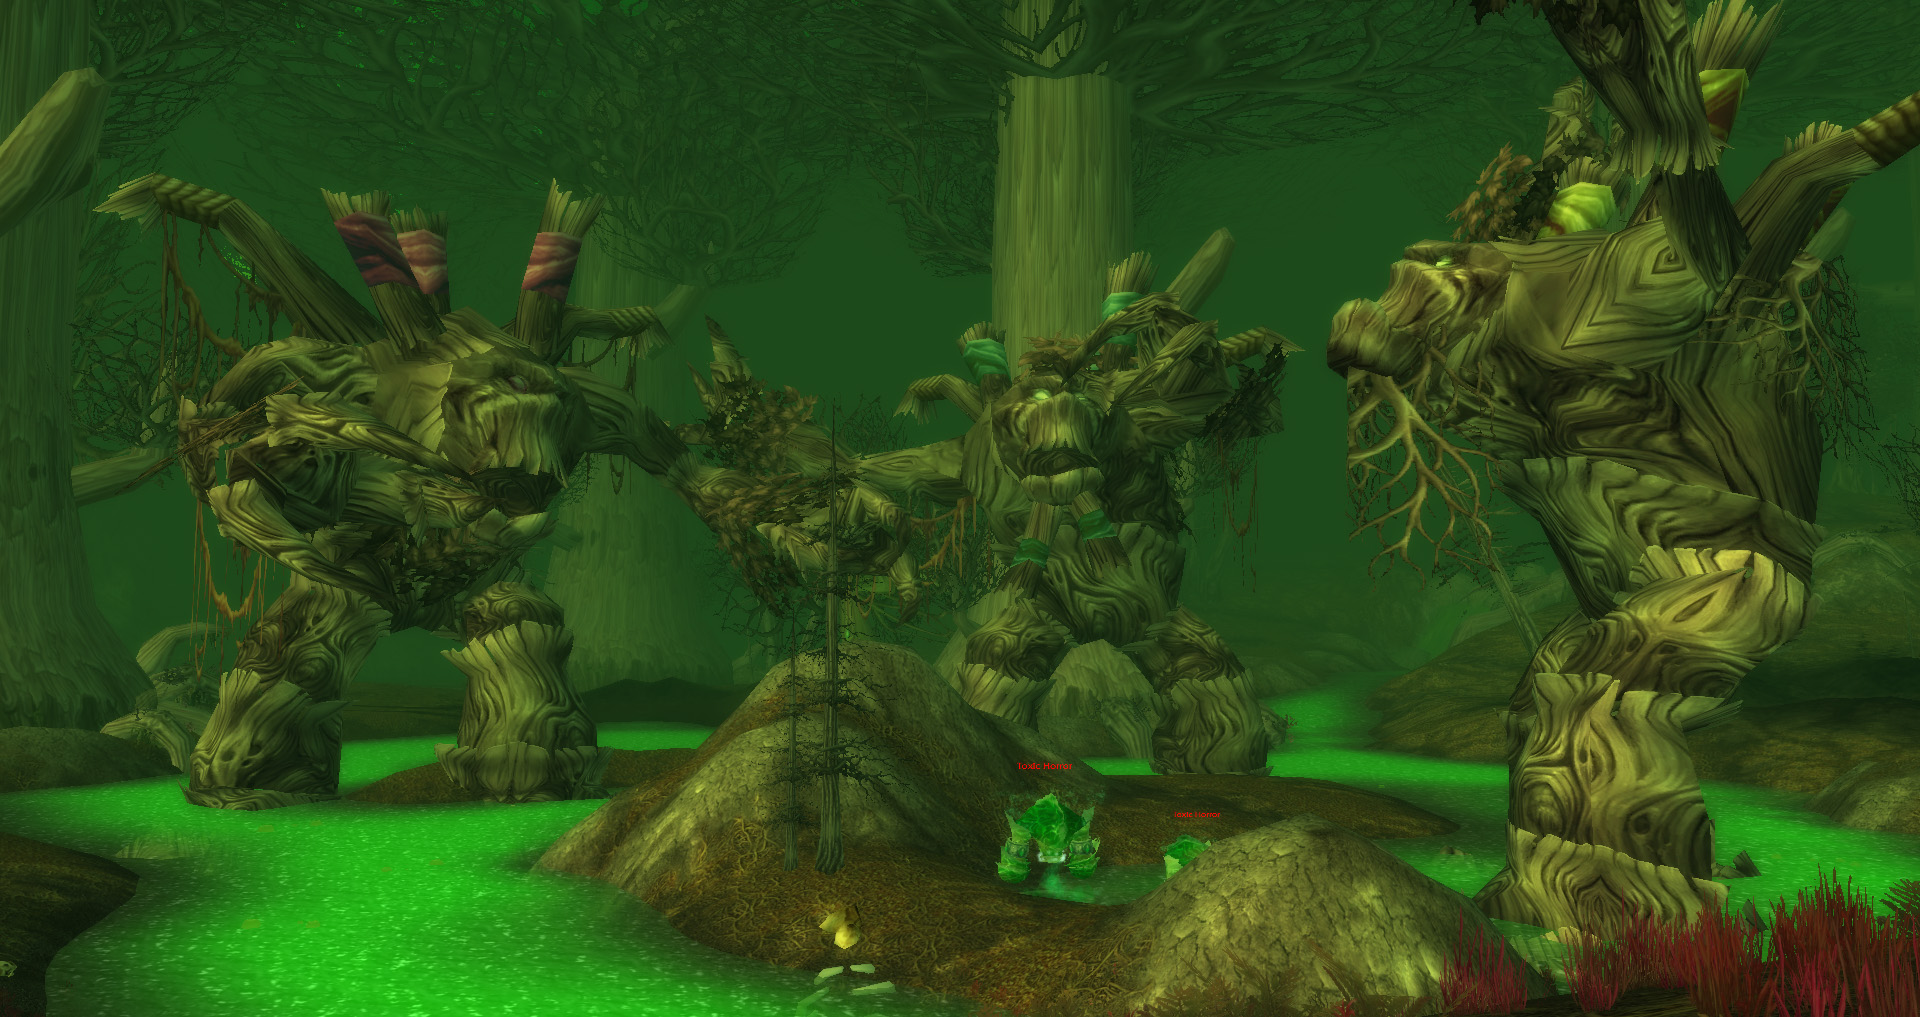
Once you talk to Vartrus the Ancient and deliver The Ancient Leaf quest, you will officially start the main quest line, with the quest An Introduction serving as a follow-up. The quest implies simply talking to Vartrus the Ancient and learning about what happened to him and his fellow ancients, with their physical forms being destroyed long ago when the Burning Legion invaded but their spirits living on.
Completing the An Introduction quest will now allow you to interact with the other two ancients, Stoma the Ancient and Hastat the Ancient. You will now be able to pick up 3 distinct quests: Stave of the Ancients from Vartrus the Ancient, Ancient Sinew Wrapped Lamina from Hastat the Ancient, and A Proper String from Stoma the Ancient.
While you can pick all 3 quests at the same time, you can turn in each quest individually, meaning that you don’t have to complete them all at once!
A Proper Sting
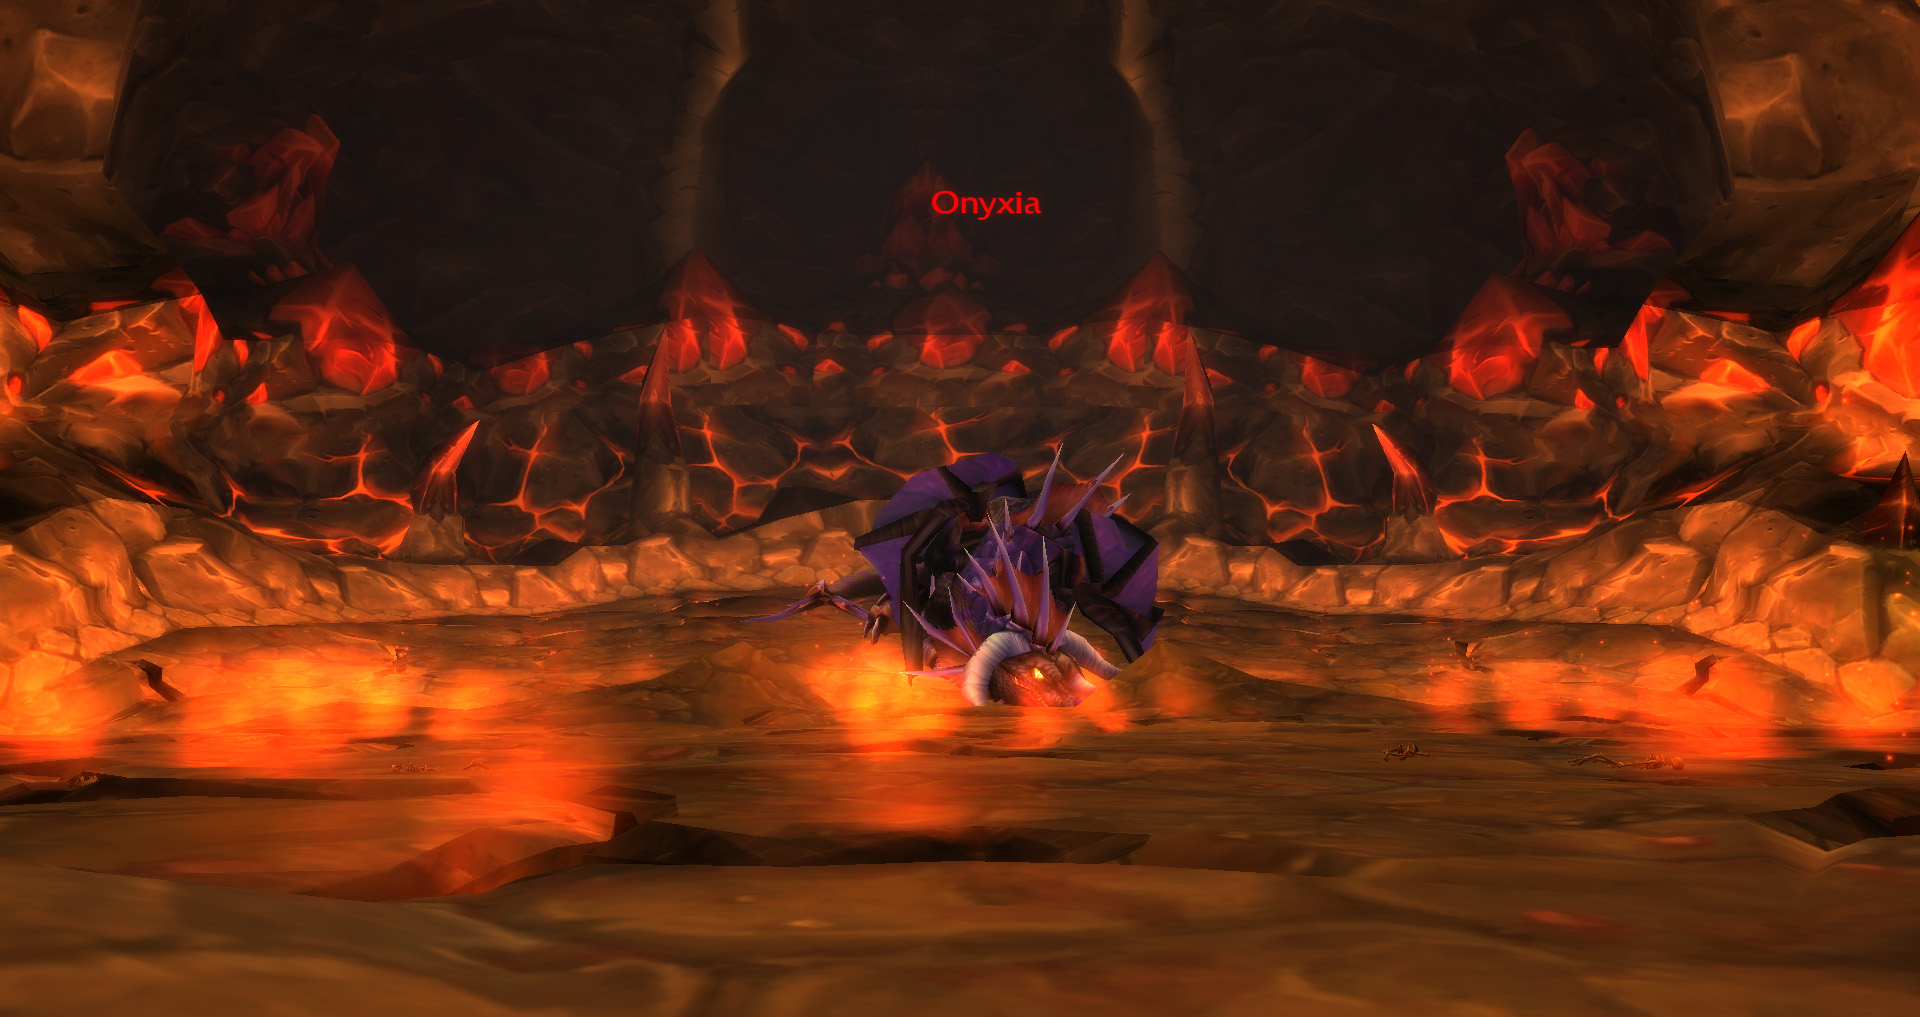
A Proper String requires you to gain a piece of Mature Black Dragon Sinew. Sadly for us, the only mature Black Dragon left on Azeroth is Onyxia, which means that you will have to venture into Onyxia’s Lair and kill the mighty dragon. The problem with this part of the quest is the drop chance of the Mature Black Dragon Sinew being somewhat low, meaning that you will most likely have to complete multiple runs to acquire it.
Ancient Sinew Wrapped Lamina
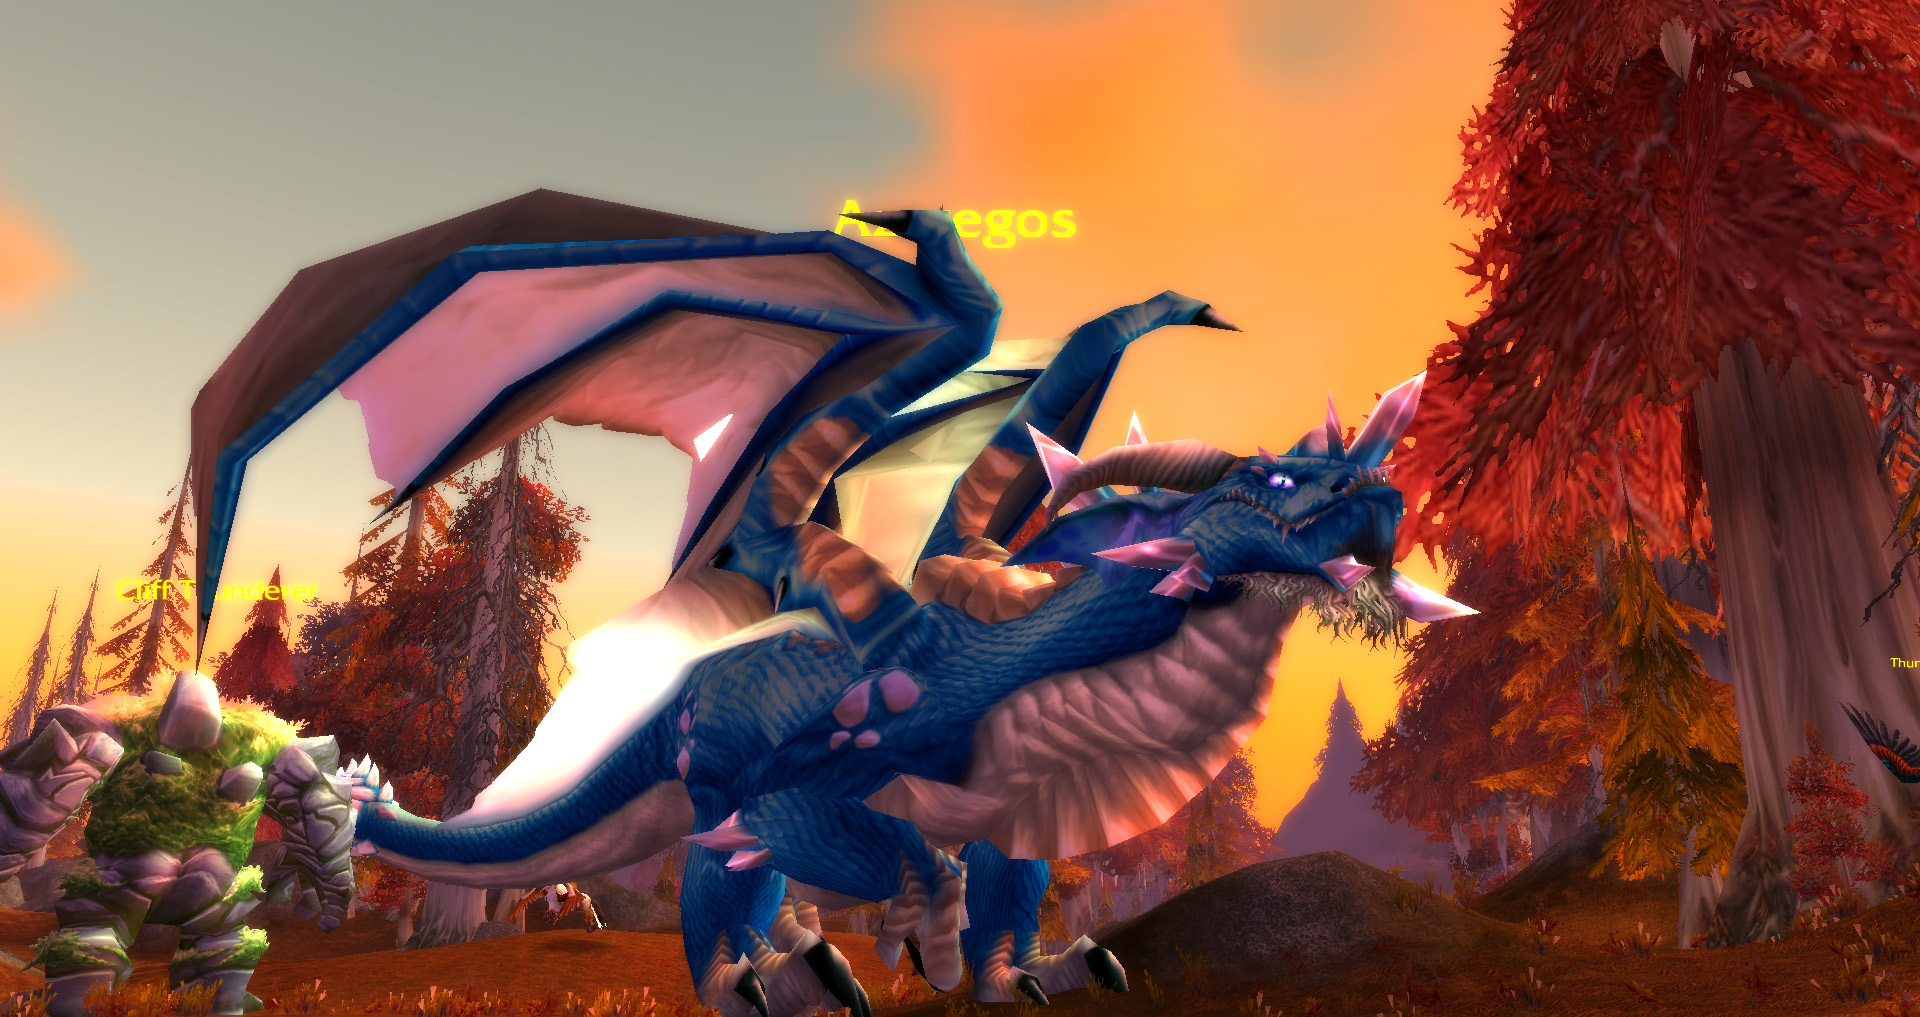
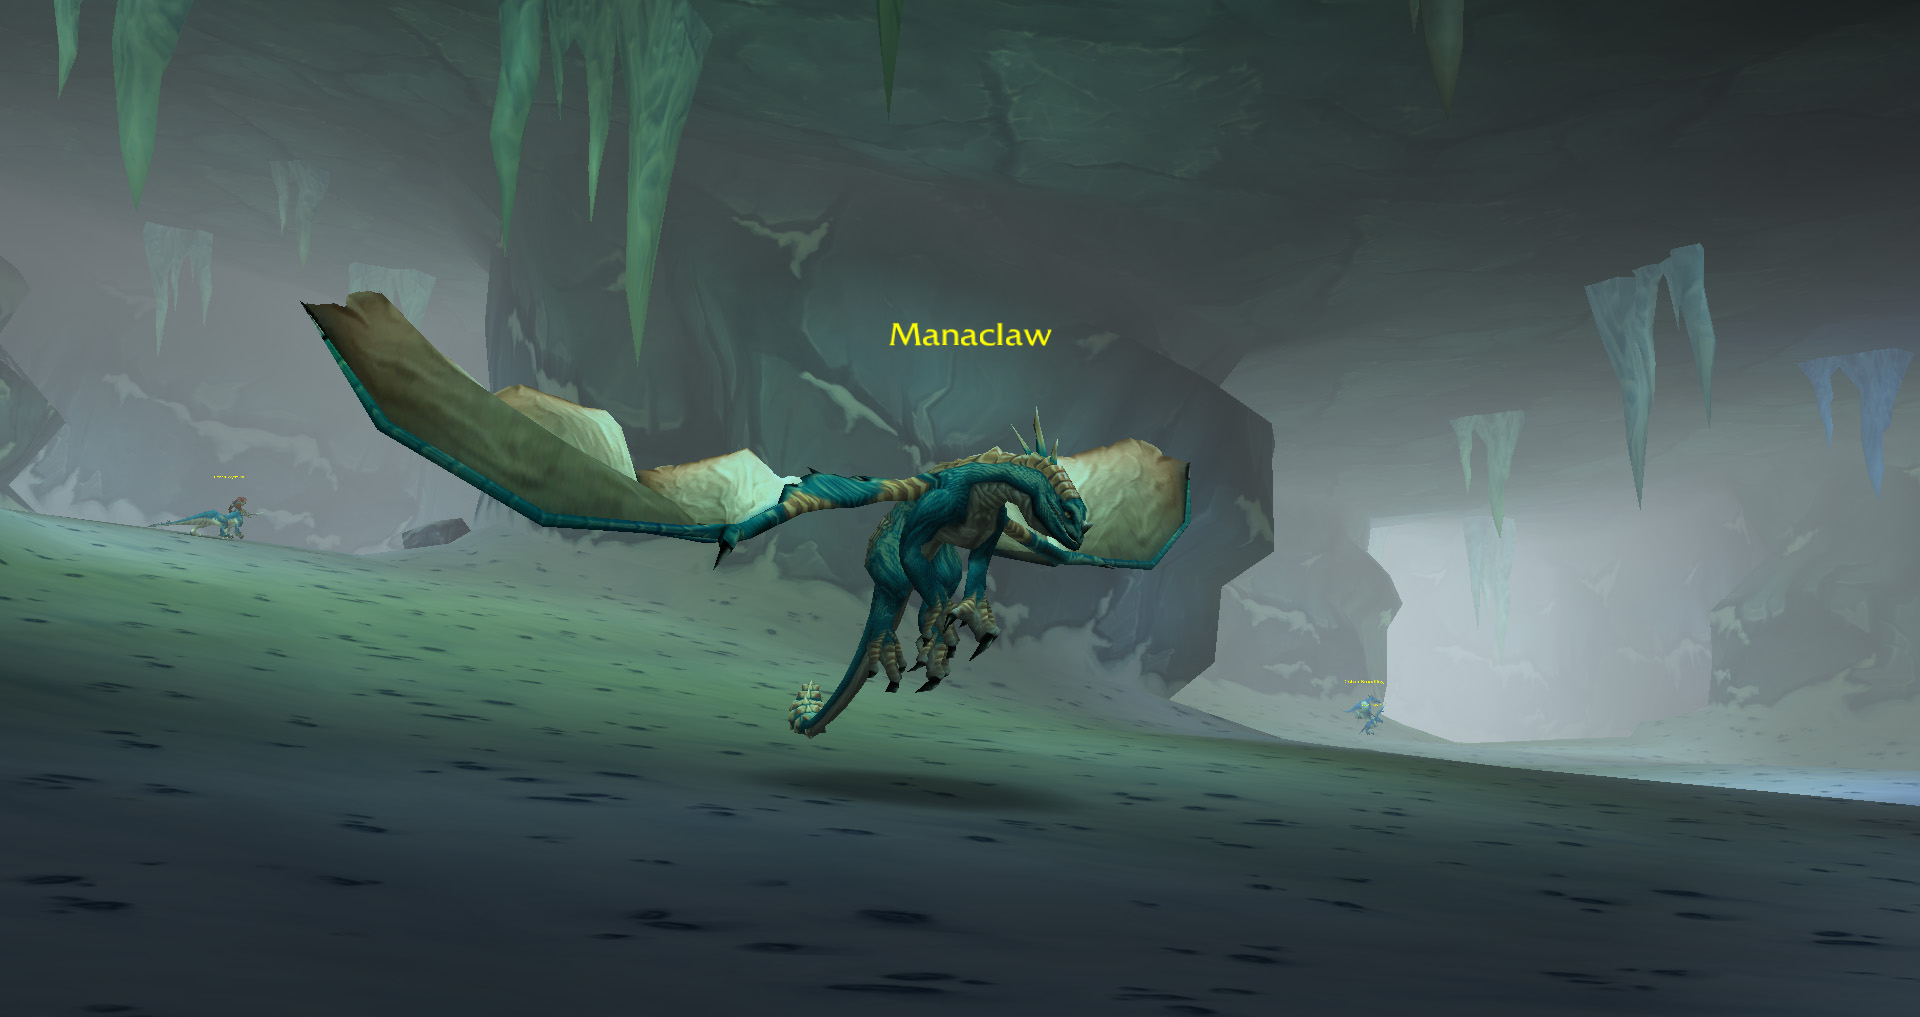
Ancient Sinew Wrapped Lamina tasks you with getting a piece of Mature Blue Dragon Sinew. This task is somewhat easier to accomplish than A Proper String as the Mature Blue Dragon Sinew can be acquired from multiple sources. One popular choice for acquiring the Mature Blue Dragon Sinew can is Azuregos, a World Boss that can be encountered in Azshara, due to the item having a high drop rate from him.
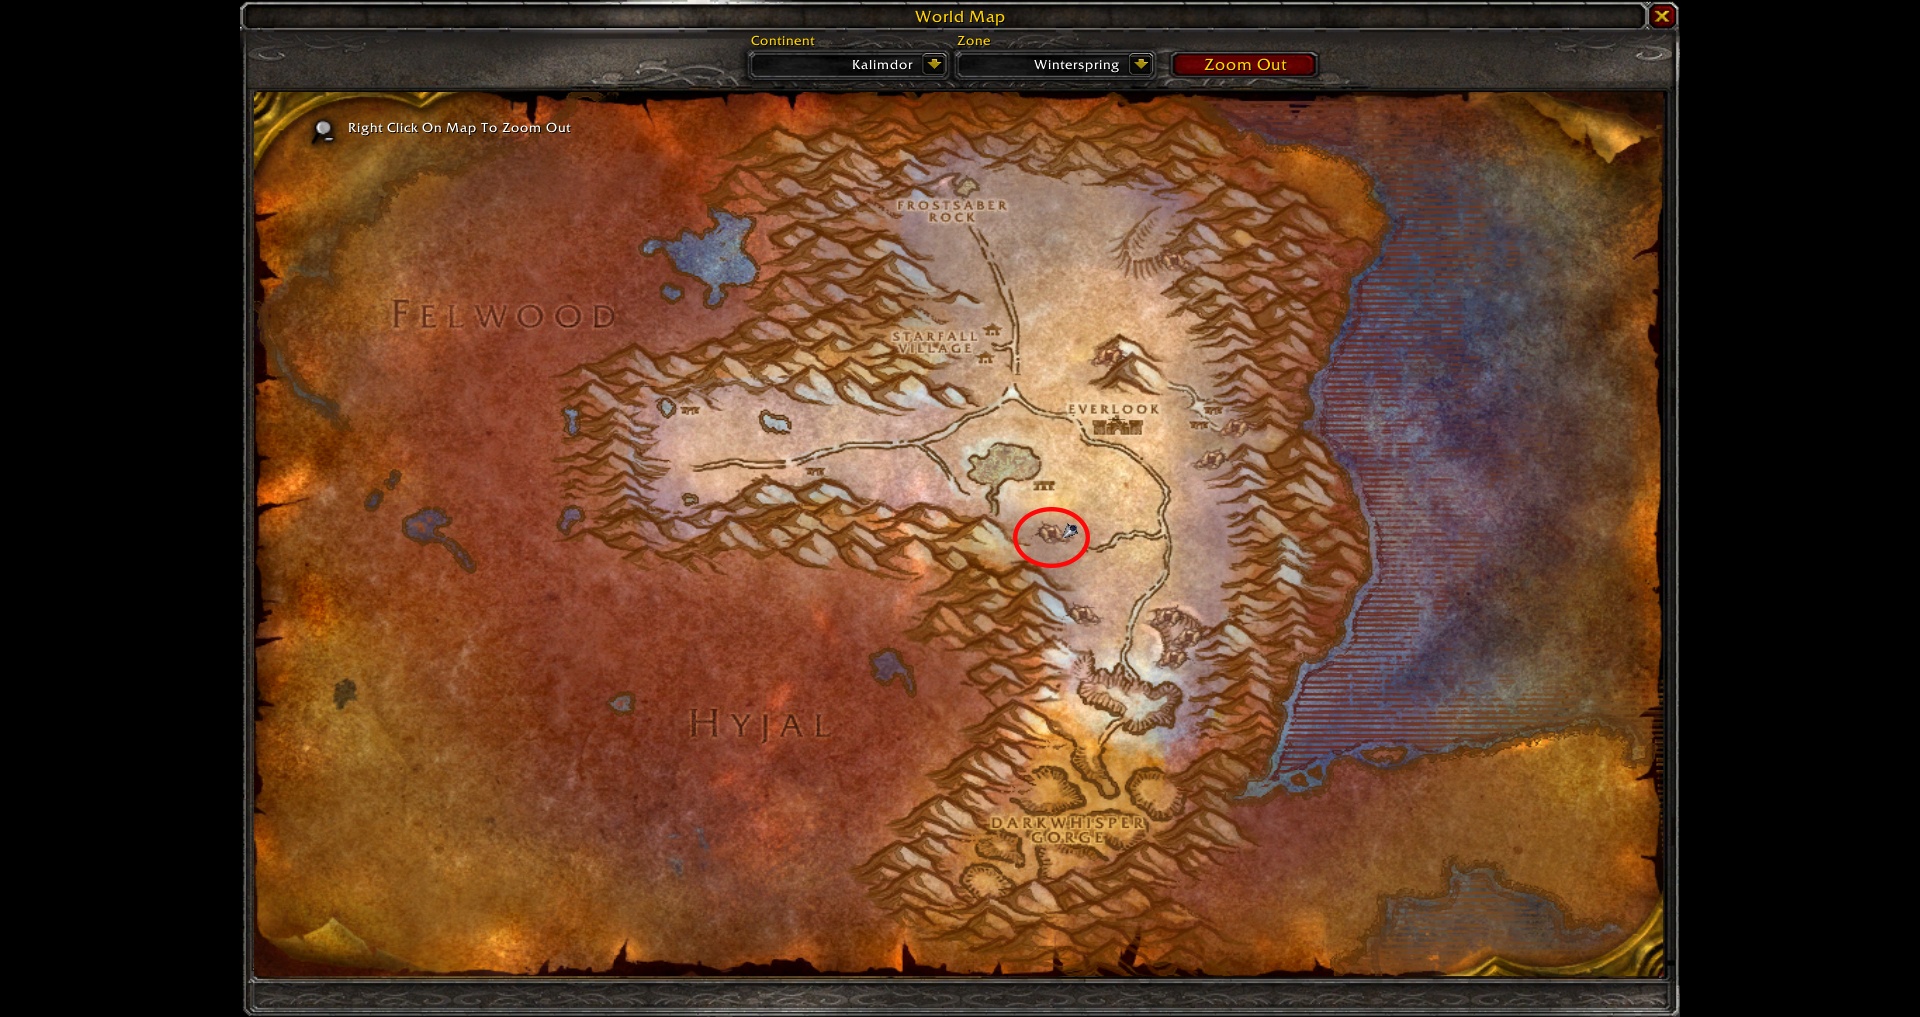
Alternatively, the Mature Blue Dragon Sinew can be acquired from multiple Blue Dragonkin in Winterspring, specifically in Mazthoril (a cave southeast of Everlook). However, their drop rate is extremely low, being around 0.5%. However, this beats having to wait for Azuregos to spawn since his spawn timer lasts several days. Keep in mind that all of the mobs found in Mazthoril are elites, meaning that you will have to be very careful inside the cave, as pulling multiple mobs at once can result in a certain death!
Staves of the Ancients
Well, if you’ve now finished those two quests and you thought you had a hard time, now comes the truly difficult part. The remaining quest, Stave of the Ancients requires you to kill four different demons as an act of retribution for the ancients and loot their heads, which at first sounds like a common task, but there is a catch. Once you read through the quest log, you will notice that the quest specifically mentions “You must complete this task by yourself”.
Yeah, you heard that right, completing this task alone means absolutely no external help, and that includes your pet! If anyone else damages the demons, a special NPC named The Cleaner will spawn and kill everyone in its vicinity, which means that you’ll have to reset the fight. However, you are allowed to benefit from buffs and effects, which means that you can get fully buffed with all the class-specific buffs, potions, and even World Buffs before attempting the quest.
Additionally, one of the demons in this quest requires you to use Melee Attacks, meaning that enchanting your weapon with Demonslaying will be a very good option to ease the fight. Furthermore, Elixir of Demonslaying will be a great ally for each of the four encounters, as it grants a massive Attack Power boost.
All of the four demons wear a humanoid disguise and are neutral, with each being found in a different corner of Azeroth. You will have to talk to each of them while they are in their humanoid disguises and tell them that you’ve uncovered their secret to trigger the encounter. After talking to the demons, you will have a few moments to reposition yourself while the demons assume their true form.
While some of the demons can be easily found in their designated locations, some of them have very large pathing routes, meaning that the Track Demons spell will be invaluable in this part of the quest line.
Simone the Seductress
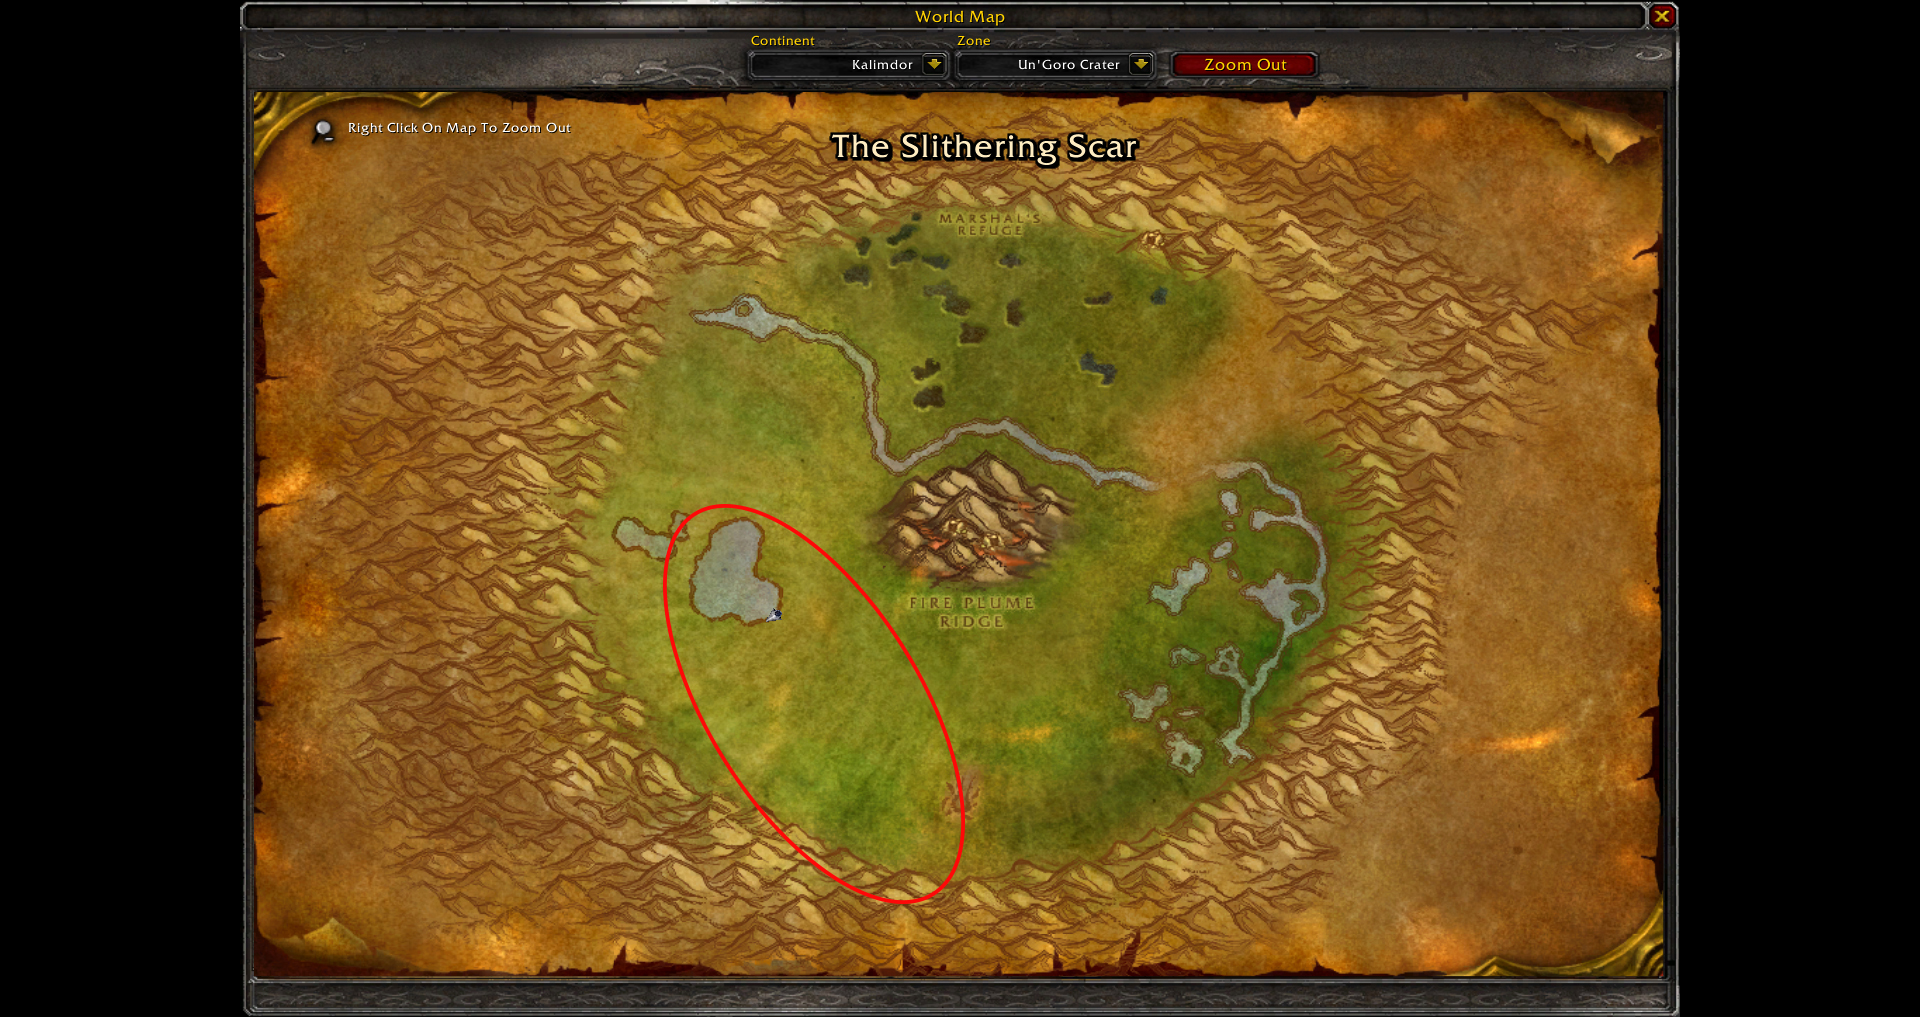
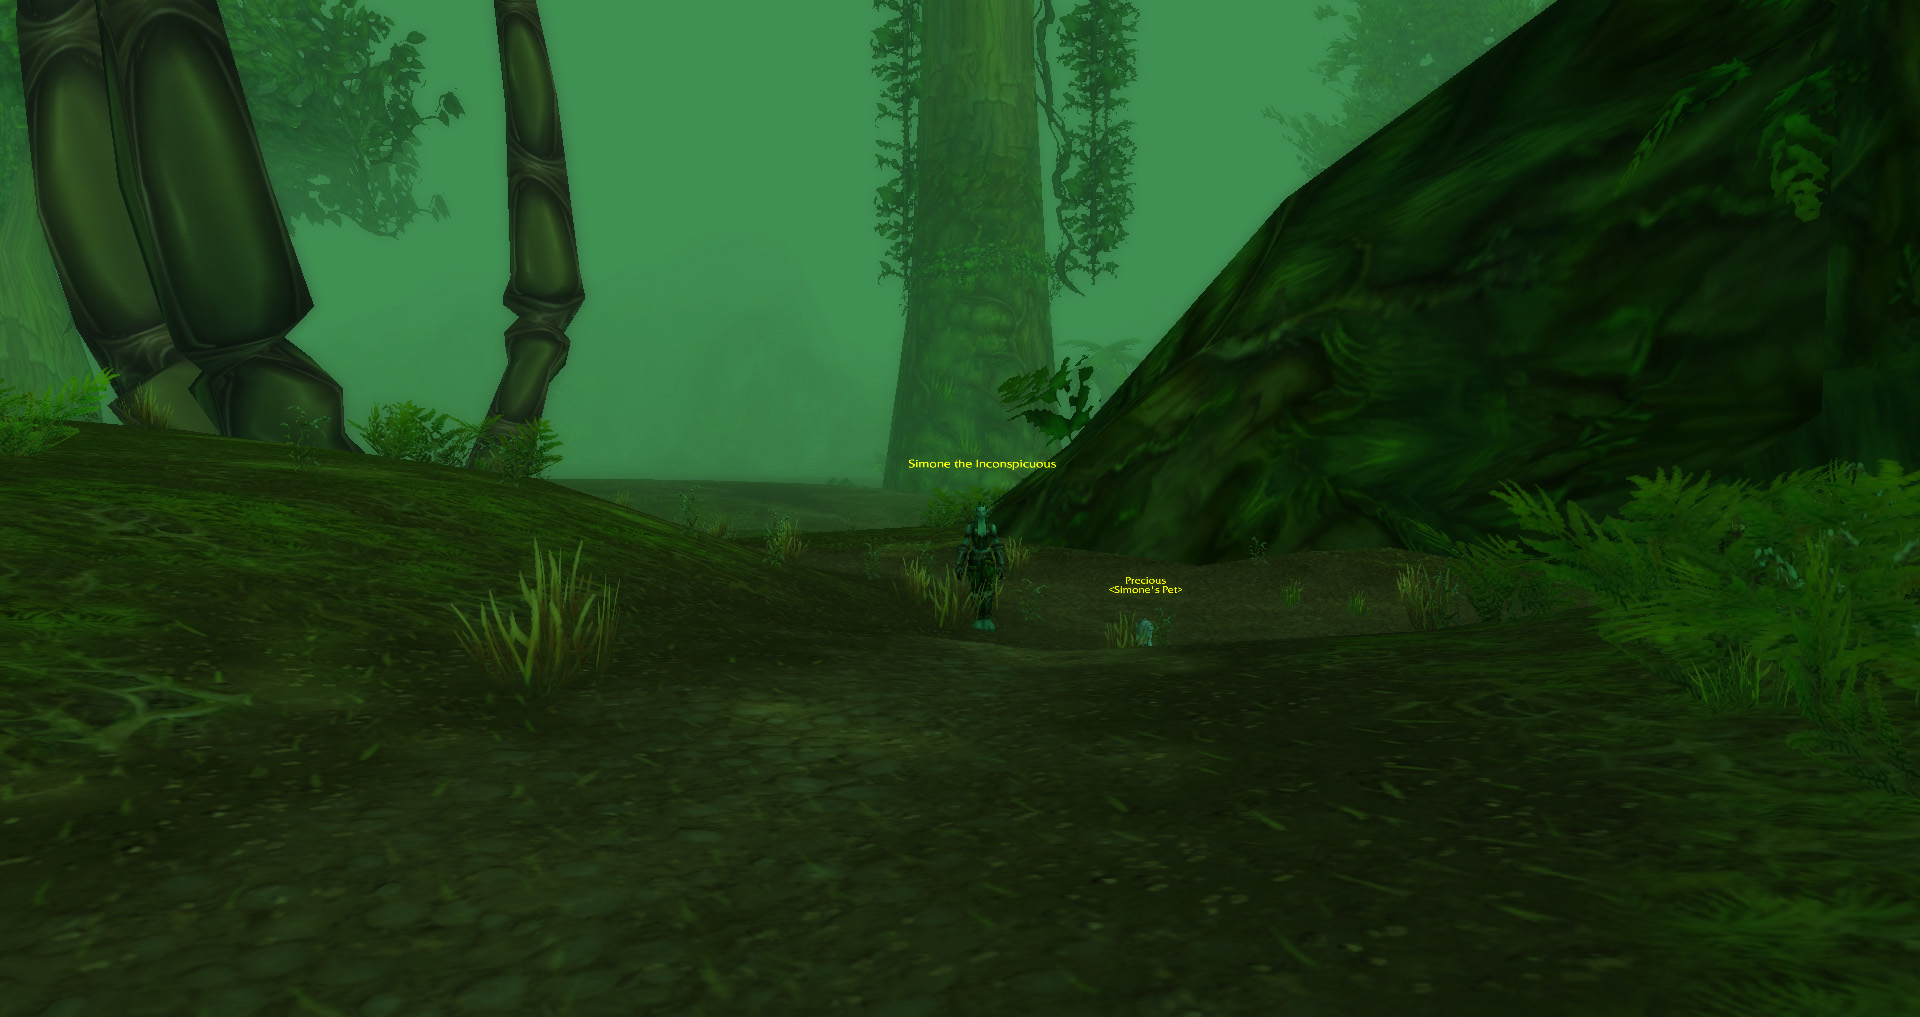
Simone the Seductress is the first demon you are tasked to kill, requiring you to journey to Un’goro Crater. She is disguised as a troll named Simone the Inconspicuous and has a pet wolf companion named Precious by her side. The problem with Simone is that her patrolling route is extremely large, and Un’goro Crater is not known as the friendliest of places, being infested to the brim with dangerous mobs. This is where Track Demons really does its job, as it will help you easily locate her. Her route always starts at the lake on the western side of Un’goro but can extend as far as the south of the map.
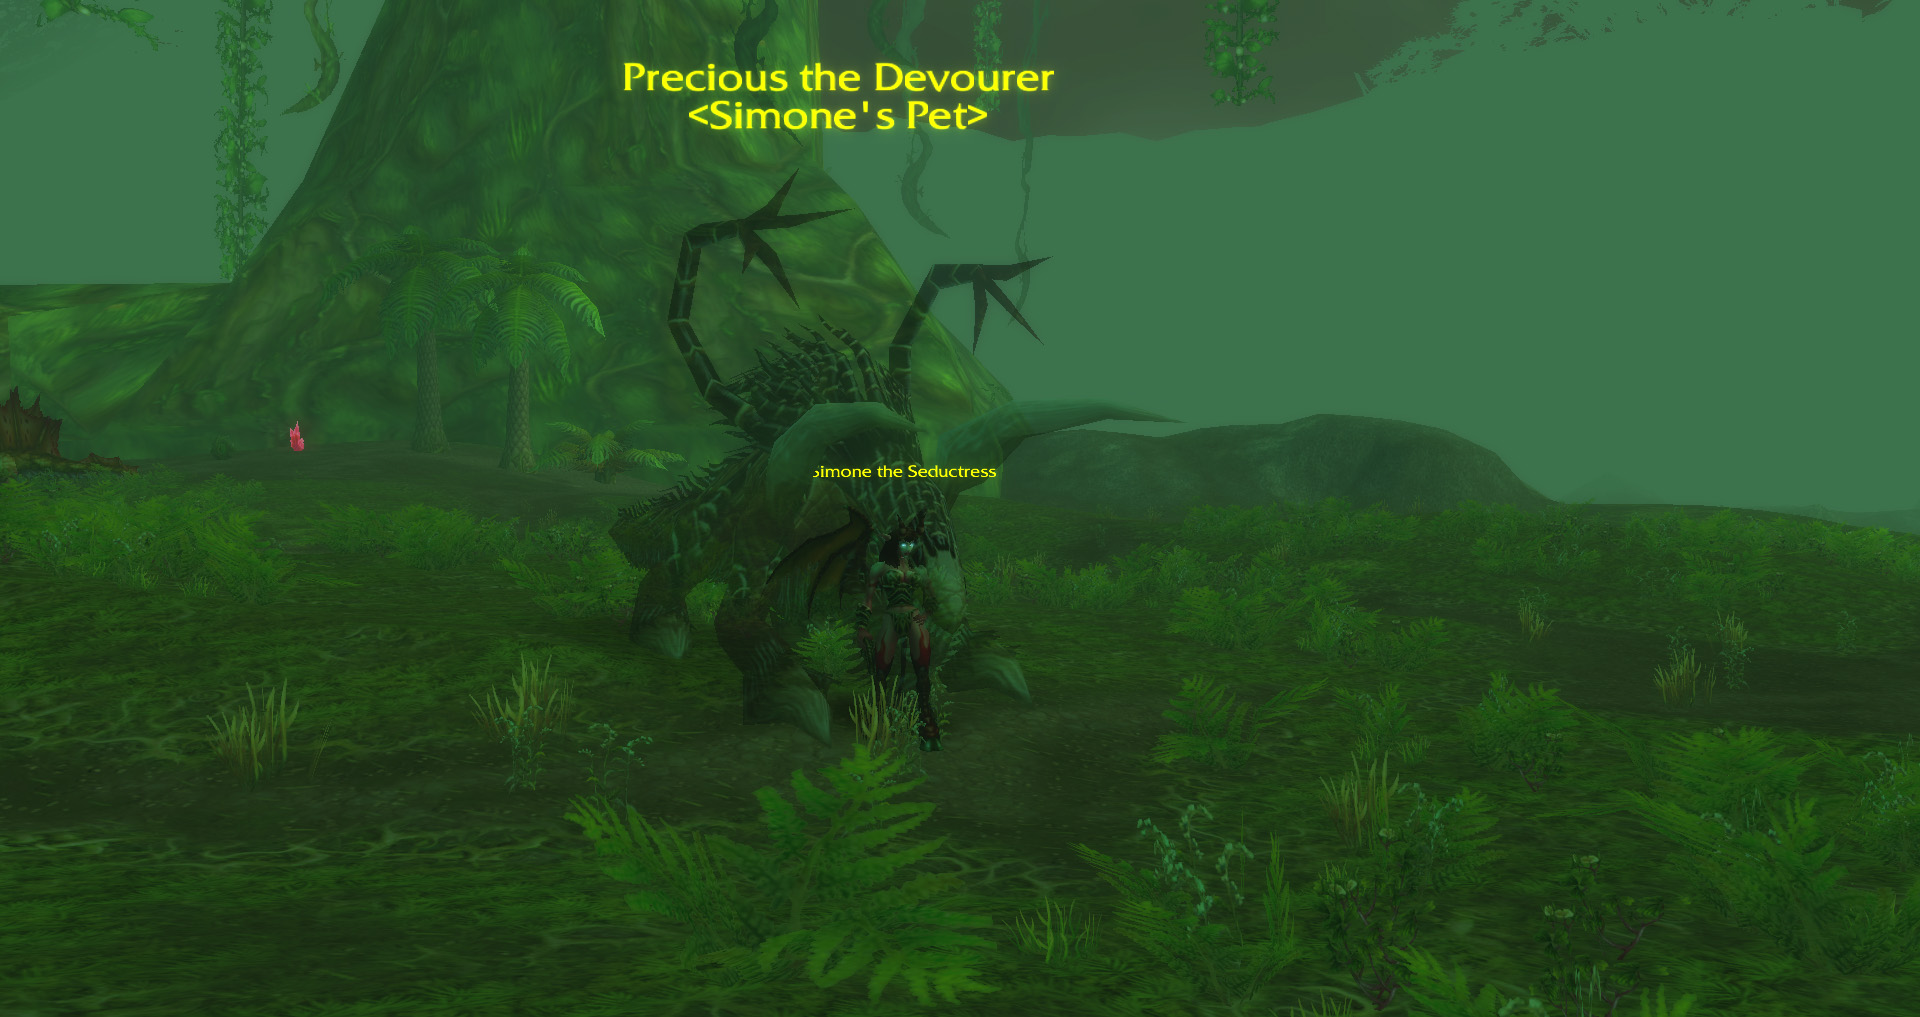
While the other demons might be more annoying to deal with, Simone the Seductress is the hardest by far as she is joined in battle by her pet, Precious, who turns out to be a giant Felstalker. Luckily, the Felstalker doesn’t have an infinite aggro range, meaning you can cheese it with a well-placed Freezing Trap and kite Simone the Seductress outside its aggro range. This is where the tough part starts as you will have to deal with Simone the Seductress while at the same time making sure that you don’t aggro other mobs.
Simone the Seductress has two distinct abilities that should make you wary of her, Chain Lightning and Temptress’ Kiss. The former, Chain Lightning, acts as the shaman spell, however, it hits a lot harder. You will have to consistently apply Viper Sting to ensure she won’t spam you with it. The latter, Temptress’ Kiss is a debuff that reduces your Ranged Attack Power by an extreme amount. This is where the Demonslaying enchantment comes to your aid, alongside a very powerful Melee Weapon. Once Simone the Seductress is out of mana, she won’t be much of a threat, provided that you prepare properly for the fight and can outlast her in melee combat.
Klinfran the Crazed
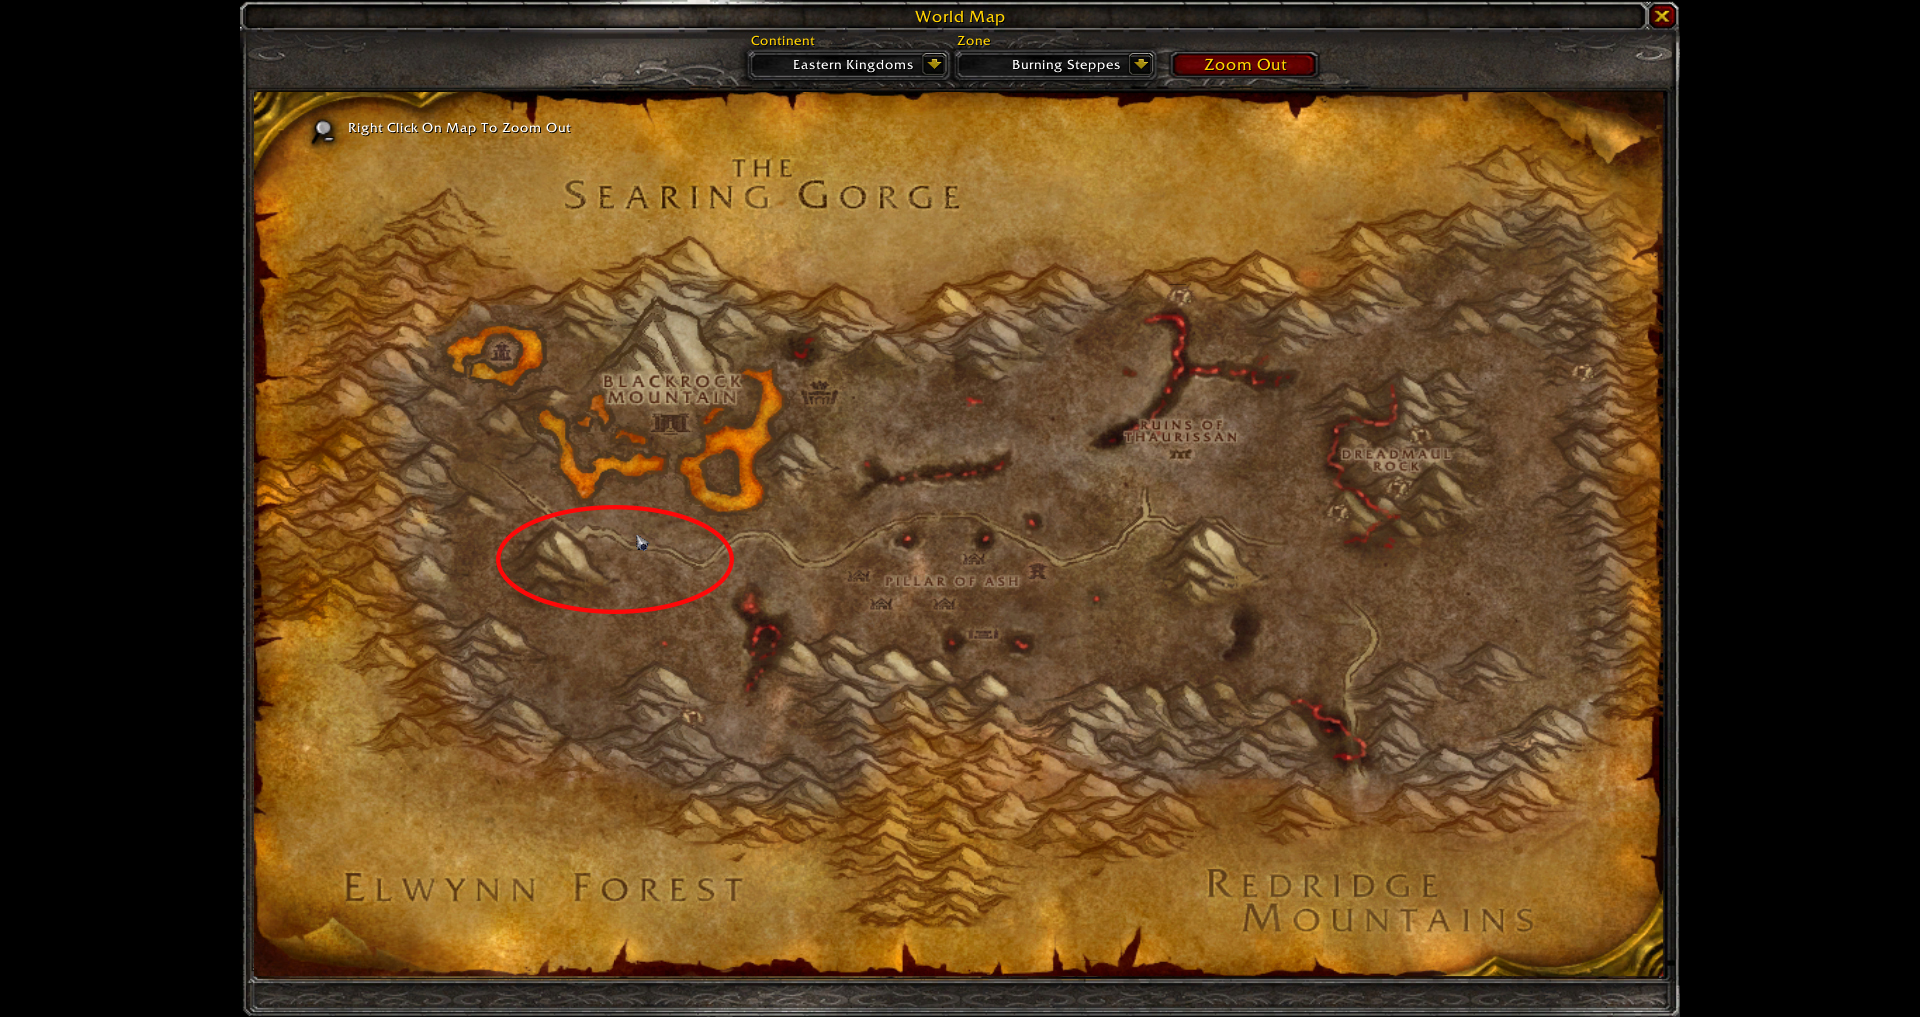
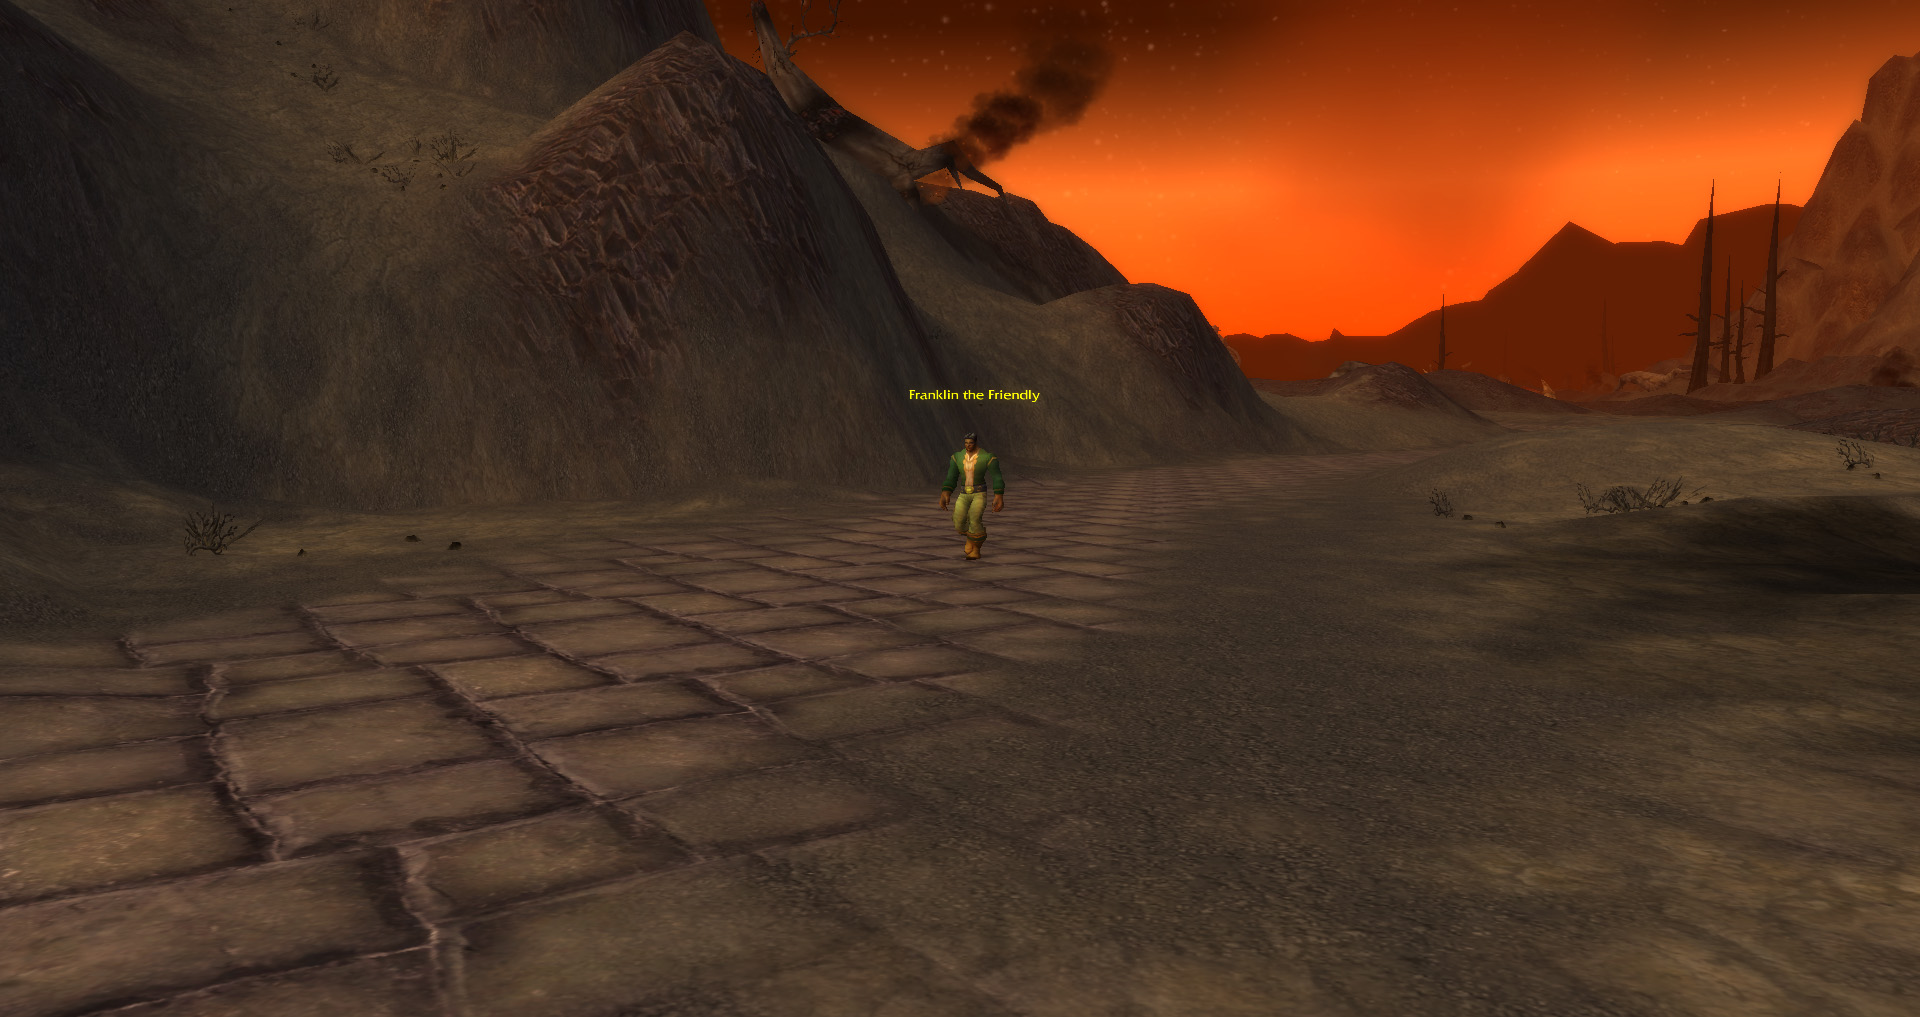

Klinfran the Crazed is the second demon that you will encounter, and arguably the easiest one of them all. He is wearing the guise of Franklin the Friendly and can be found patrolling south of the entrance to Blackrock Mountain in the Burning Steppes. He only has one ability that you’ll have to worry about, Demonic Frenzy. The ability works as a dispel while also buffing him with increased Attack Speed and increased Attack Power. Luckily, you can use a Tranquilizing Shot to dispel the effect.
You can choose to simply kite him around the Burning Steppes while chipping away his health or cheese with various objects such as the trees found around the area to block his pathing. You may also fight him in melee, as his damage output is low while he doesn’t have Demonic Frenzy.
Solenor the Slayer
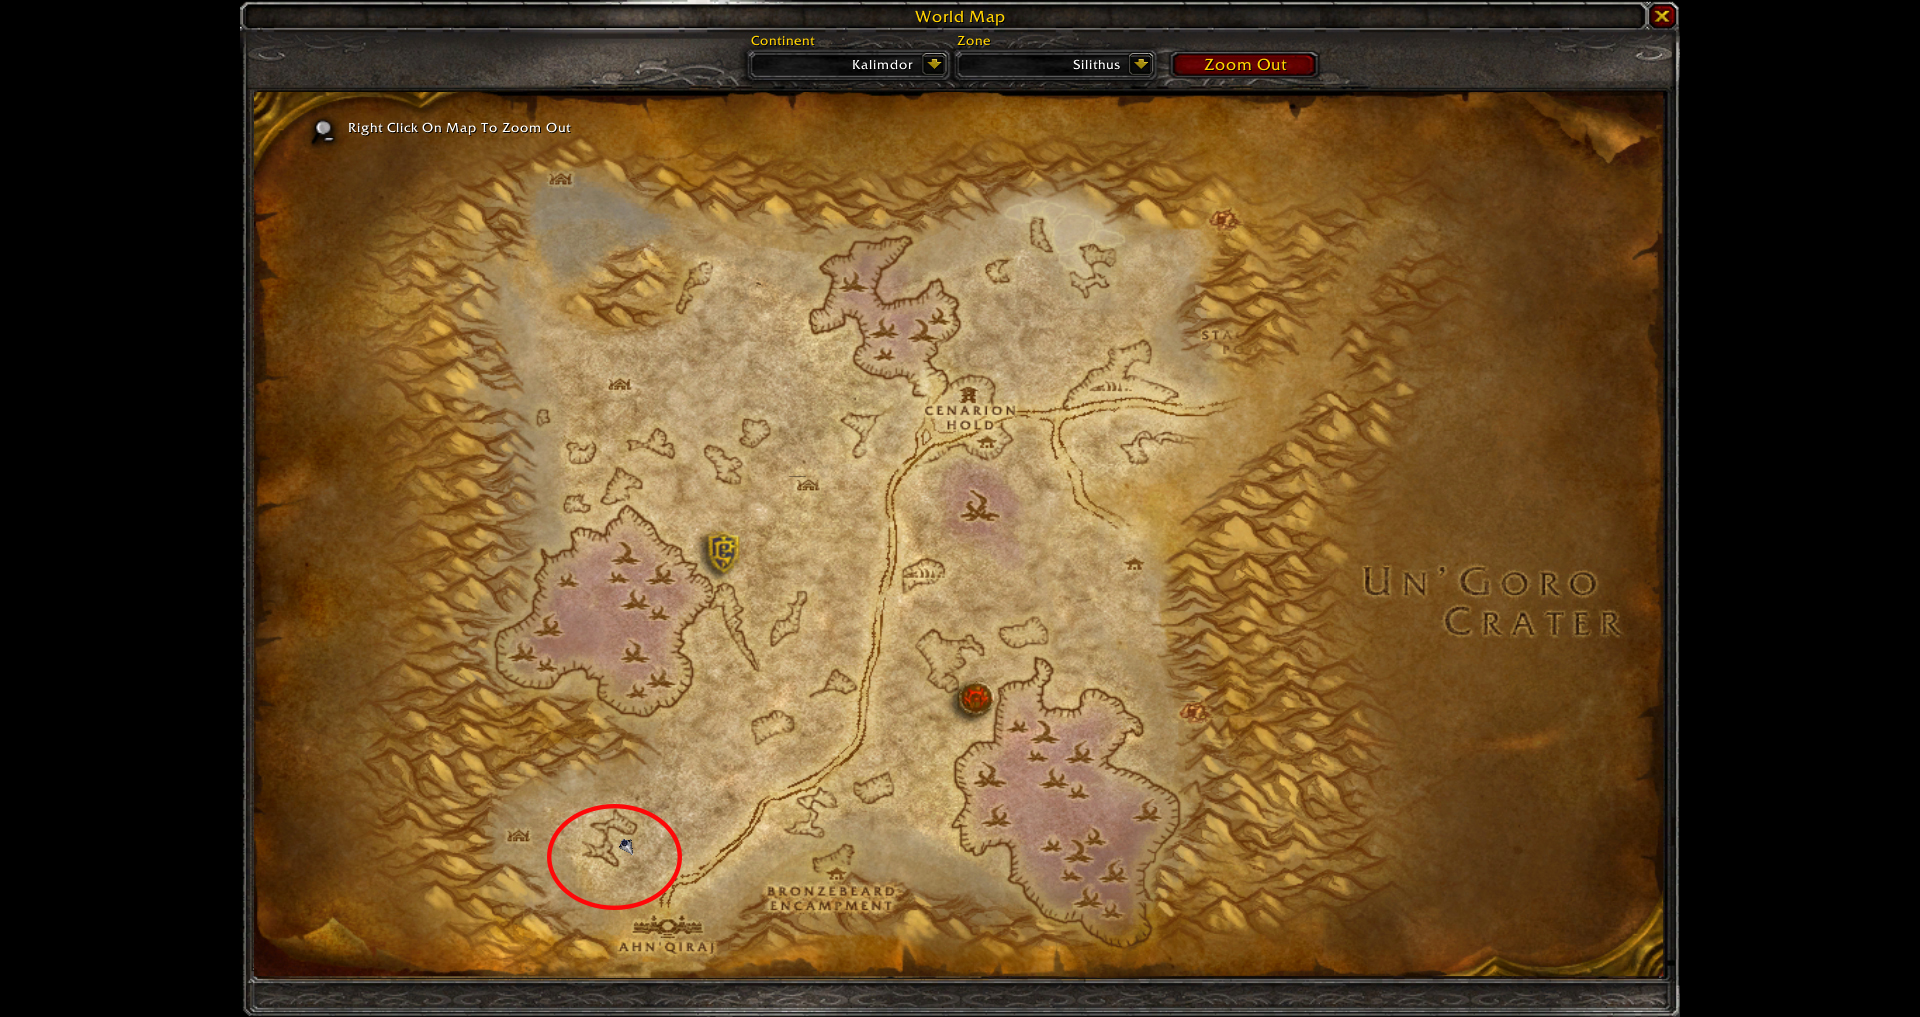
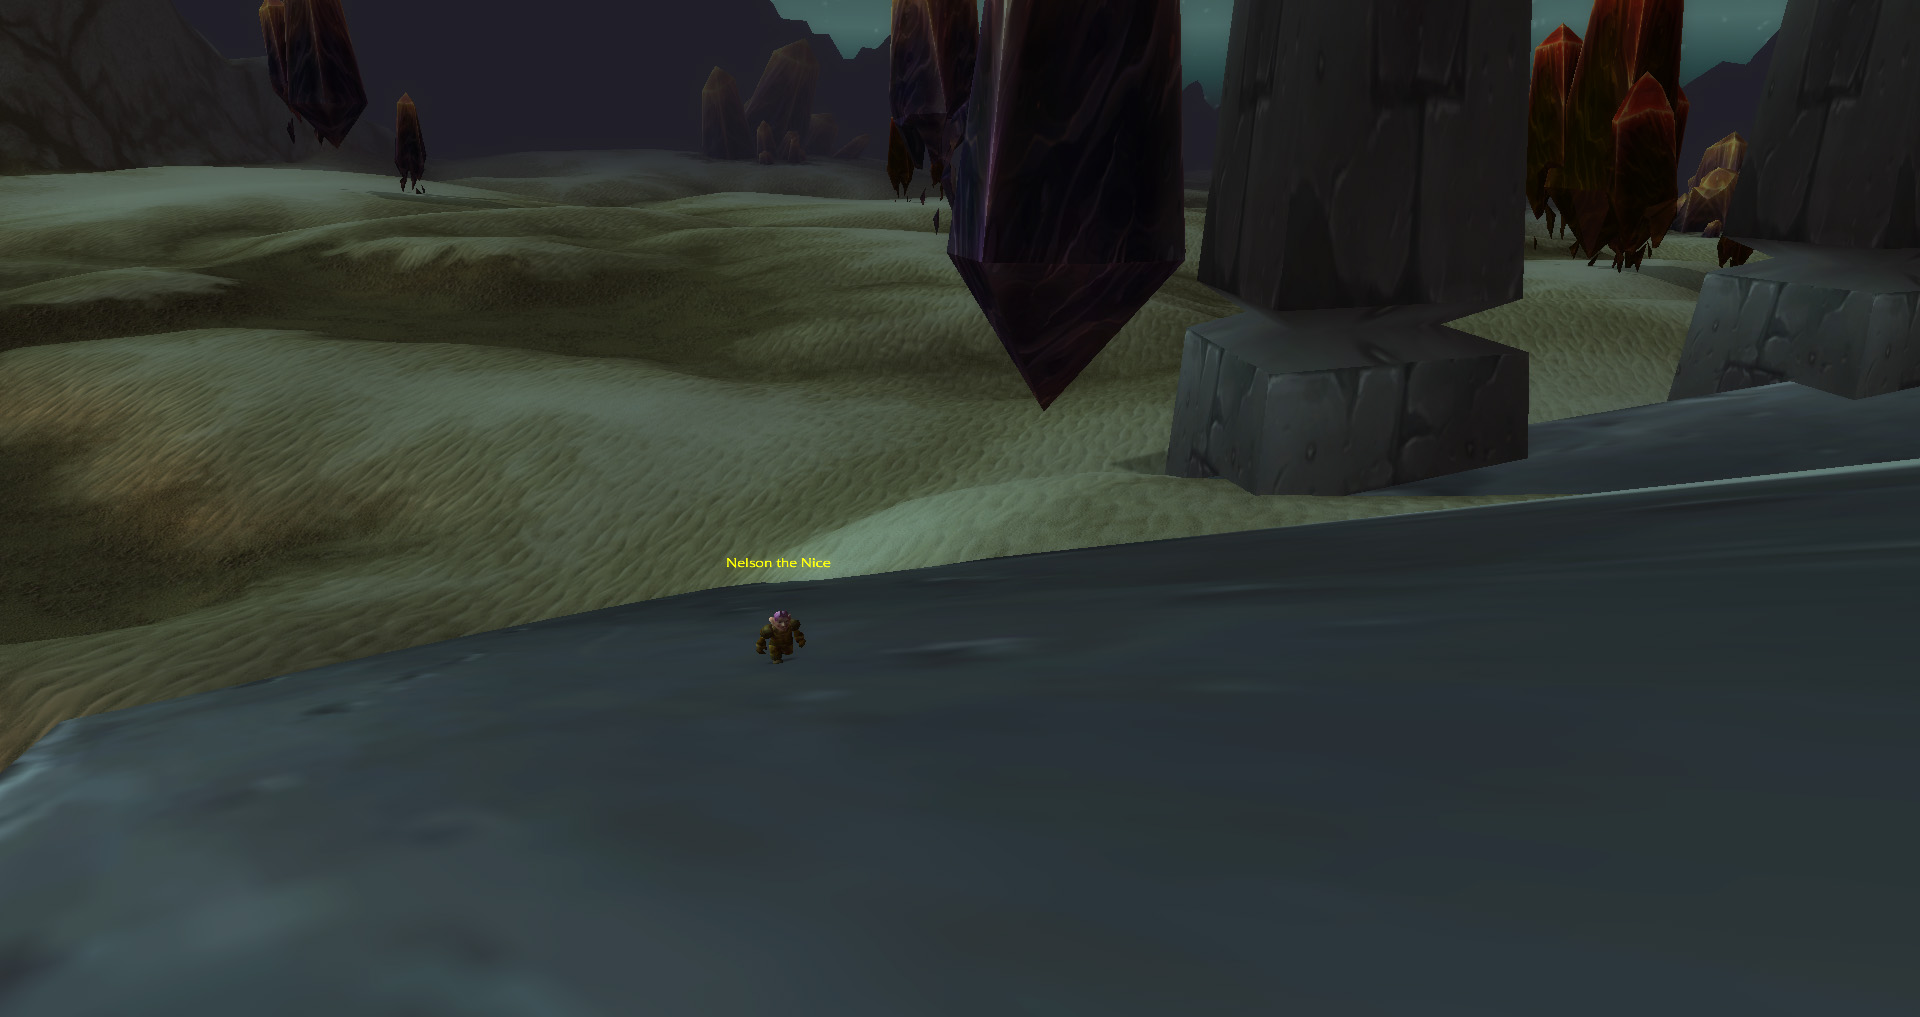
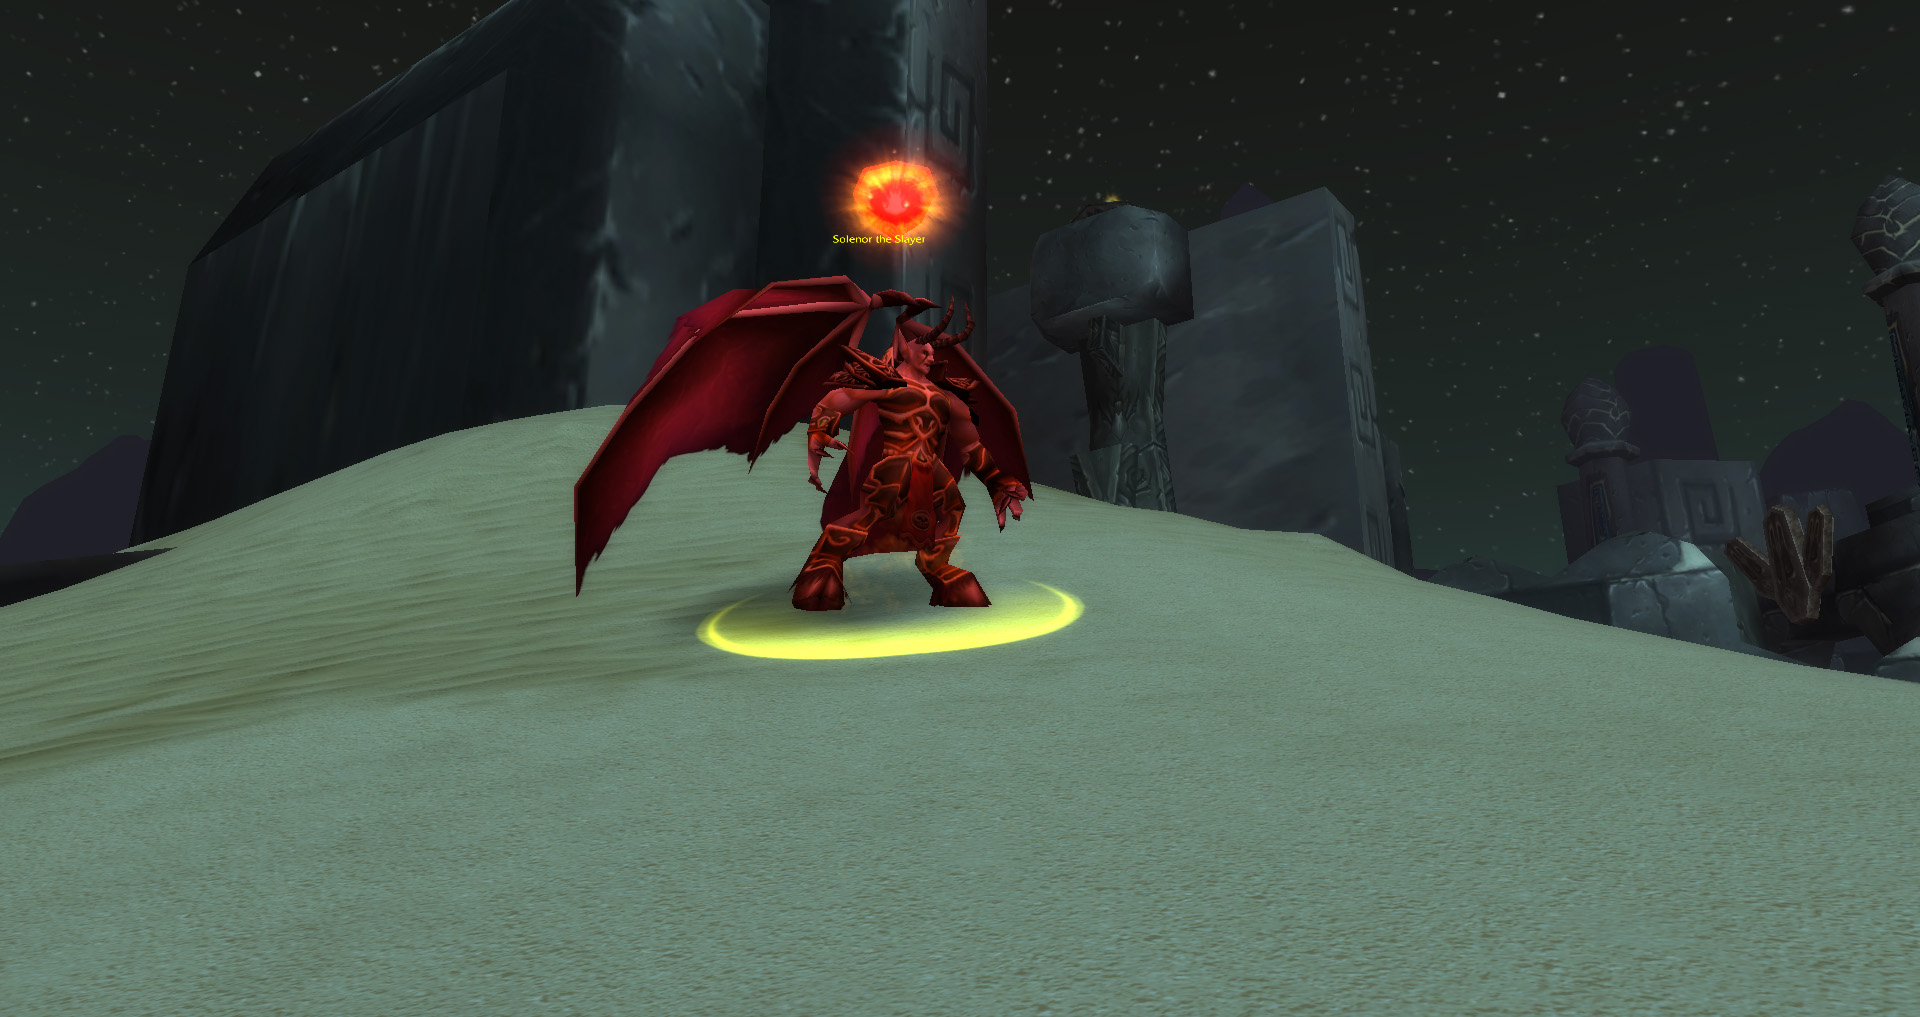
Solenor the Slayer is the third demon you’ll encounter and is well-known as the most technical fight of the bunch. He is disguised as a gnome named Nelson the Nice and roams around the gates of Ahn’Qiraj gates, in the far southwest side of Silithus. He has three distinct abilities that make him quite troublesome, Soul Flame, Creeping Doom, and Dreadful Fright.
Soul Flame is cast right as he transforms into his true form, enraging him in the process. This can be countered with a cheese mechanic in which you utilize a Frost Trap and Feign Death to remove his “Enrage” status and reset the fight. This will buy you around 15 minutes in which he won’t be able to use Soul Flame, making the fight a lot easier. Additionally, Solenor the Slayer has one special weakness named Crippling Clip. This results as a result of using Wing Clip on him, rooting him in place for a long duration. While rooted, he will cast Creeping Doom and Dreadful Fright.
Creeping Doom summons beetles that come to his aid, requiring you to AoE them down. It is advised to manage your mana as best as possible as you will need to dispatch them fast, or else they’ll hurt a lot. Lastly, Dreadful Fright is known to be one of the most annoying mechanics to deal with as Solenor will spam the ability whenever he has the chance. One way to completely mitigate the mechanic and cheese the fight is to duel a warlock or have a warlock of the opposite faction cast Curse of Recklessness on you, which will make you immune to Fear, respectively to Dreadful Fright.
Artorius the Doombringer
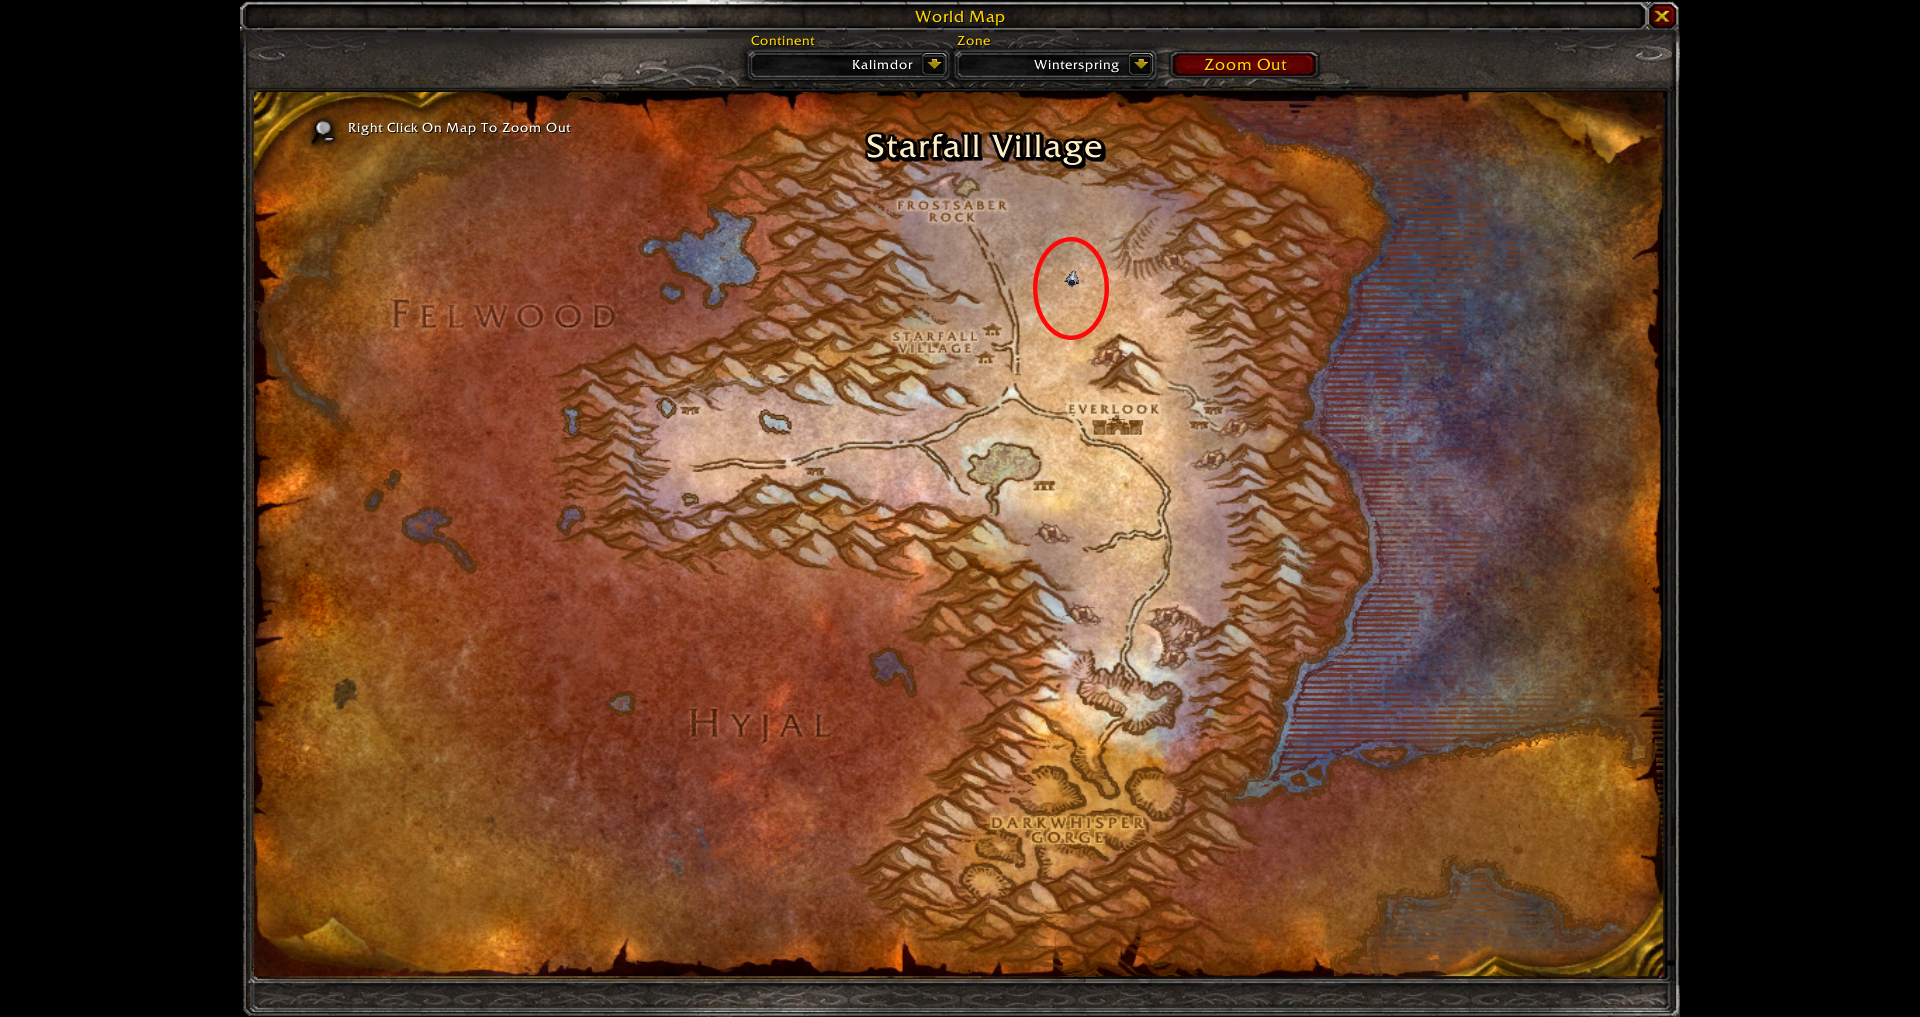
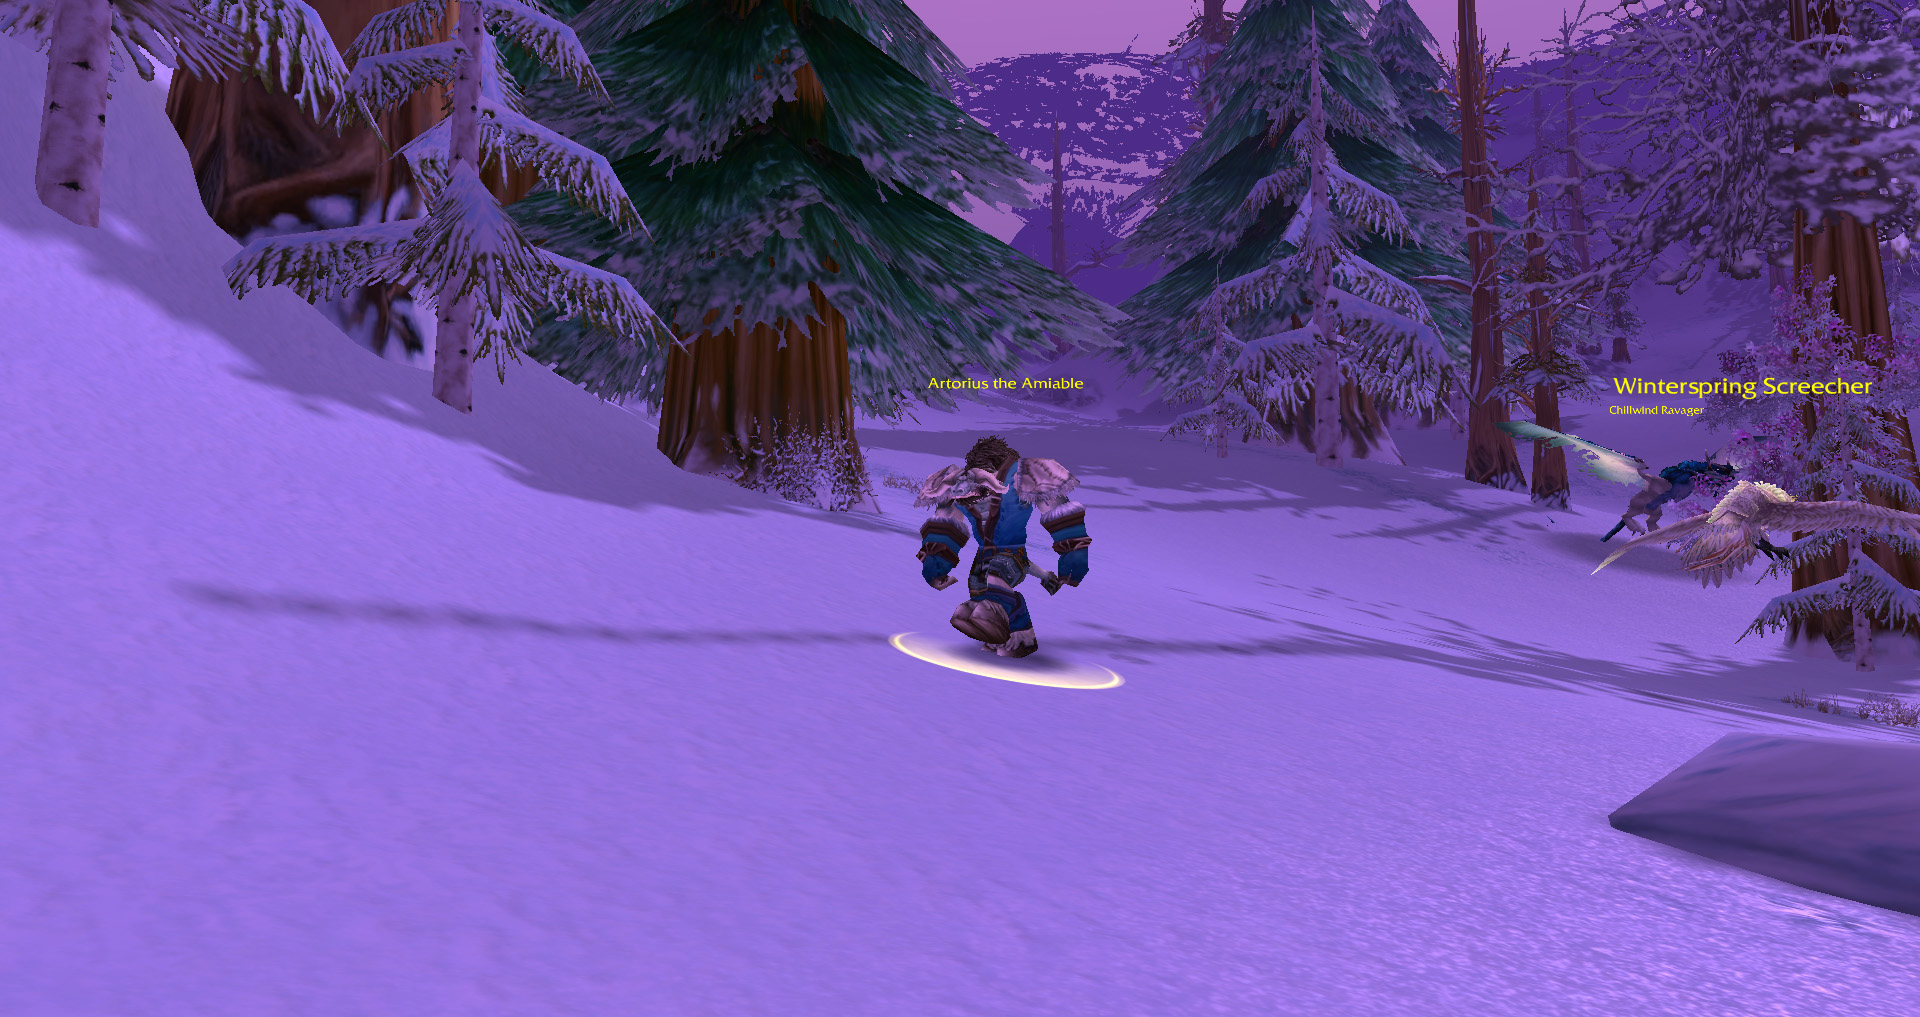
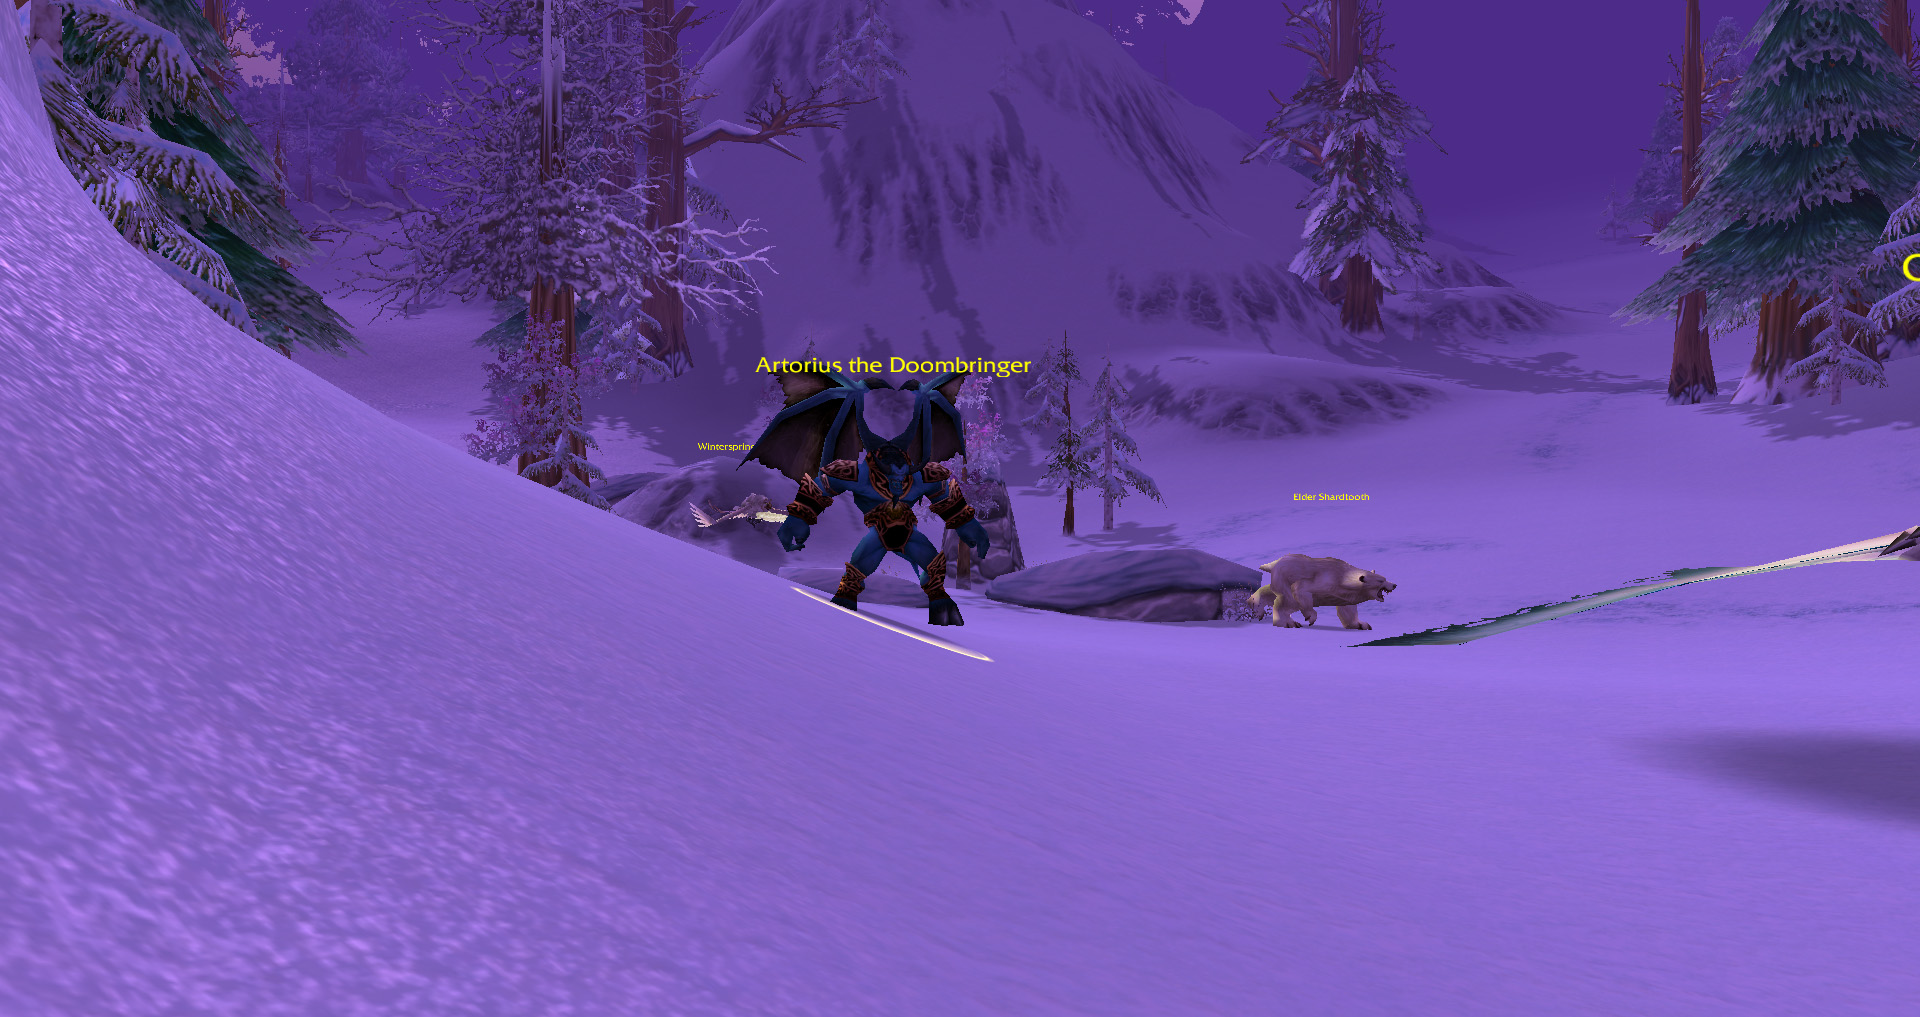
Arguably the most annoying and difficult demon to face is the fourth demon, Artorius the Doombringer. This demon wearing the guise of a friendly and amiable Tauren named Artorius the Amiable can be found in the northern part of Winterspring. Artorius has two specific abilities that are extremely hard to deal with, Demonic Doom and Demonic Frenzy. The former, Demonic Doom, ability places a debuff on you if you are at 30 or less than 30 yards from him, dealing extreme amounts of Shadow Damage. The latter ability, Demonic Frenzy, removes any debuff placed on him, empowering him in the process.
This encounter is particularly hard to deal with as you will have to consistently check the distance between you and him and kite him throughout Winterspring. You will have to be careful of your mana while also avoiding any danger along your chosen kiting path. Luckily, Artorius the Doombringer has a major weakness that will aid you throughout the fight, Serpent Sting. Using Serpent Sting on Artorius will trigger an additional debuff named, Stinging Trauma, which will deal extra Nature Damage against him. Demonic Frenzy may also be dispelled by Tranquilizing Shot just like in the case of Klinfran the Crazed, but since you don’t want to be anywhere near Artorius the Doombringer, dispelling the buff is not necessary.
Finishing the Rhok’delar Chain Quest
Once you meet all the necessary requirements to complete the Stave of the Ancients, Ancient Sinew Wrapped Lamina, and A Proper String quests, you will have to return to the Irontree Woods in Felwood and talk to the ancients. Delivering the quests will grant you the Ancient Sinew Wrapped Lamina, Enchanted Black Dragon Sinew, and Ancient Rune Etched Stave.
All you’ll have to do now is click on the Ancient Rune Etched Stave while having the Enchanted Black Dragon Sinew in your bag to create Rhok’delar, Longbow of the Ancient Keepers! Furthermore, you can interact once again with Vartrus the Ancient to receive Lok’delar, Stave of the Ancient Keepers without having to complete any additional tasks.
About the Author