- Author: Luxrah
- Date: April 16, 2023
- Updated: April 16, 2023
- Expansion: World of Warcraft
VuhDo replaces your group unit frames with highly customizable ones. It also makes it easy to bind your spells to mouse clicks, similar to using mouseover macros. VuhDo and addons like it are particularly popular among healers, who spend most of their time in group content interacting with unit frames.
This addon’s options can be a little overwhelming at first. One easy way to get started is by installing a pre-configured profile that you can later customize according to your own preferences. We’ll cover how to install profiles later in this guide. We’ll also go over all of the addon’s options so you can tweak everything to your liking.
But first, let’s get VuhDo installed!
Installing VuhDo
VuhDo is available to download on CurseForge and Wago. You can install it manually or using the addon manager of your choice.
We have a complete guide for How to Install and Manage Addons, so go check that out if you need some help!
Setting Up VuhDo
Once you have VuhDo installed in your Addons folder, you’ll need to make sure it’s enabled in your game.
Start up World of Warcraft, and on your character selection screen, look for the AddOns button in the bottom left corner. Make sure that the following are enabled:
- VuhDo [‘vu:du:]
- VuhDo [‘vu:du:] – Options
Now load into the game and you should see some VuhDo panels on your screen. You’re good to go!
Installing Profiles for VuhDo
Before you start customizing VuhDo, you may want to consider installing a pre-configured profile. The best place to find one is in Wago’s VuhDo section. Look for one that you like and then you can modify it.
To install a profile, you’ll need the import string. On Wago.io, there is a COPY IMPORT STRING button at the top of every profile page.
In the game, type /vd opt or click on the VuhDo button on the minimap to open the VuhDo options menu. Click the Tools tab on the bottom. You should be on a page labeled Profiles. Click the Import button. Now paste your import string into the text box and click Okay.
Customizing VuhDo
If you’ve taken a look at VuhDo’s options yet, you might be feeling overwhelmed. Not to worry, we’ll walk you through what everything does.
VuhDo Chat Commands
First and foremost, here are some chat commands to make customizing and troubleshooting easier.
- Type
/vdor/vuhdoto view available commands. - Type
/vd optor/vuhdo optionsto open the options menu. - Type
/vd resor/vuhdo resetto reset the positions of the panels. - Type
/vd lockor/vuhdo lockto lock or unlock the movement of the panels. - Type
/vd mmor/vuhdo minimapto turn the minimap icon on or off. - Type
/vd showto turn panels on, and/vd hideto hide them. Typing/vd togglealso works for both. - Type
/vd load [Name]to load a profile or key layout, replacing [Name] with its name. - Type
/vd mtor/vuhdo broadto broadcast the main tanks. - Type
/vd roleto reset player roles. - Type
/vd abor/vuhdo aboutto get your VuhDo version info.
VuhDo Options Menu
Now let’s look at the options menu. There are lots of settings in here! Some of them are fairly straightforward while others require some explanation. We’ll go through section by section. Note that there is a sliding scale on the right side of the menu that will allow you to make the menu larger or smaller according to your preferences.
The General tab contains settings that apply to VuhDo broadly, or which don’t fit into one of the other tabs. Let’s look at each of the pages in this tab which can be accessed by the buttons on the right side of the menu.
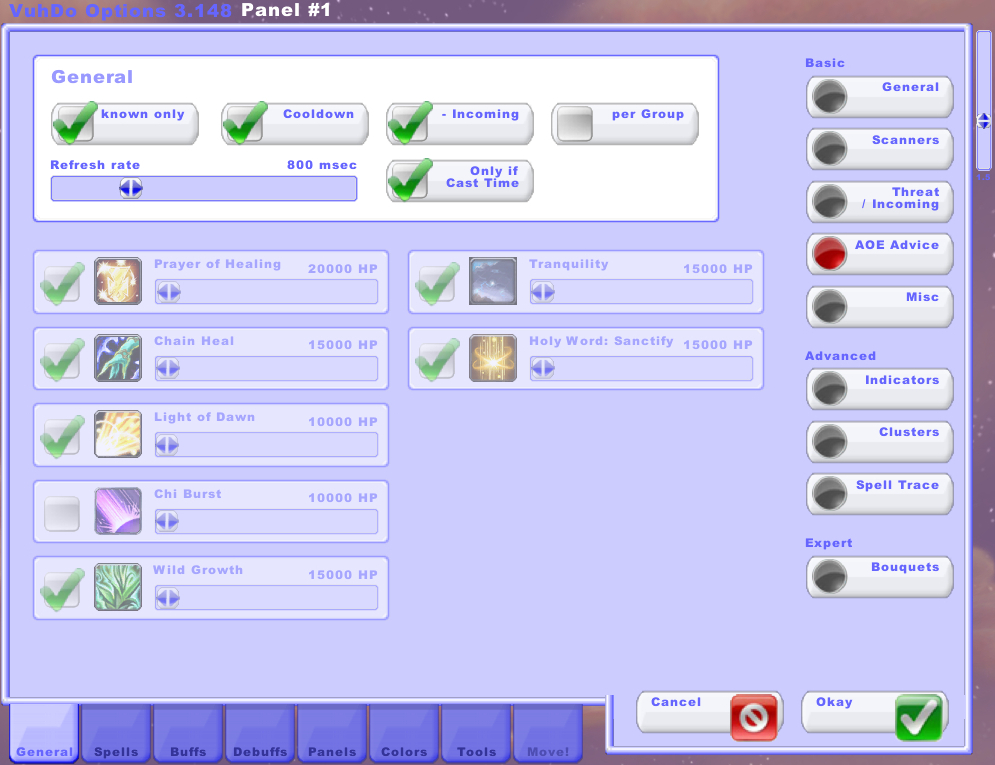
The General section includes some very basic settings for the VuhDo panels.
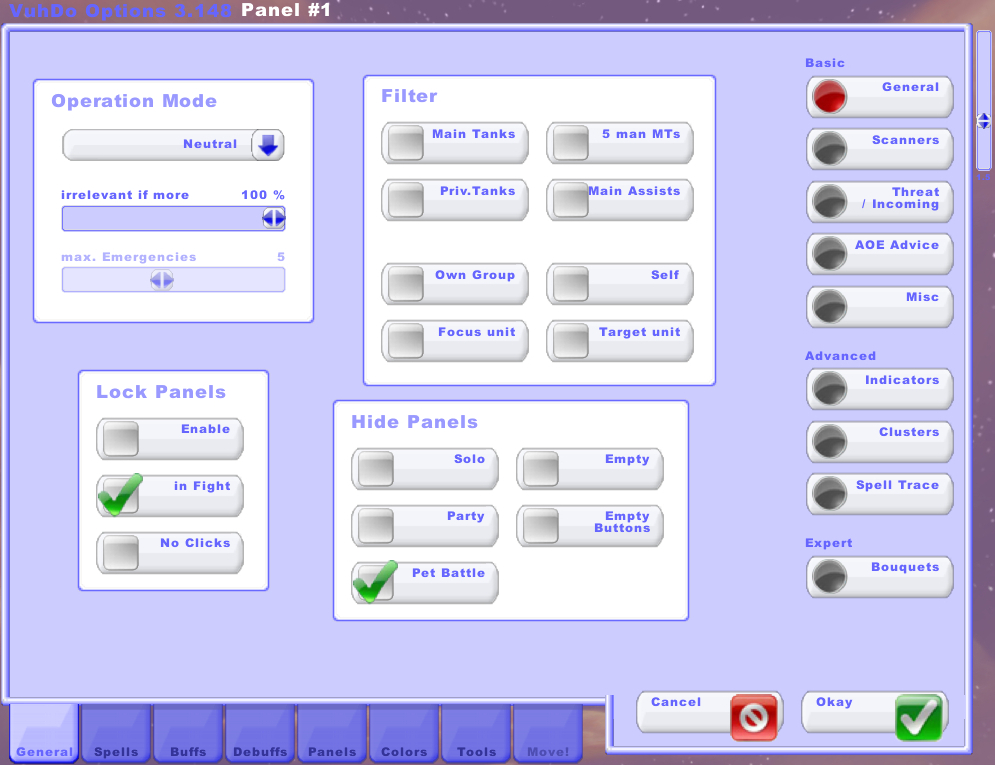
- Operation Mode
- The options in this section will change the color and fade of your unit frames to emphasize certain conditions, such as who has the least HP remaining.
- Filter
- These options affect what units will be displayed in your unit frames and how. Hover over each option for specifics.
- Lock Panels
- You can choose to lock your unit frames to prevent them from being moved around on the screen. You can also choose to make them unclickable.
- Hide Panels
- You can choose to hide certain panels under certain conditions. Hover over each option for specifics.
The Scanners section controls how VuhDo frames get their information from the game.
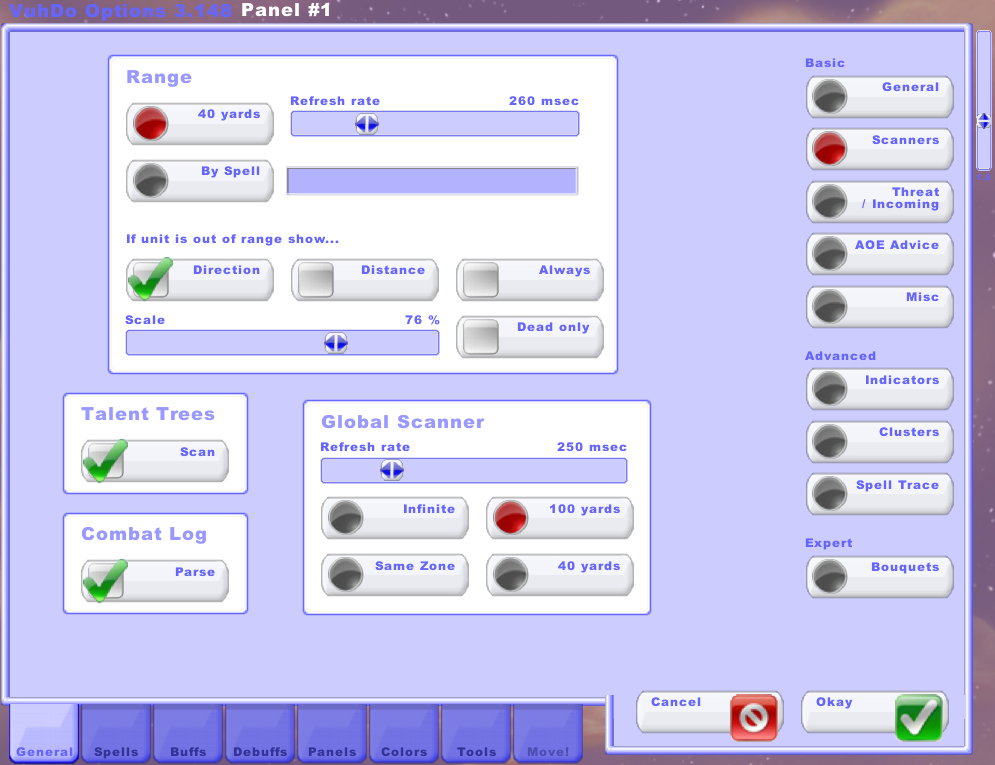
- Range
- The options in this section determine how VuhDo decides if a unit is out of range. The unit frames can be set to show a directional arrow and distance for out of range units.
- Talent Trees
- Enabling this will allow VuhDo to scan talents to determine a player’s role.
- Combat Log
- Enabling this will allow VuhDo to use the combat log to help update unit health.
- Global Scanner
- These options determine which units VuhDo tracks for buffs, HoTs, etc.
The Threat/Incoming section has settings for tracking threat and incoming heals on your unit frames.
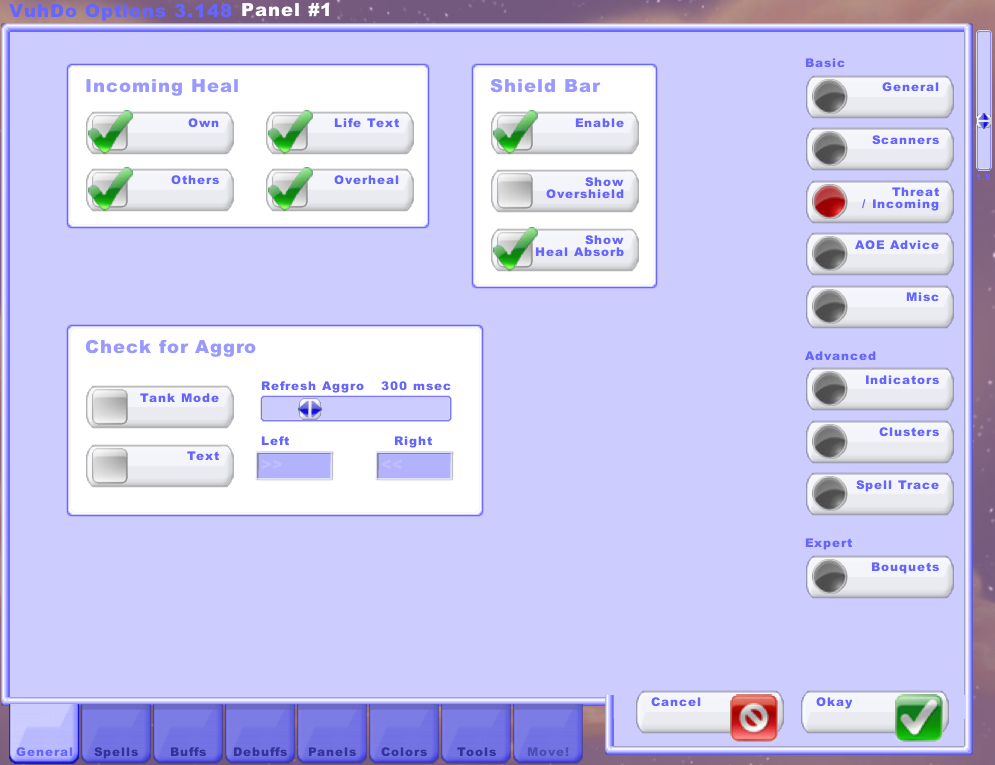
- Incoming Heal
- These options determine which incoming heals will appear on your unit frames. This lets you see when someone is about to receive a heal, and roughly how much they will be healed for.
- Shield Bar
- These options show shielded amounts on unit frames as an extension of the health bar.
- Check for Aggro
- The options in this section allow you to choose how to display aggro on the unit frames so you can see who currently has threat on a mob.
The Misc tab has options for hiding default Blizzard frames, support for other addons, and announcing resurrection casts.
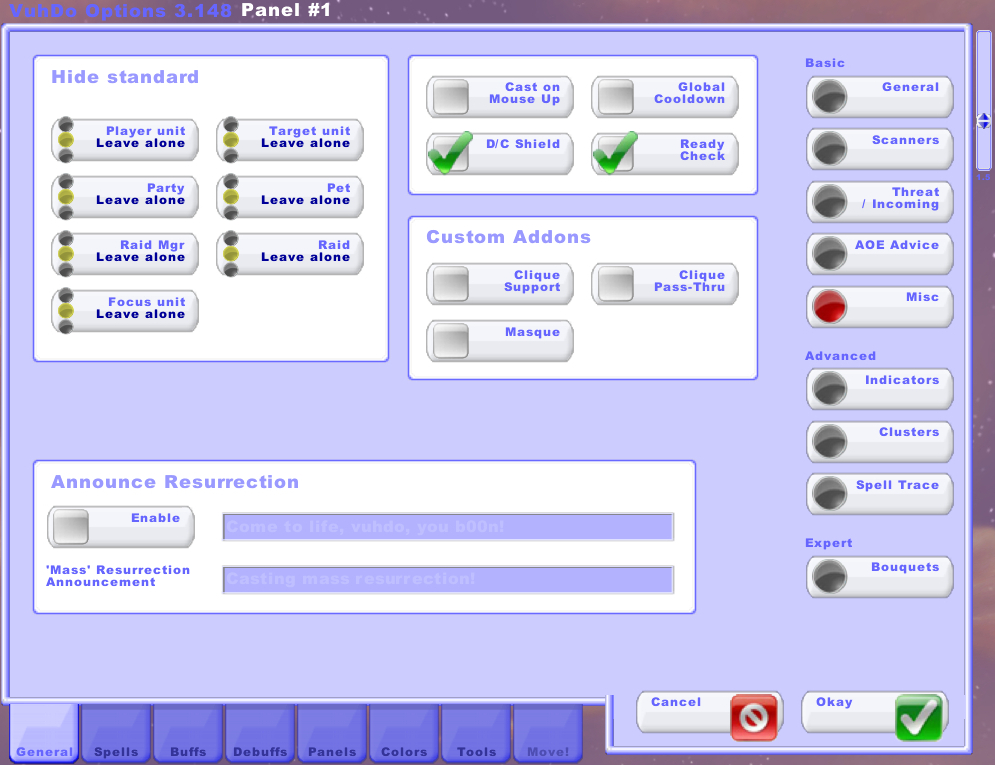
- Hide standard
- These options allow you to hide or show the game’s default unit frames.
- Cast on Mouse Up
- If this box is checked, VuhDo mouse binds will cast when your mouse button is released, allowing you to hold your cast.
- Global Cooldown
- When this box is checked, your global cooldown will show up as a bar.
- D/C Shield
- If this is checked, VuhDo will use 2 macro slots to help correct errors after a disconnect.
- Ready Check
- If this is checked, ready check icons will show up on your unit frames.
- Custom Addons
- These options enable compatibility for specific addons.
- Announce Resurrection
- You can use these options to have VuhDo announce when you are resurrecting dead teammates.
The Indicators section allows you to modify the icons and other status indicators that appear on your unit frames.
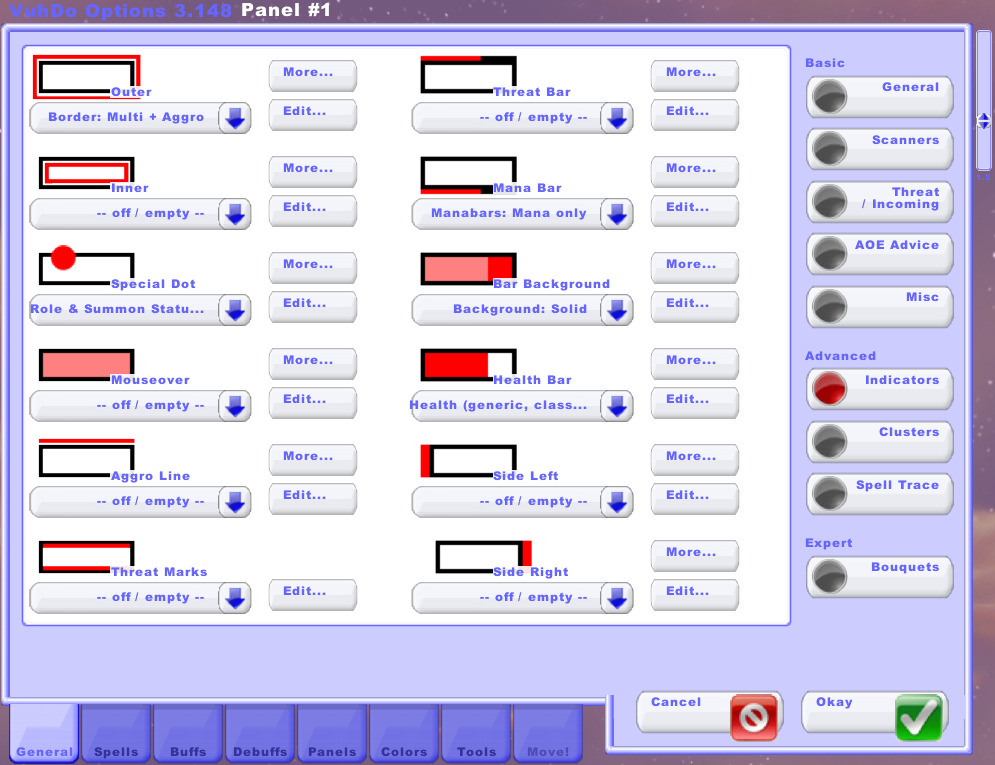
- Each indicator type has a dropdown where you can choose what status to display there. For example, aggro is displayed by default in the outer border indicator.
- Each indicator also has a More… button where you can adjust the look of the indicator, such as its width or texture.
- Clicking the Edit… button for an indicator takes you to its settings under Bouquets, which we’ll cover in that section.
The Clusters section allows you to modify how VuhDo detects and displays its cluster heal indicator. The indicator draws a box around the units that are expected to be hit by a multi-target healing ability if you cast it on your current hover target.
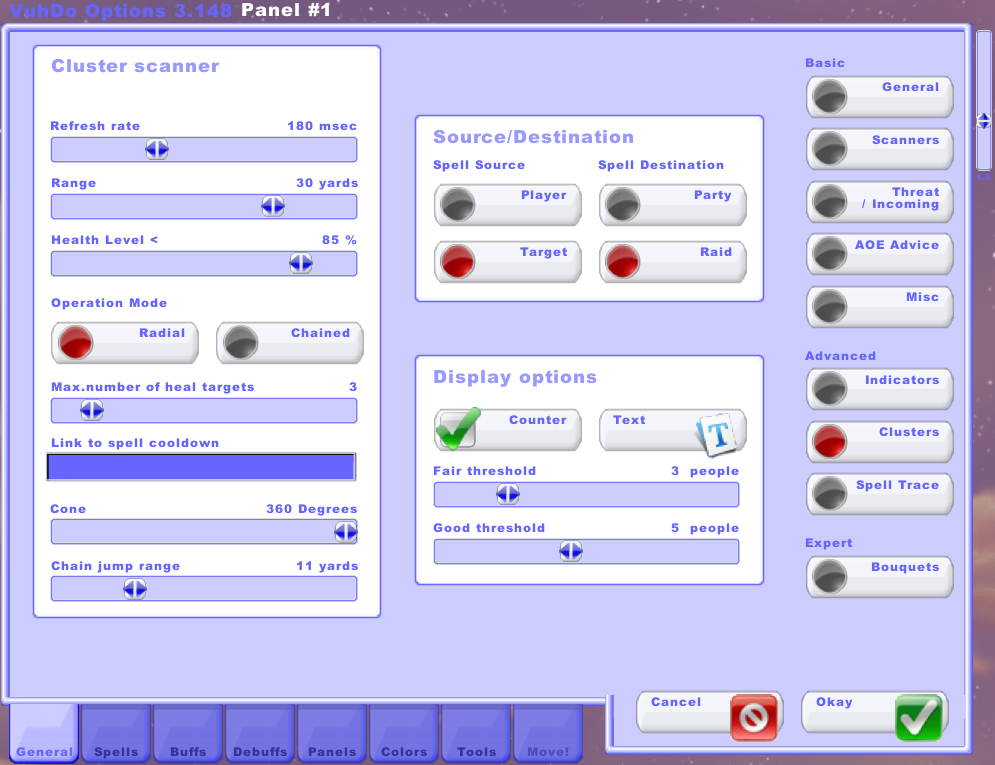
- Cluster scanner
- These options adjust how VuhDo detects targets for cluster heals.
- Source/Destination
- Here you can tell VuhDo what type of spell your primary cluster heal is and how it will spread.
- Display options
- Here you can choose how to display the cluster indicator on your unit frames.
The Spell Trace page is where you can tell VuhDo to track which units are affected by a spell. It can then be displayed on unit frames as a bouquet or using a HoT indicator.
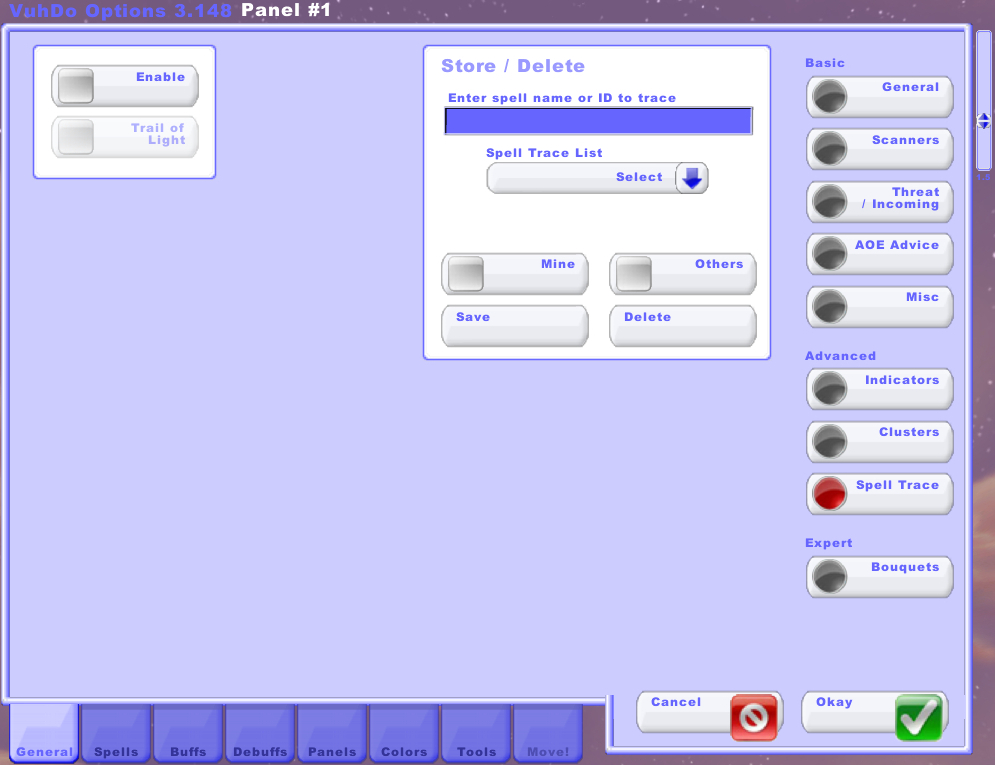
- Enable
- If this is checked, your spell traces will be active.
- Trail of Light
- If this is checked, VuhDo will track Trail of Light using a special bouquet.
- Store/Delete
- Use the text box to enter a new spell to trace, or use the dropdown menu to select an existing one to modify.
The Bouquets page is where you can modify the statuses that are displayed in your indicators.
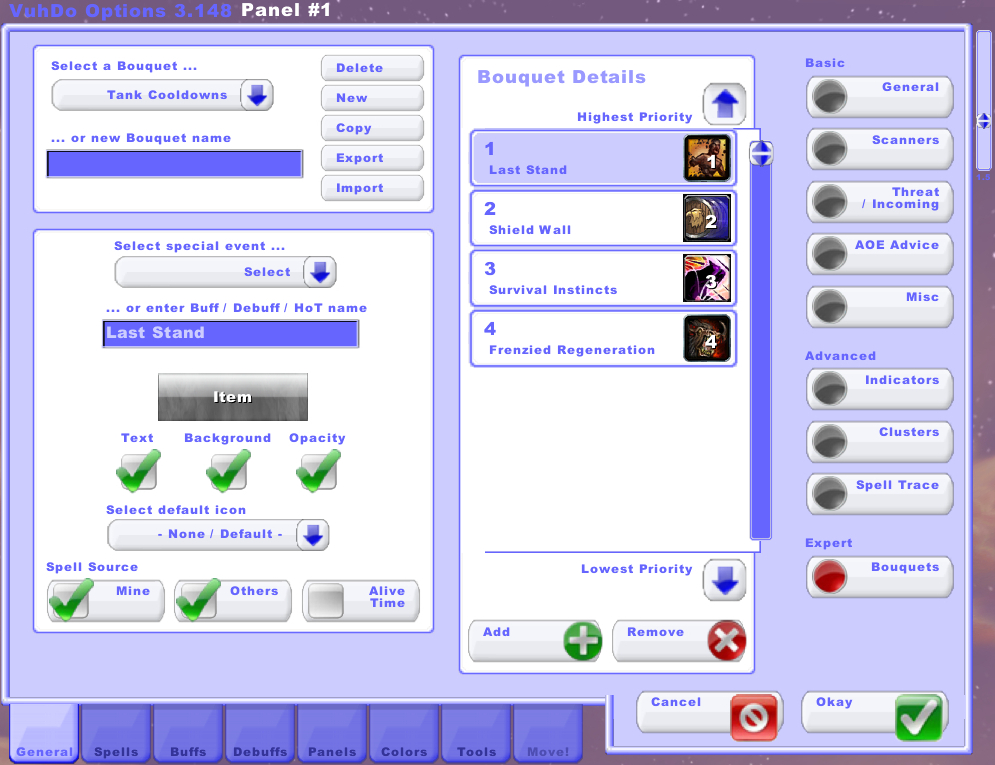
- In the upper left you can select an existing bouquet to edit from the dropdown menu or you can create a new one using the text box. There are also options to import and export bouquets.
- On the right side you can select an element of the bouquet that you would like to modify. Its settings will appear in the lower left.
- In the lower left you can select the event the bouquet element will track and modify how the event will alter the appearance of the unit frame.
The Spells tab contains settings for binding your spells and abilities to mouse clicks. Let’s look at each of the pages in this tab which can be accessed by the buttons on the right side of the menu.
The Mouse tab is where you can assign spells and macros to mouse clicks.
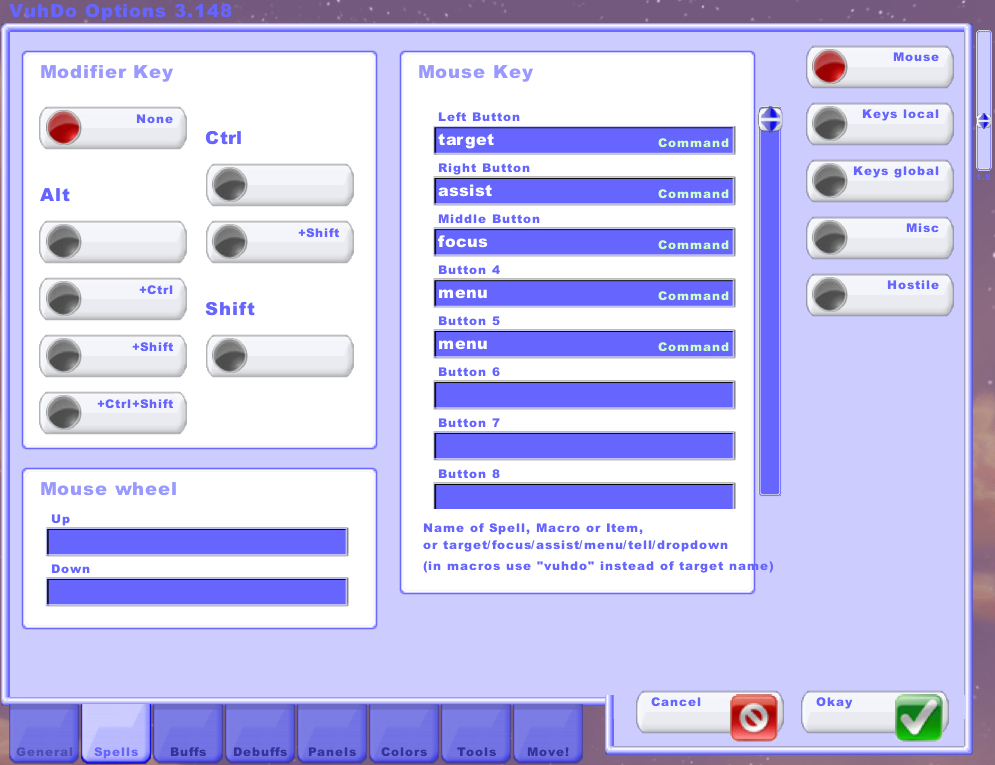
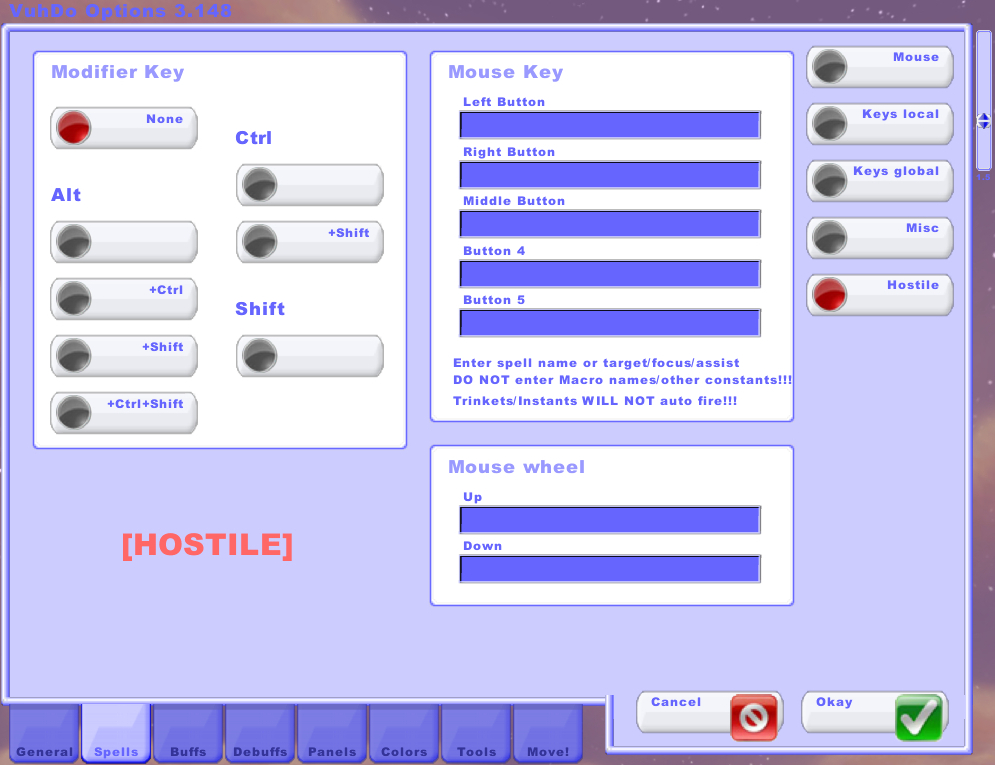
- Modifier Key
- Modifiers are key presses that alter what a keybind does. For example, If you hold down Shift and right-click on a unit frame, you can use a different ability than if you simply right-click. Selecting a modifier key or keys in this section will change the other two sections to display mouse bindings associated with that modifier.
- Mouse Key
- This is where you can choose which mouse button will do what when you use it to click on VuhDo unit frames. Use the text boxes to enter the names of spells, macros, items, or special commands that you want to apply to your mouse buttons. Note that there are a lot of possible mouse buttons listed here and most standard mice only have a couple.
- Mouse wheel
- These bindings apply when you scroll your mouse wheel up or down. Otherwise this section functions the same as the Mouse Key section.
The Keys local page is where you can assign spells to just about any combination of key presses. It differs from Keys global in that its keybinds only apply to VuhDo’s unit frames.
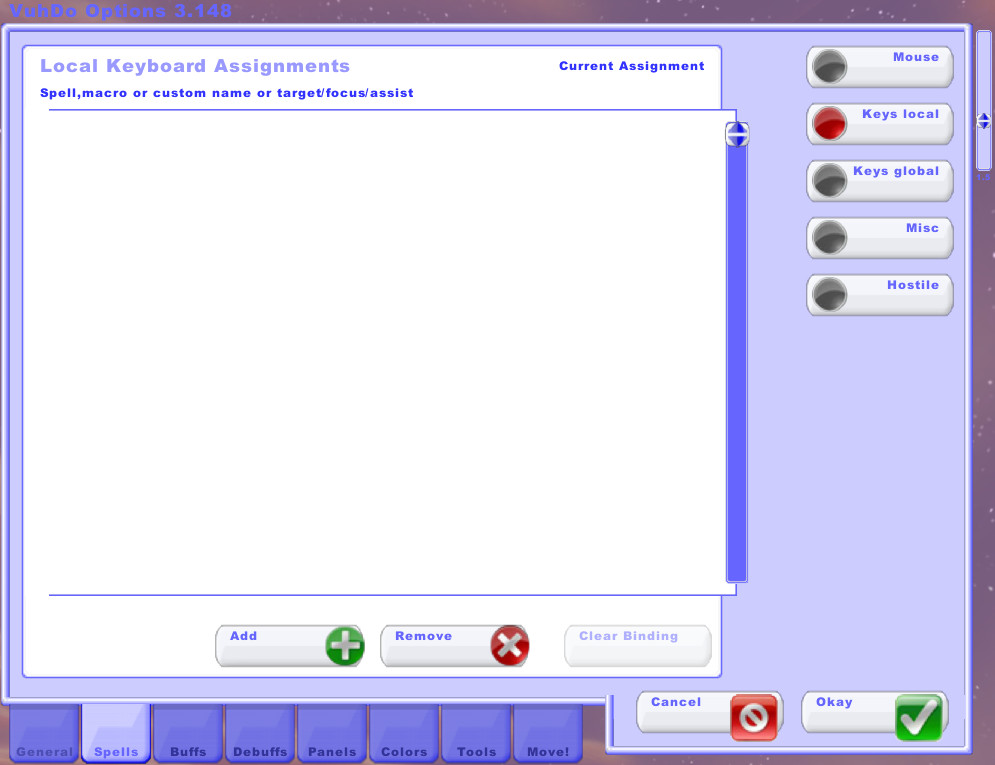
- Current Assignment
- All of your current local keybinds will be listed here. You can change the name using the text box, or click Edit… to modify what spell or macro is bound. Click the button to the right of the Edit… button to choose a keybind.
- Add/Remove/Clear Binding
- These buttons can add a new binding, remove an existing one, or erase its current keybind.
The Keys global page is where you can assign spells to just about any combination of key presses. It differs from Keys local in that its keybinds apply to the entire interface, not just VuhDo unit frames.
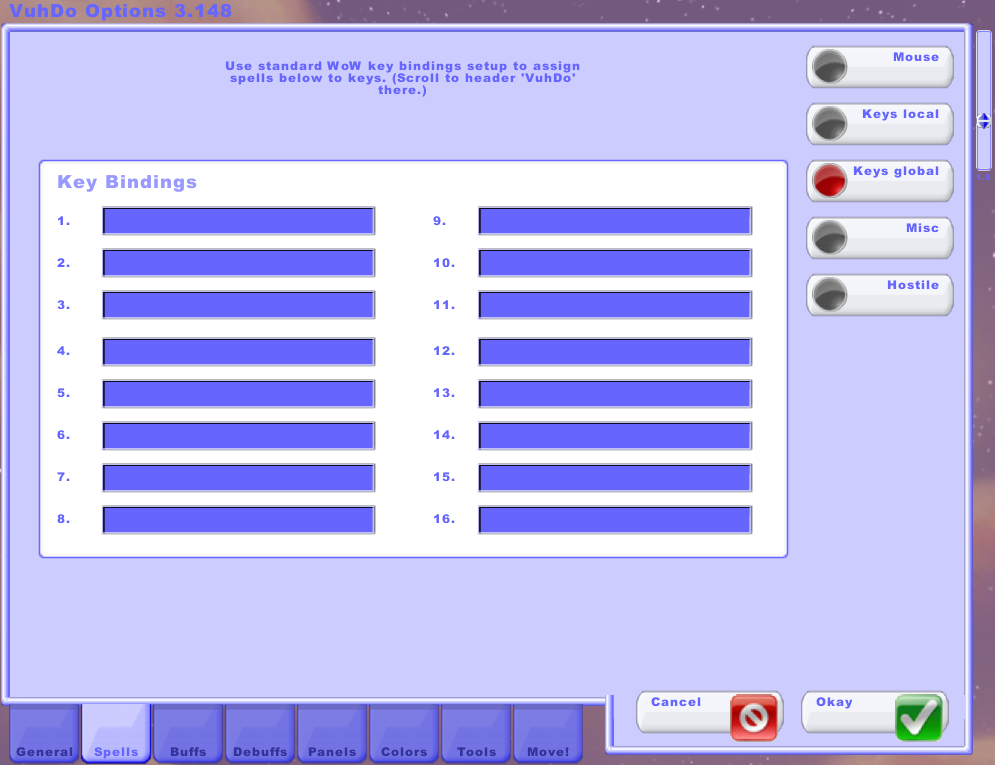
- These bindings should be set in the standard in-game keybind menu under the VuhDo header. The bindings you set there will then appear here.
The Misc section is where you can set certain spells and abilities to trigger automatically when interacting with VuhDo unit frames.
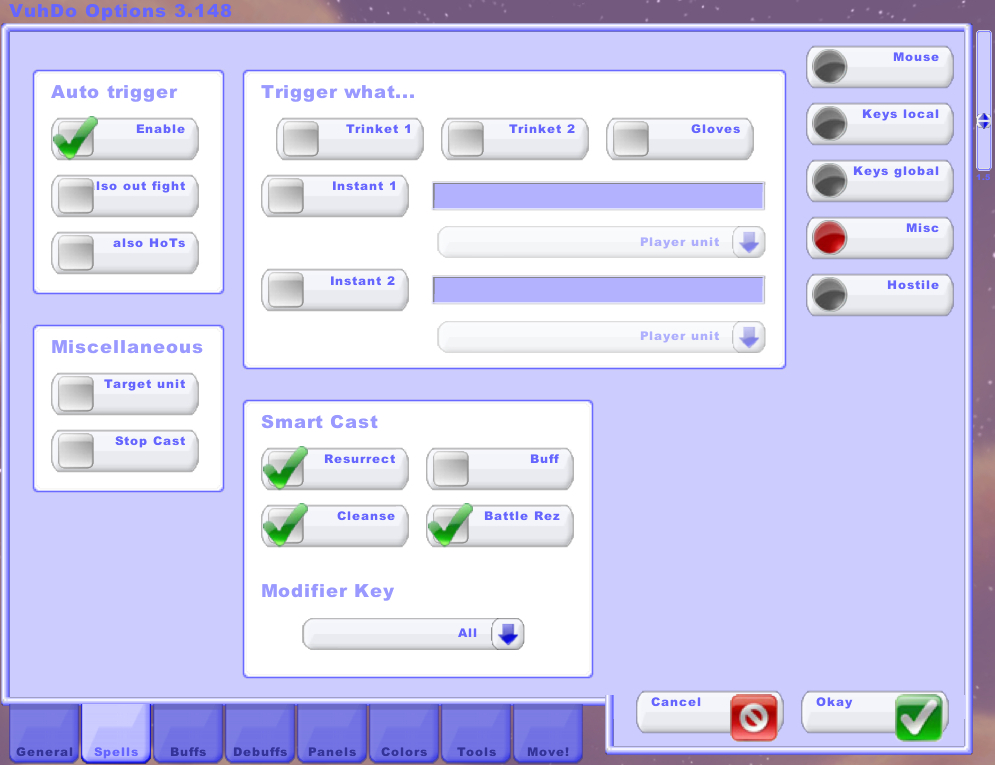
- Auto trigger
- Here you can enable or disable the auto casts on this page, and determine whether to automatically use trinkets out of combat or for HoTs.
- Trigger what…
- VuhDo can attempt to automatically use your trinkets, glove tinker, or specified instant-cast spells any time you cast a healing spell. When setting up an instant spell, you can also choose what target types will trigger its use.
- Miscellaneous
- You can choose to have your mouse clicks target the unit you are interacting with. You can also set up VuhDo to stop casts that are already in progress in favor of a new click.
- Smart Cast
- VuhDo can intelligently choose to cast resurrection spells, cleanses, or buffs under the appropriate conditions, with or without a modifier key.
The Hostile section allows you to set mouse bindings for hostile targets in your unit frames. For example, if one of your party members has been mind controlled, you may want to be able to quickly cast a crowd control ability on them. The options on this page are mostly identical to those in the Mouse section.
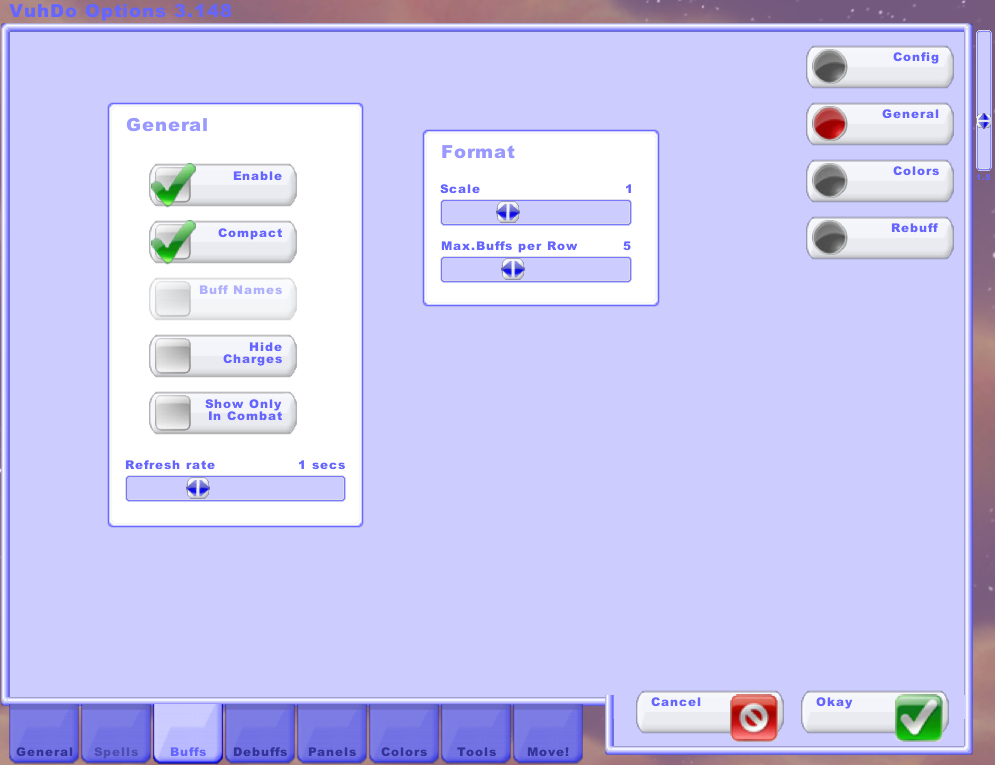
The Buffs tab contains settings for buffs handled by VuhDo. Let’s look at each of the pages in this tab which can be accessed by the buttons on the right side of the menu.
The Config section is where you can choose the buffs that will appear in your BuffWatch panel. The BuffWatch panel will indicate whether the buffs are currently active on you and your teammates. You can activate these buffs by clicking on them in the BuffWatch frame.
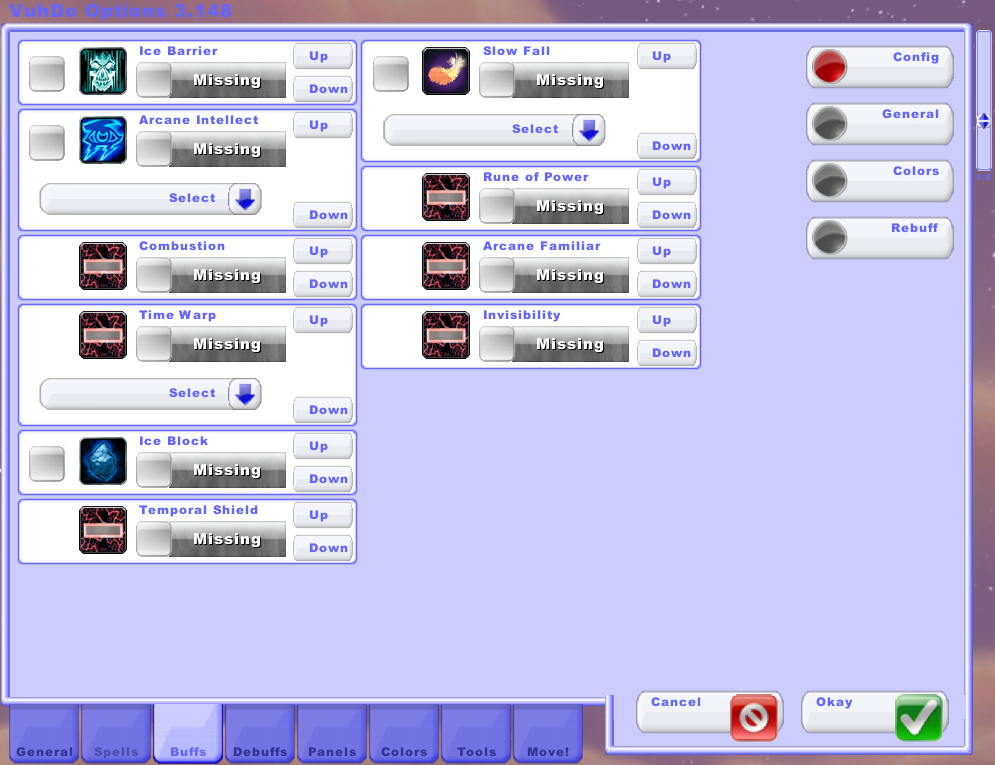
- Click the check box to the left of a buff to enable it in the BuffWatch frame.
- Click the Missing checkbox to change the color of the health bar for units that are missing the buff. You can use the dropdown menu below the buff to choose which unit types to track for this.
- Use the Up and Down buttons to change the order that buffs appear in this menu and in the BuffWatch panel.
The Colors section is where you can choose the colors for the BuffWatch panel.
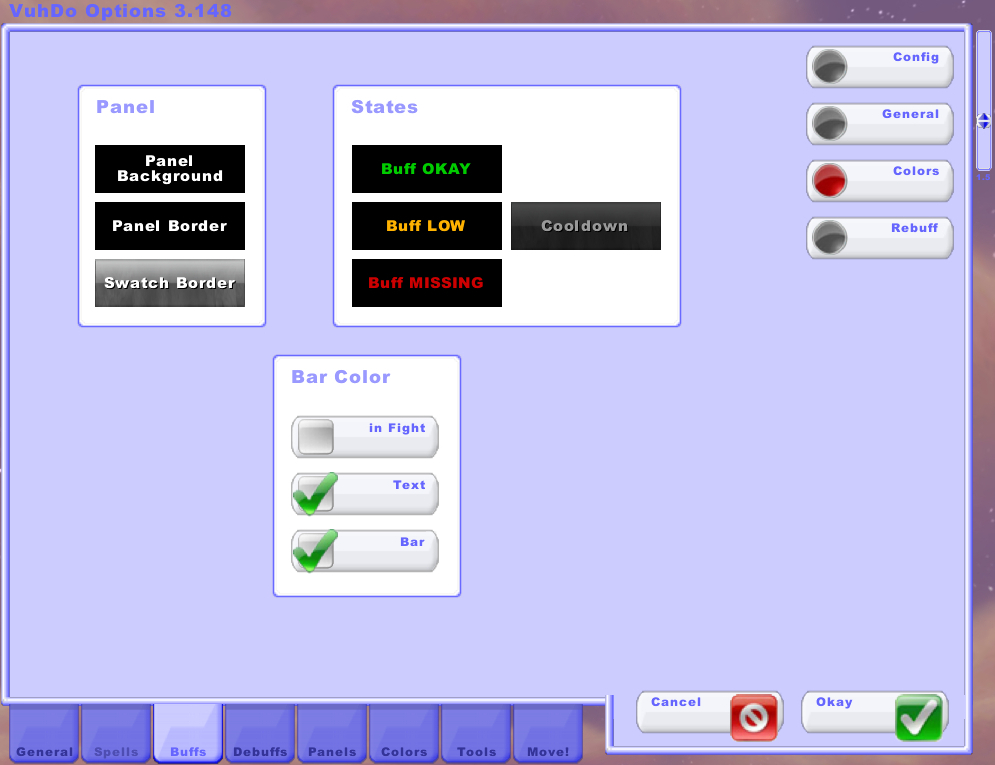
- Panel
- Choose the background, border, and swatch border for the BuffWatch panel. The swatch border is the border that appears around the individual buffs in the panel.
- States
- Choose the colors that will overlay the individual buffs based on the current status of that buff.
- Bar Color
- Choose whether missing buffs will show up mid-flight, and whether the status color will show as text, bars, or both.
The Rebuff section has some settings for automatic rebuffing using the BuffWatch panel.
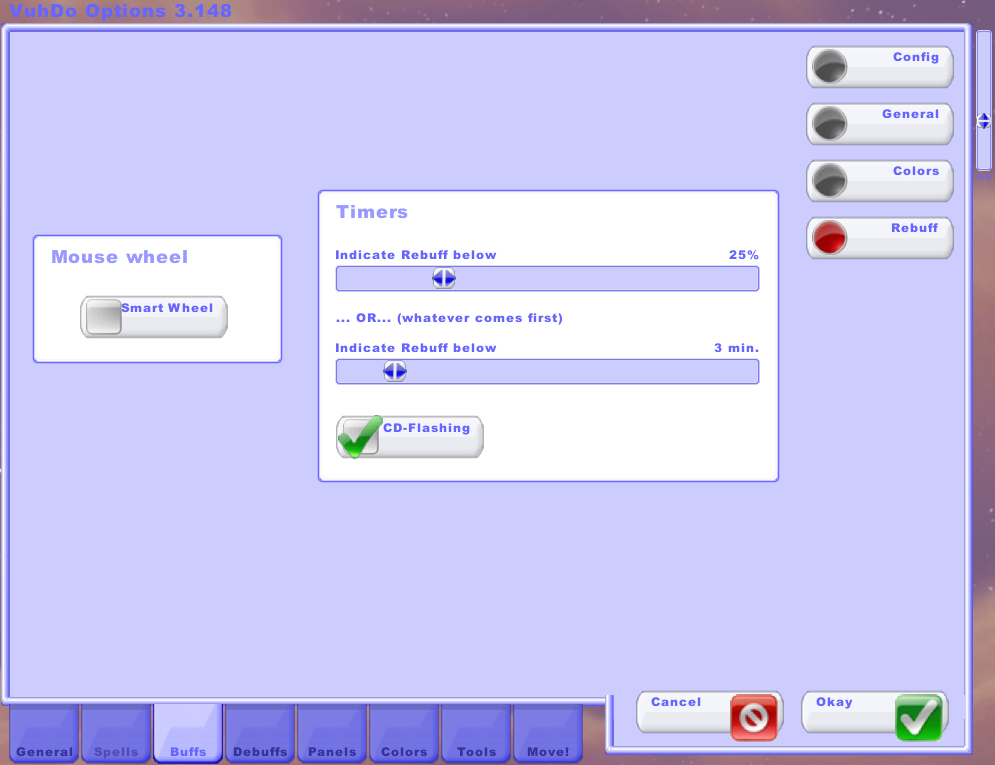
- Mouse wheel
- If Smart Wheel is checked, you will be able to automatically reapply buffs in your BuffWatch by scrolling the mouse wheel over the panel.
- Timers
- These settings determine when BuffWatch indicates that a buff needs to be reapplied.
The Debuffs tab contains settings for debuffs tracked by VuhDo. Let’s look at each of the pages in this tab which can be accessed by the buttons on the right side of the menu.
The Standard section has some general settings for customizing how VuhDo detects and displays debuffs.
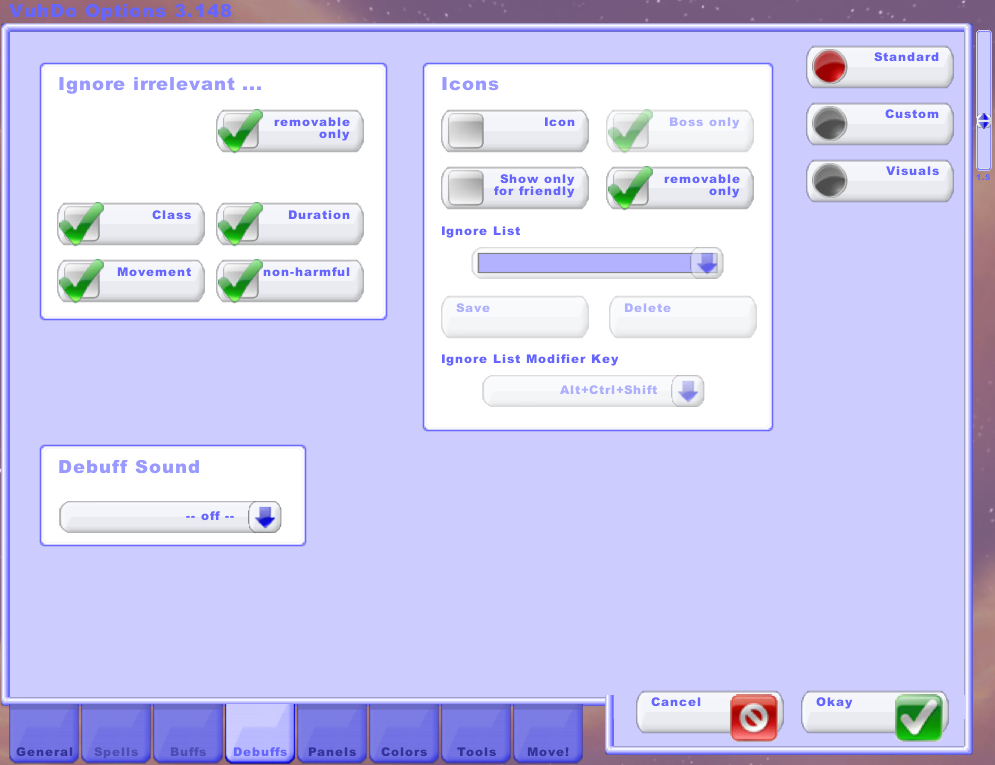
- Ignore irrelevant
- These checkboxes will tell VuhDo to ignore certain debuffs so that your unit frames aren’t cluttered with debuffs you don’t need to worry about.
- Icons
- These options determine how and why debuff icons appear on your unit frames. You can also see currently ignored debuffs, and set a keybind to click on debuff icons to add them to the ignore list.
- Debuff Sound
- You can use this dropdown menu to select a sound to play when a unit in your unit frames gets a debuff.
The Custom section allows you to customize the indicators for specific debuffs.
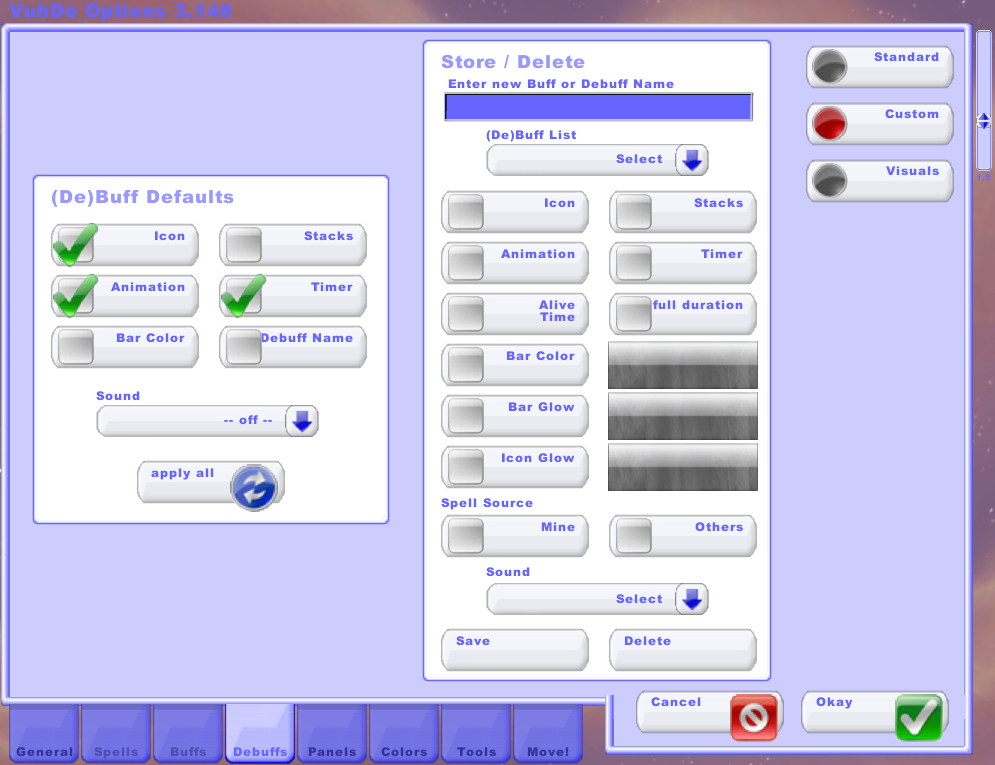
- (De)Buff Defaults
- These settings apply to all custom debuff indicators that are not individually customized. You can choose whether to show the icon, stacks, timer, animation effects, name, and custom bar color of the debuff. You can also select a custom sound to play from the dropdown menu.
- Store/Delete
- You can add a new debuff to track by typing a name into the text field, or you can select an existing one from the (De)Buff List dropdown menu. Then you can customize its appearance, whether it tracks only your spells or those cast by others, and whether a sound is played when a unit gains the debuff.
The Visuals section is where you can customize where debuff indicators appear on your unit frames.
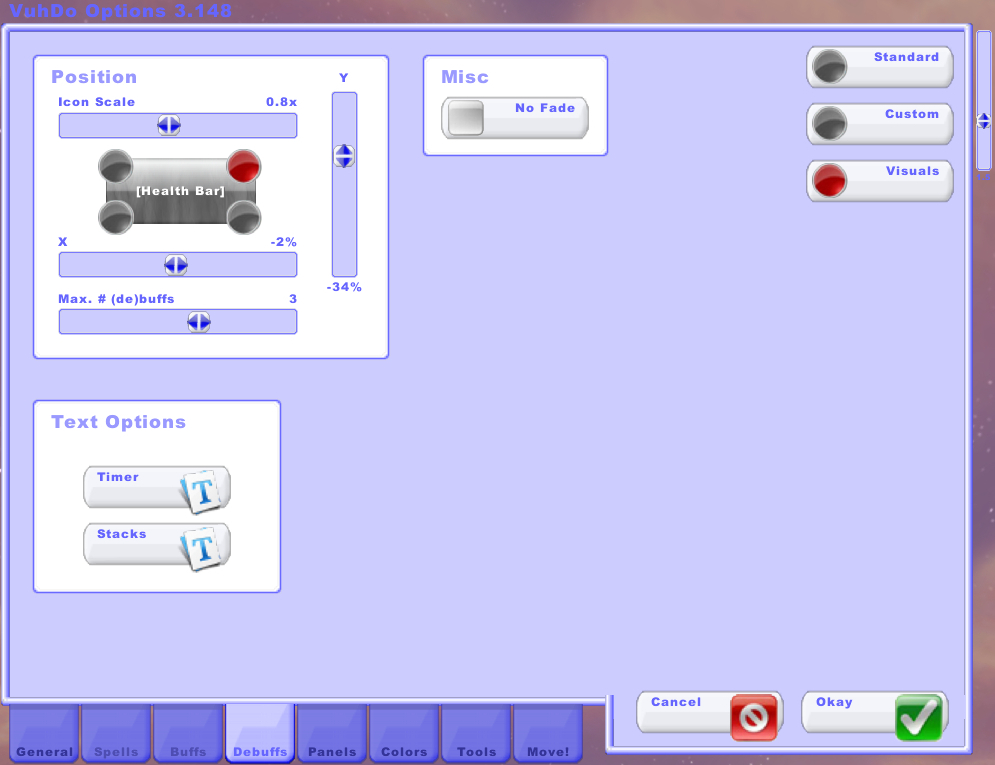
- Position
- You can choose the scale of the debuff’s icon and where it appears in relation to the health bar, as well as the maximum number of debuffs that will be shown per unit.
- Misc
- If No Fade is checked, you will still see debuff indicators even if the unit is out of range.
- Text Options
- Click on Timer or Stacks to bring up a dialogue box with options for where these numbers will be displayed on your unit frames. You can choose the position, scale, font, and font styling for each.
The Panels tab contains settings for customizing the look of the VuhDo panels and the unit frames they contain. Let’s look at each of the pages in this tab which can be accessed by the buttons on the right side of the menu.
Note that these settings will affect the currently selected panel, which is labeled at the top of the menu (“Panel #1” in the screenshots below). You can select a different panel by clicking on its label in your unit frames. There is also an apply all button in the bottom right corner that will apply the settings to ALL panels.
Before you start messing with the settings in this tab, you may want to check out the Panel Wizard in the Tools tab. It can help you quickly configure your panels. Then you can return to the Panels tab to fine-tune them.
The General section has some basic settings for your VuhDo panels.
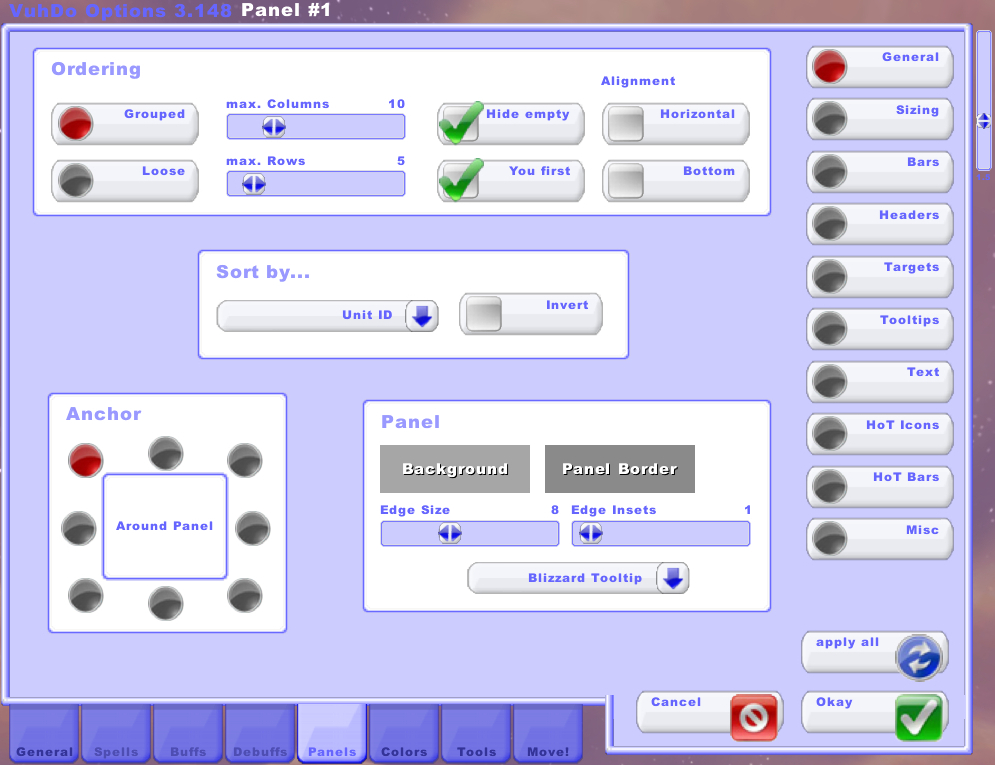
- Ordering
- These options determine what order units are sorted in and how the unit frames are laid out.
- Sort by…
- These options determine the primary sorting criteria for your unit frames.
- Anchor
- This setting changes the position of the panel anchor.
- Panel
- This is where you can change the background and border of the panel.
The Sizing section is where you can adjust the size, scale, and spacing of your VuhDo panels.
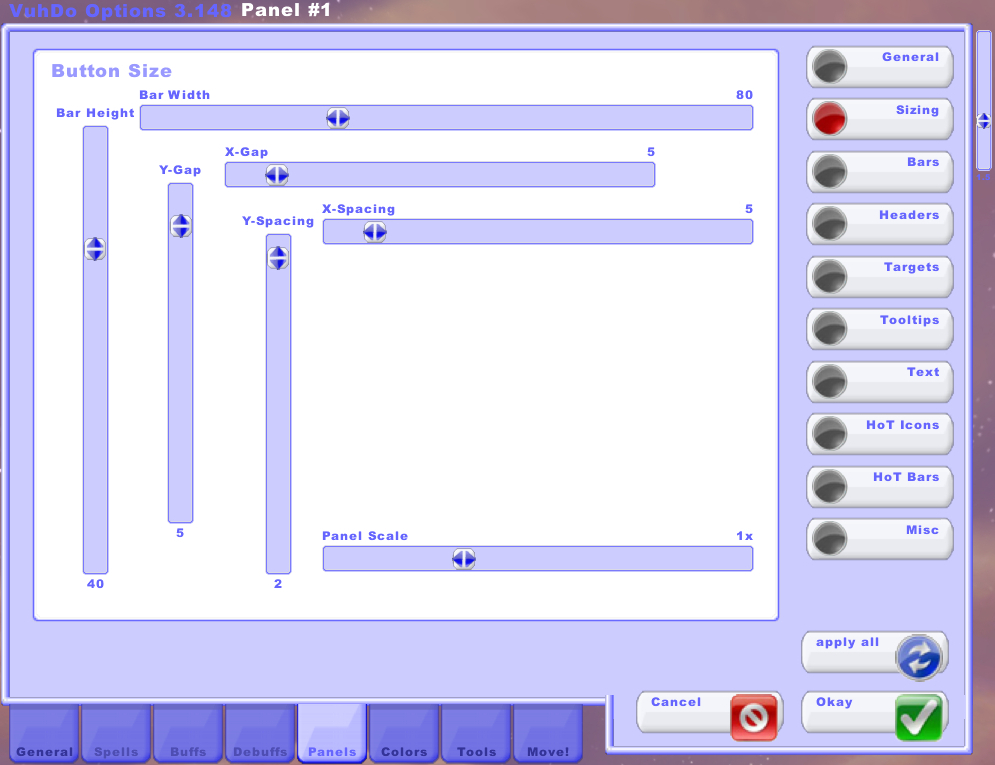
- Bar Width/Bar Height
- Adjust these sliders to change the size of the health bars in the currently selected panel.
- X-Gap/Y-Gap/X-Spacing/Y-Spacing
- Adjust these sliders to change the spacing around and between the health bars.
- Panel Scale
- Adjust this slider to scale the currently selected panel.
The Bars section Is where you can change the look of health and power bars in your VuhDo panels.
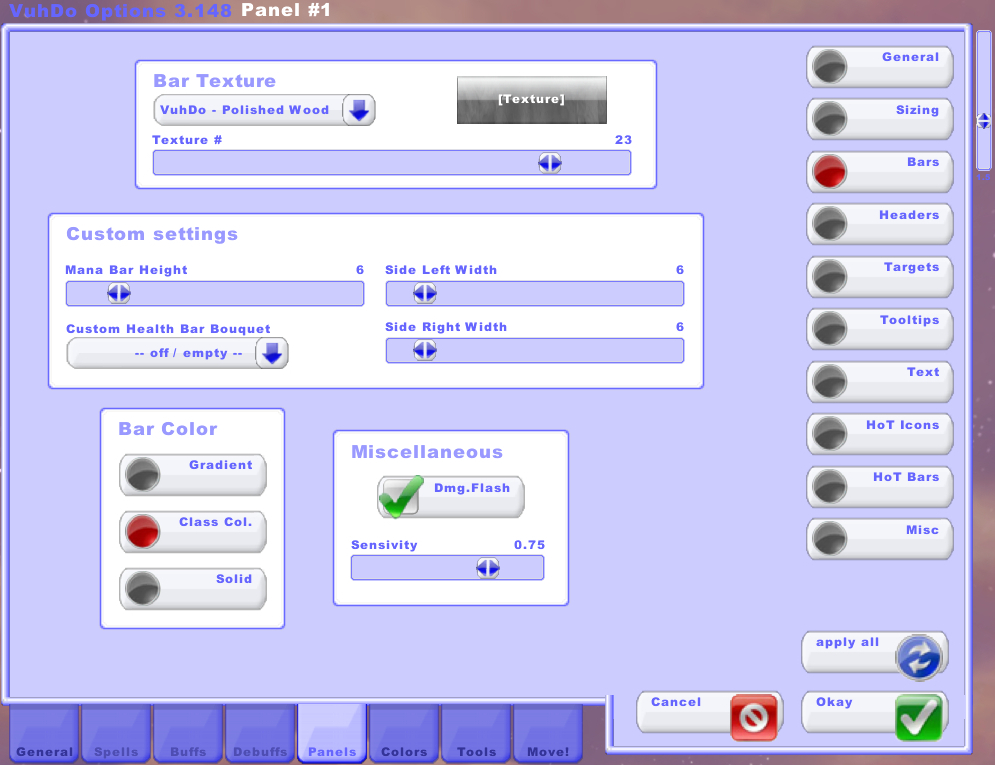
- Bar Texture
- Here you can select the primary texture for health bars in the currently selected panel.
- Custom settings
- Here you can adjust the size of the mana/power bar and the health bar bouquet (which changes the color/look of the health bar based on certain conditions).
- Bar Color
- Here you can choose the default coloring of health bars: gradient, class color, or solid.
- Miscellaneous
- If Dmg.Flash is checked, health bars will flash when a unit takes severe damage. You can also set the sensitivity value of this flashing.
The Headers section has options for the headings that appear at the top of each group in your VuhDo panels.
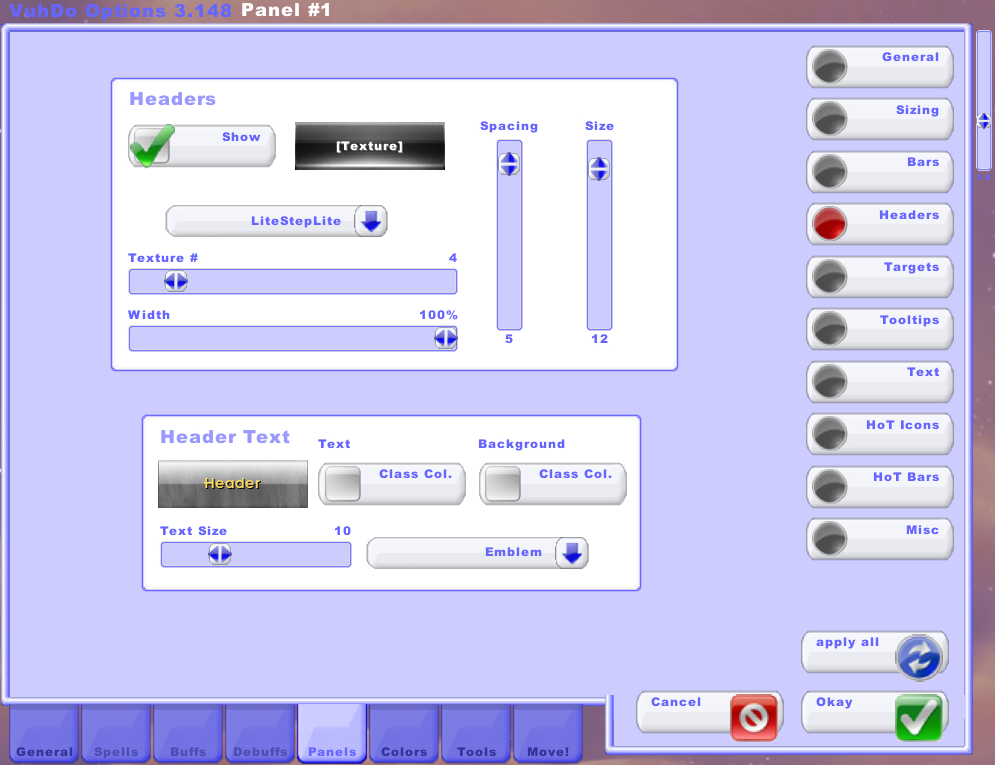
- Headers
- These options will allow you to show or hide the group headers, as well as customize their size, spacing, and background texture.
- Header Text
- You can choose to color the headers by class if you are sorting groups by class. You can also adjust the size and font of the headers.
The Targets section allows you to show a target frame for every unit in your panel.
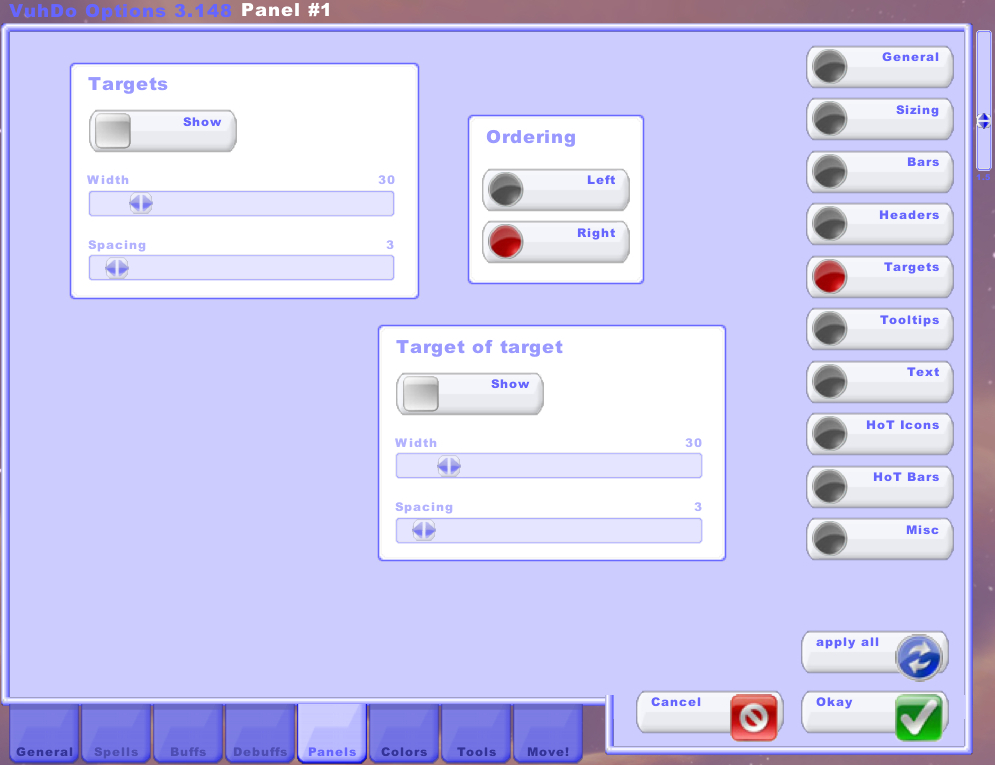
- Targets
- If Show is checked, the panel will create a space beside every unit to show its current target. You can adjust the size and spacing of the target unit.
- Ordering
- Choose whether to show the target frame to the left or right of each unit.
- Target of target
- If Show is checked, the panel will add a second space beside every unit to show the current target’s target. You can adjust the size and spacing of this unit as well.
The Tooltips section contains settings to customize the tooltips that appear when you hover over VuhDo panel.
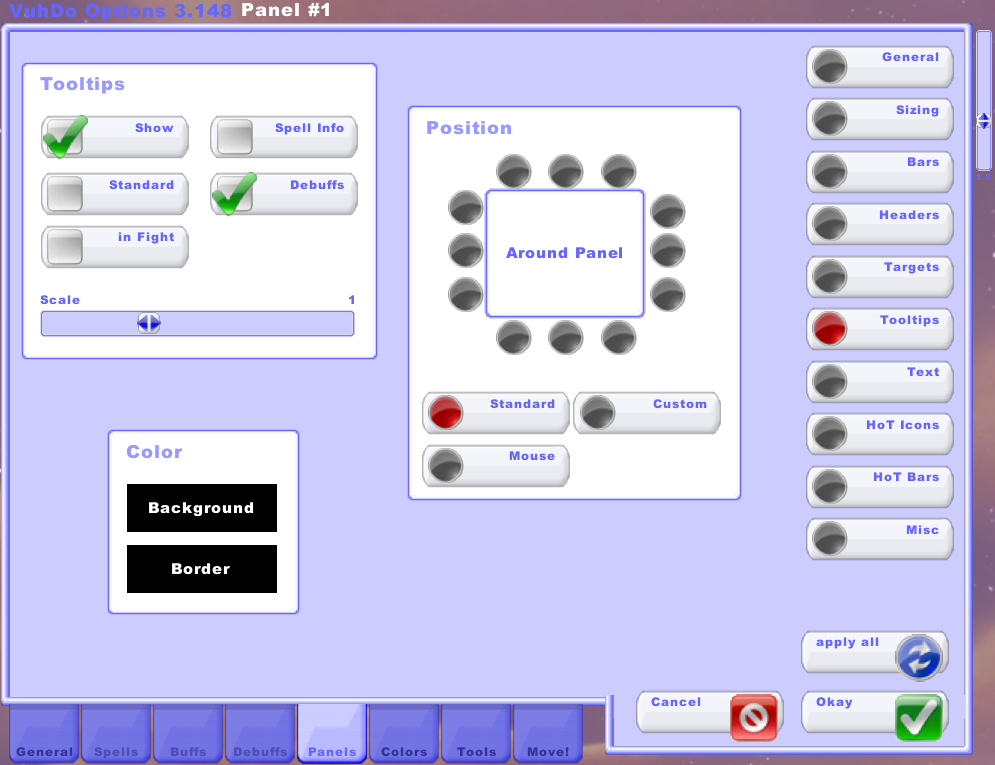
- Tooltips
- Choose whether to show tooltips at all, whether to use standard Blizzard tooltips instead of VuhDo’s, whether to show tooltips while in flight, and whether to show tooltips for spells and debuffs. You can also adjust the scale of the tooltip.
- Position
- Choose whether to have tooltips appear in a particular location around the selected panel, or have them appear in the standard location (the bottom right corner of your screen), in a custom location, or at your mouse cursor location.
- Color
- Here you can modify the background and border of VuhDo’s tooltips.
The Text section has many options for customizing the appearance of text on your VuhDo panels.
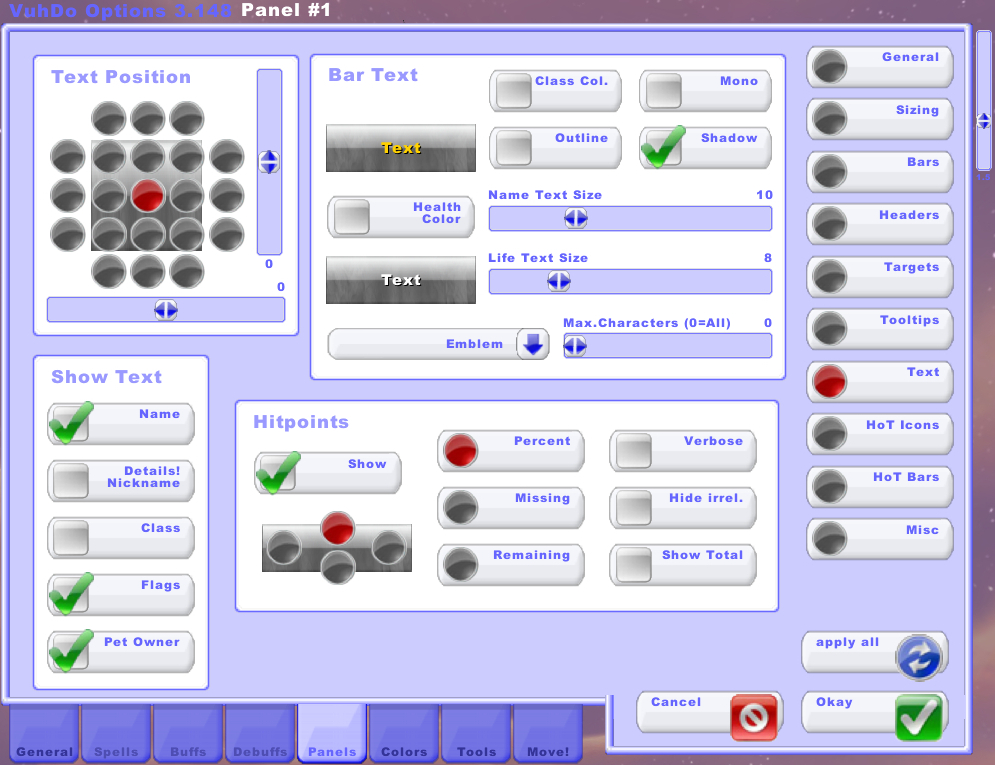
- Text Position
- You can choose the position of the primary unit frame text (name, health %, etc.) in relation to the health bar, and adjust its position vertically and horizontally.
- Bar Text
- You can adjust the styling of the primary unit frame text, including its color, font, size, and decoration. Use the Max.Characters slider if you would like to shorten long character names.
- Show Text
- Choose what text you would like to have appear in the unit frame: unit name, player’s nickname in Details!, class, flags (afk, d/c, dead), or pet owner’s name.
- Hitpoints
- Choose whether to show the unit’s health as part of the text, and where and how it displays.
The HoT Icons section is where you can modify the HoT icons that appear on your unit frames. HoTs are heal-over-time spells, short-term buffs that stay on the player and continue to heal them until they expire. You can also use HoT icons to display other kinds of buffs that you want to track.
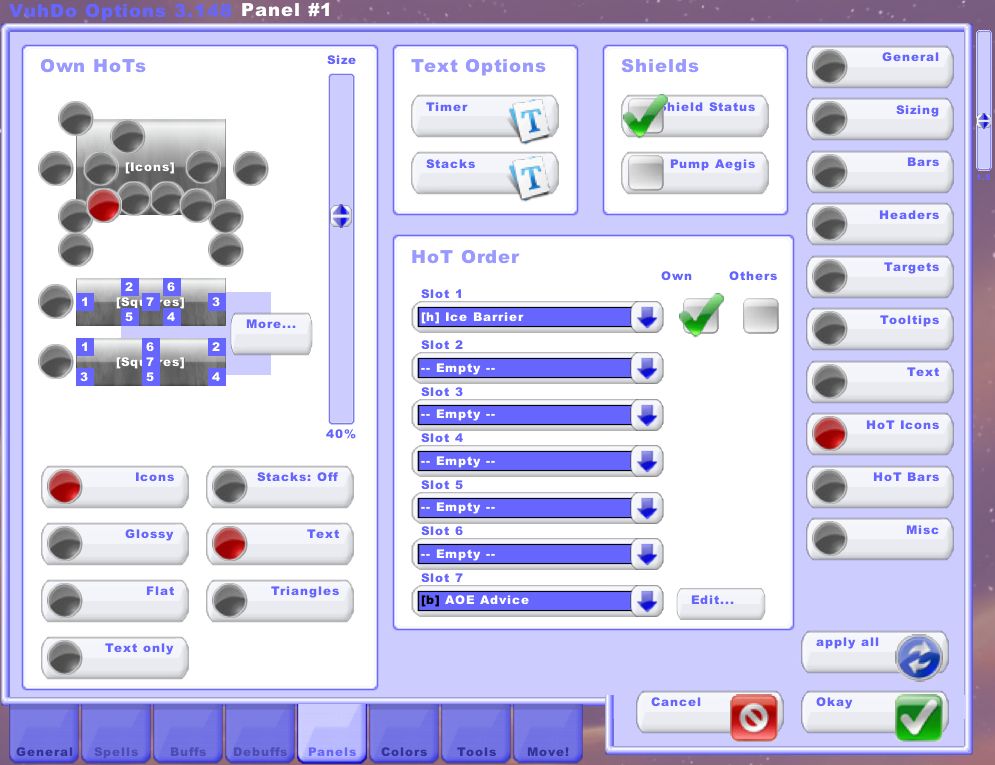
- Own HoTs
- This is where you can choose the size and position of your HoT icons on the unit frames. You can also pick between the standard icon or a glossy or flat one, or text only. The stack counter can also be turned on or off, and shown either as text or triangle indicators.
- Text Options
- Click on Timer or Stacks to bring up a dialog box in which you can choose the position, scale, and font of your HoT timers and stack counters.
- Shields
- If Shield Status is checked, VuhDo will attempt to show the remaining shield amount for priest shields. If Pump Aegis is checked, VuhDo will calculate the remaining Divine Aegis shield amount based on the priest’s health.
- HoT Order
- Use the dropdown menus to select the HoT or other indicator that will appear in each indicator slot. You can choose to show only your own or those cast by other players. Clicking on Edit… when you have a bouquet selected will take you to its settings.
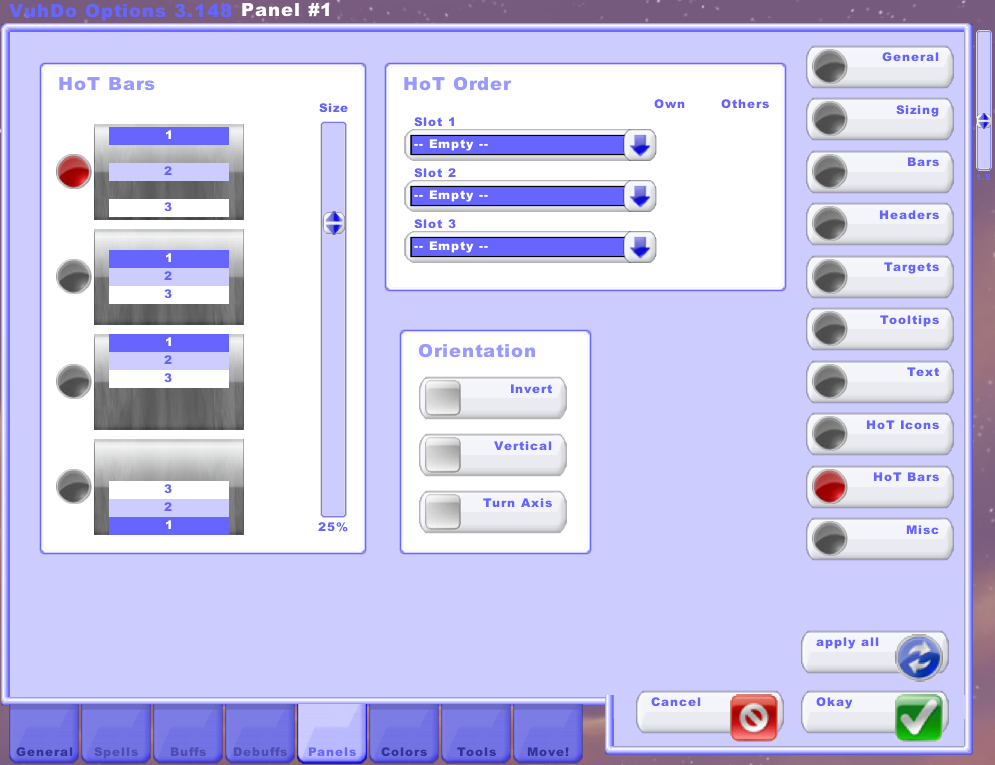
The HoT Bars section is where you can modify the HoT bars that appear on your unit frames. HoTs are heal-over-time spells, short-term buffs that stay on the player and continue to heal them until they expire. You can also use HoT bars to display other kinds of buffs that you want to track.
HoT bars show your HoTs as a progress bar rather than just an icon. VuhDo can only display three HoTs as bars, and seven as icons.
- HoT Bars
- Here you can select the positioning and size of the HoT bars on your unit frames.
- HoT Order
- Use the dropdown menus to select the HoT or other indicator that will appear in each indicator slot. You can choose to show only your own or those cast by other players. Clicking on Edit… when you have a bouquet selected will take you to its settings.
- Orientation
- Here you can adjust the direction of the HoT bars on your unit frames.
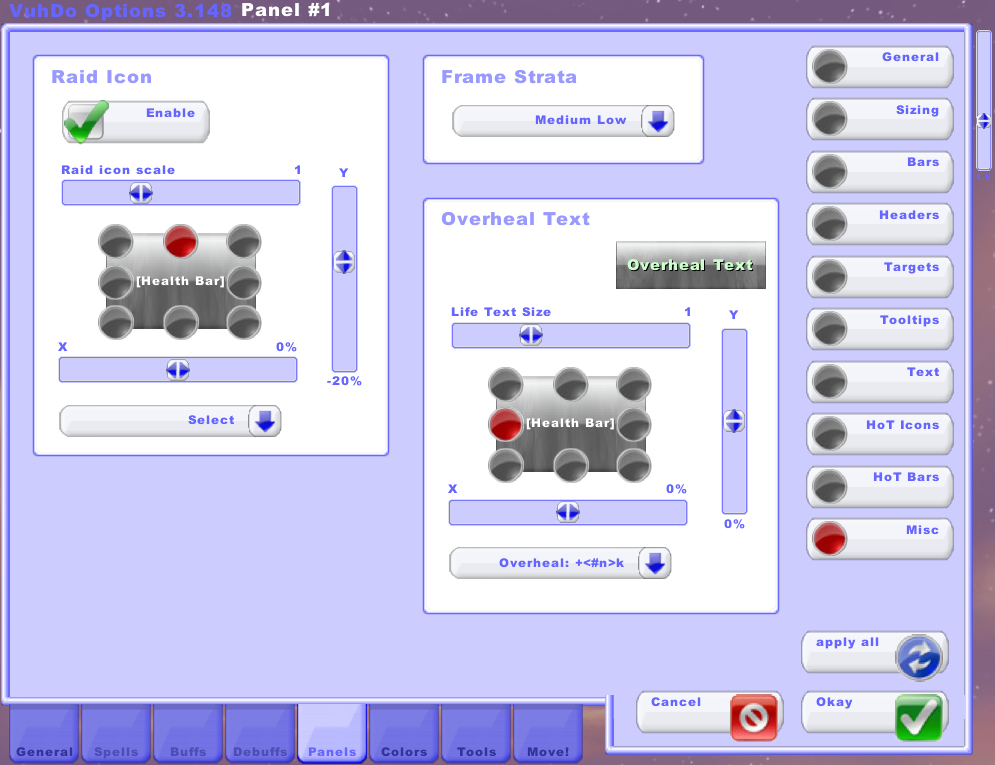
The Misc section has a few extra miscellaneous settings for modifying your unit frame panels.
- Raid Icon
- You can choose whether to show raid icons (the colorful “lucky charm” target markers) on your unit frames, and adjust their position and size. Individual markers can also be disabled using the dropdown menu.
- Frame Strata
- Use this dropdown menu if you need to bring the current panel to the front or send it to the back to avoid conflicting with other interface elements.
- Overheal Text
- You can customize how overheal text displays, including size, positioning, color, and format.
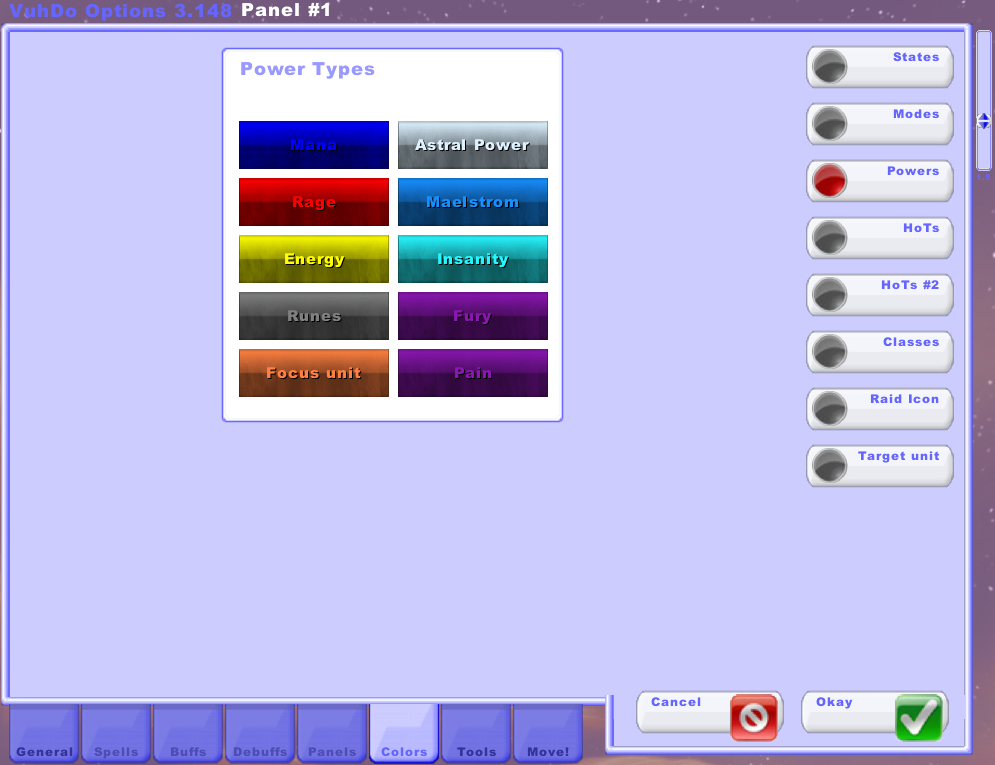
The Colors tab contains settings for modifying the coloring of various elements of the VuhDo panels. Let’s look at each of the pages in this tab which can be accessed by the buttons on the right side of the menu.
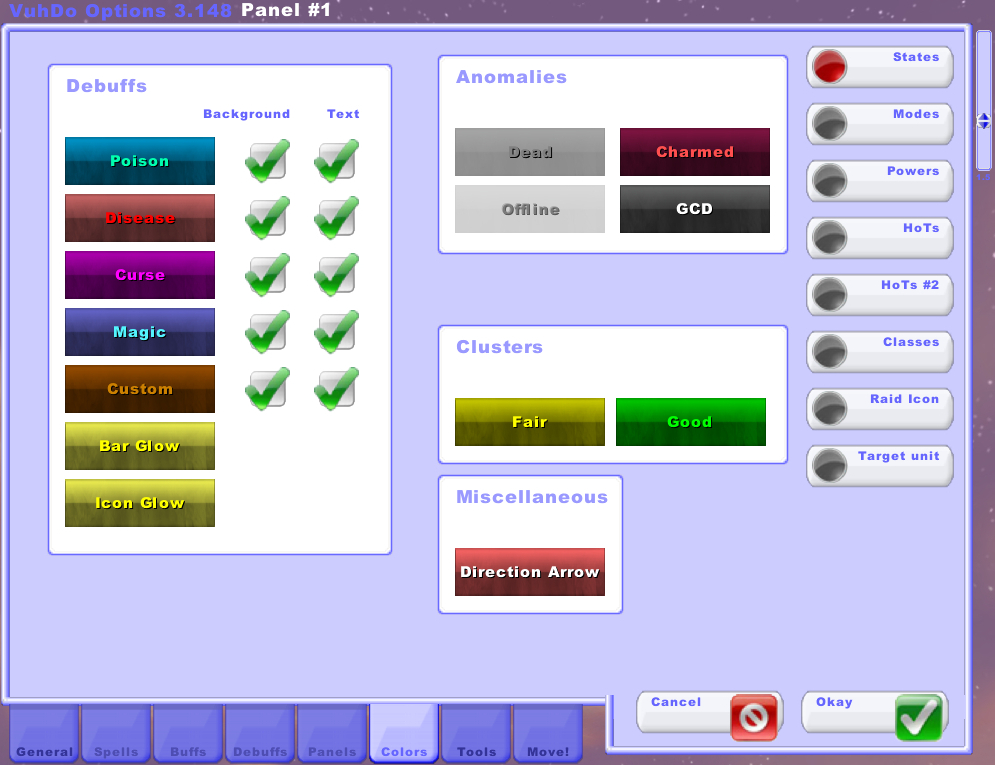
The States section is where you can modify the coloring of unit frames to reflect debuffs and other conditions.
- Debuffs
- You can click on any of the debuff types to bring up a dialog box where you can modify the color and opacity of the background and/or text that appears when a unit has that debuff type. You can disable the background or text color change by unchecking the boxes next to the debuff type.
- Anomalies
- Anomalies are special states such as dead, charmed (mind controlled), and offline. Click on any of these stats to bring up a dialog box where you can modify the color and opacity it applies to the unit frame. You can also change the color of the global cooldown bar in this section.
- Clusters
- Here you can modify the color of the border that appears around unit frames when VuhDo predicts a cluster heal. Click on either box to select color and opacity for background and text. (For more information about cluster heals, see the Cluster section of the General tab in this guide.)
- Miscellaneous
- Here you can modify the color of the directional arrow that appears when you have it enabled under Scanners in the General tab.
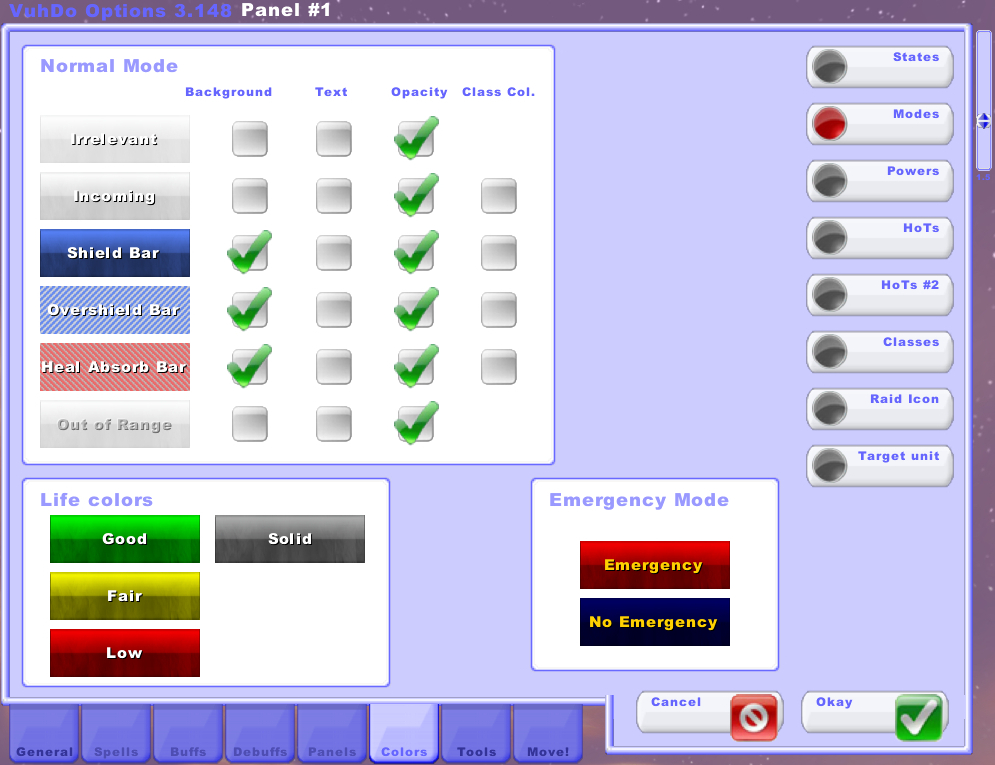
The Modes section allows you to set the status colors of your health bars based on the Operation Mode you have chosen in the General tab.
- Normal Mode
- Here you can choose to alter the color and opacity of the text and/or background of your unit frames based on various conditions, such as incoming healing or going out of range.
- Life colors
- Here you can modify the standard health indicator colors for your unit frames.
- Emergency Mode
- If you have set Operation Mode to the emergency option, these are the indicator colors for those statuses.
The HoTs section is where you can adjust the colors and effects of your HoT indicators.
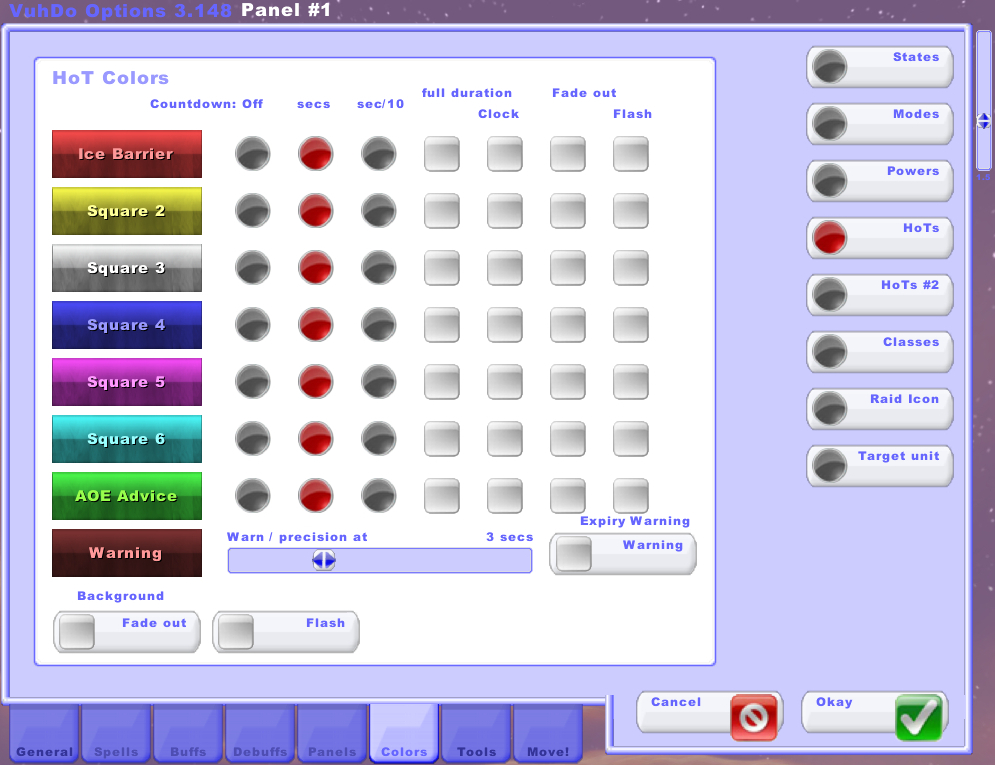
- Click on any HoT indicator on the left to adjust the color and opacity of its background and text.
- Use the round buttons to choose whether or not to show a countdown when the buff is expiring. Click the full duration checkbox to show the countdown regardless of how much time is left.
- Click the Fade out or Flash buttons to enable those effects on expiration of the buff.
- Use the Warning checkbox and slider to adjust when and if the warning color should be used.
- The Fade out and Flash buttons at the bottom will enable those settings for all HoTs.
This section is an extension of the HoTs section with a few more settings for HoT indicators.
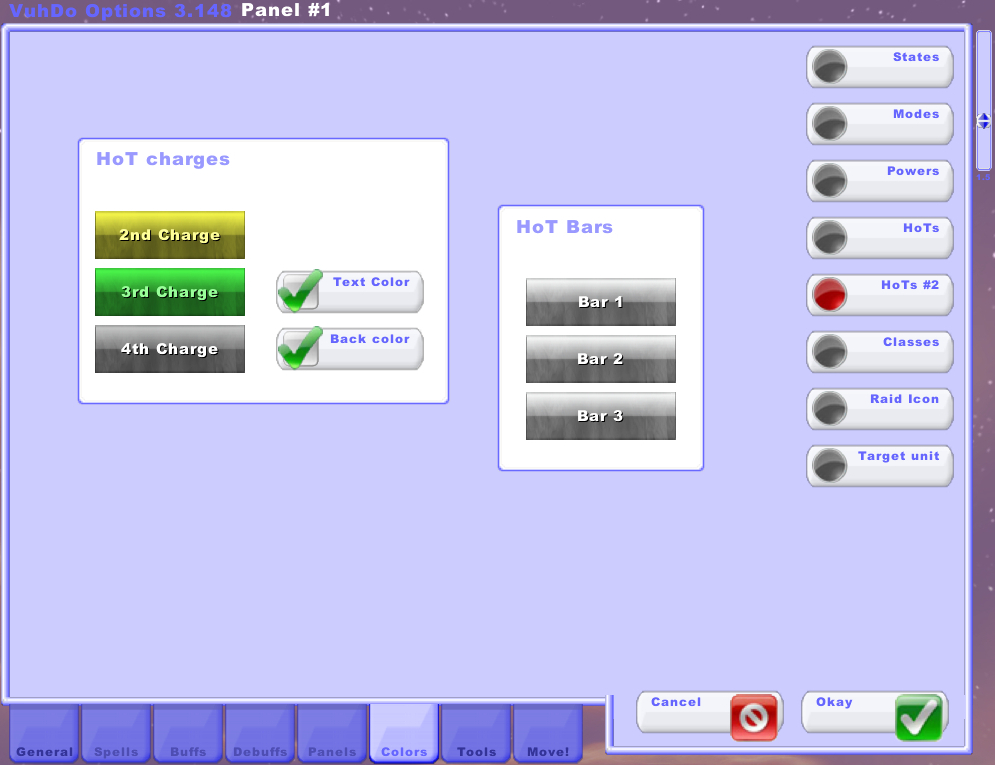
- HoT charges
- Click on one of the charges to change the color used to indicate how many charges are remaining. Use the checkboxes to determine whether the text, background, or both receive the indicator colors.
- HoT Bars
- Click on one of the bars to adjust the color and opacity of the HoT bars.
The Classes section is where you can select the colors that VuhDo will use anywhere that you have told it to use class colors.
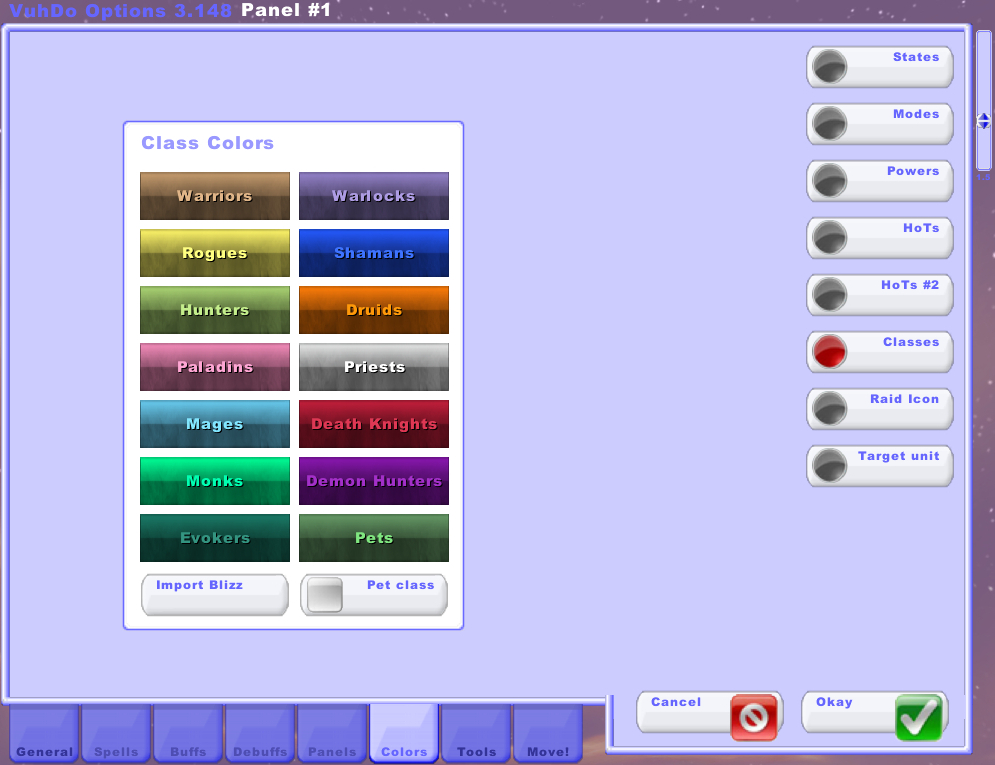
- Click on any of the class boxes to adjust the color and opacity associated with that class.
- The Import Blizz button will set these to the default class colors used by Blizzard.
- The Pet class checkbox will set pets to the same color as their player.
The Raid Icon section allows you to choose whether to modify the color of a unit frame if the unit has a raid marker.
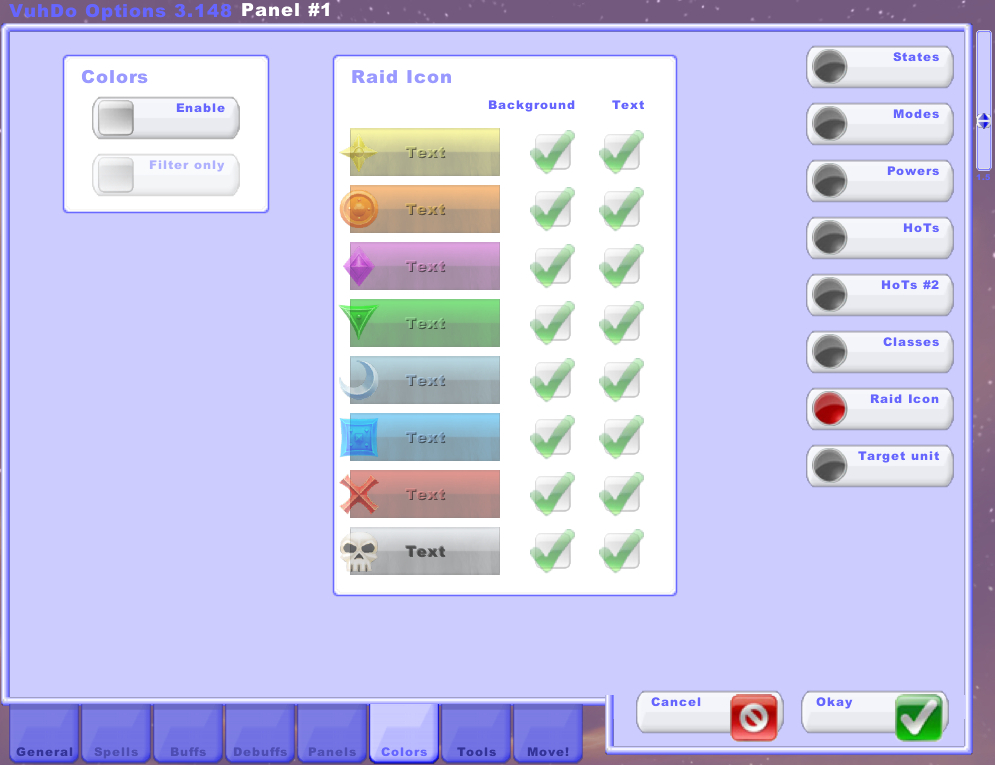
- Colors
- Choose whether to change the colors of unit frames based on raid markers. If Filter only is checked, only the raid markers indicated in the Misc section of the Panels tab will have their colors enabled.
- Raid Icon
- Click on a raid marker to modify the colors associated with it. Use the checkboxes to enable the colors for text or background.
The Target unit section allows you to modify the colors of the target unit frames if you have them enabled in the Targets section of the Panels tab.
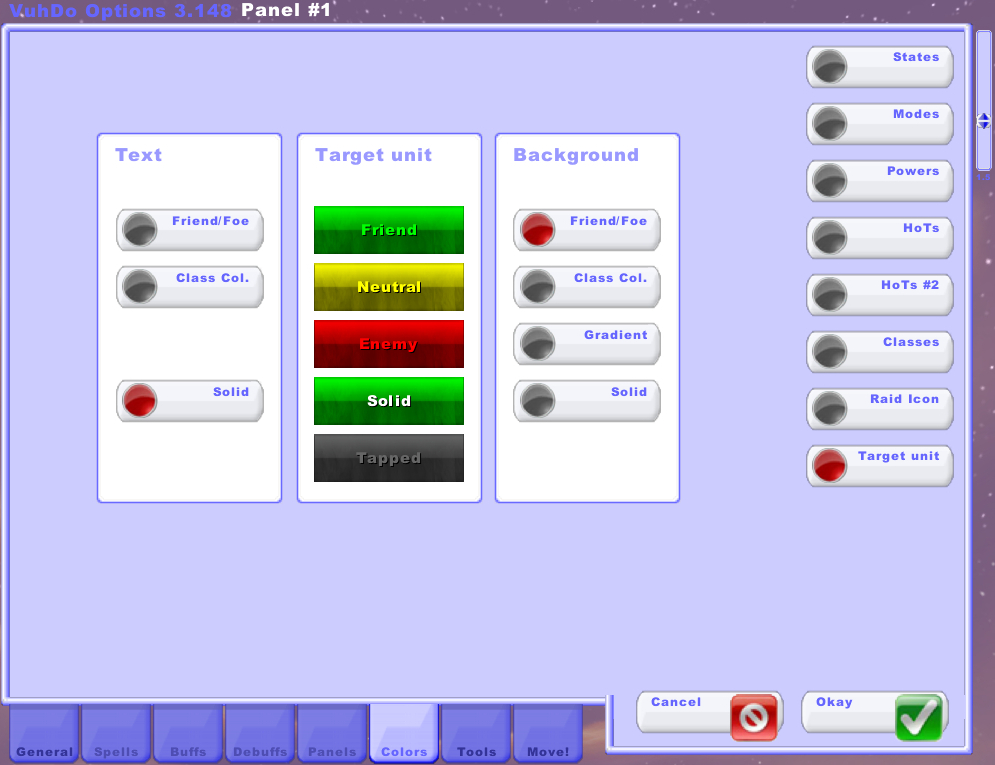
- Text
- You can choose to color the text of target units by their friend/foe status, class colors, or standard solid colors.
- Target unit
- These are the colors that will apply to the target unit frames if you have Text or Background set to Friend/Foe. Click on a bar to modify the color and opacity associated with that status.
- Background
- You can choose to color the background of target units by their friend/foe status, class colors, a gradient, or standard solid colors.
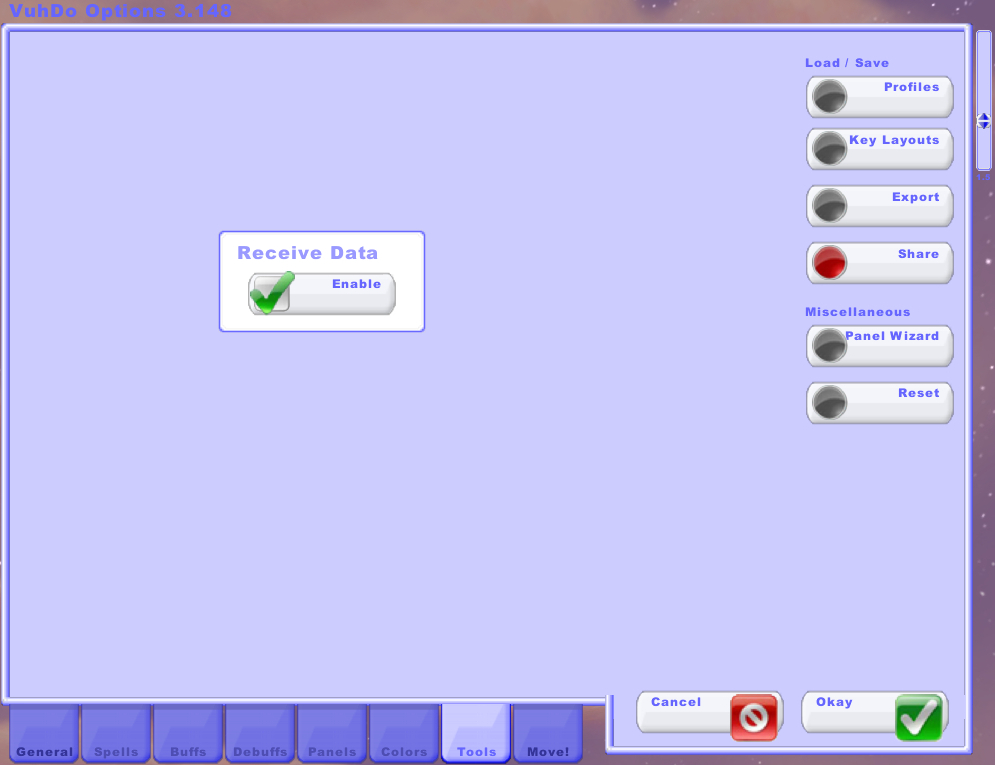
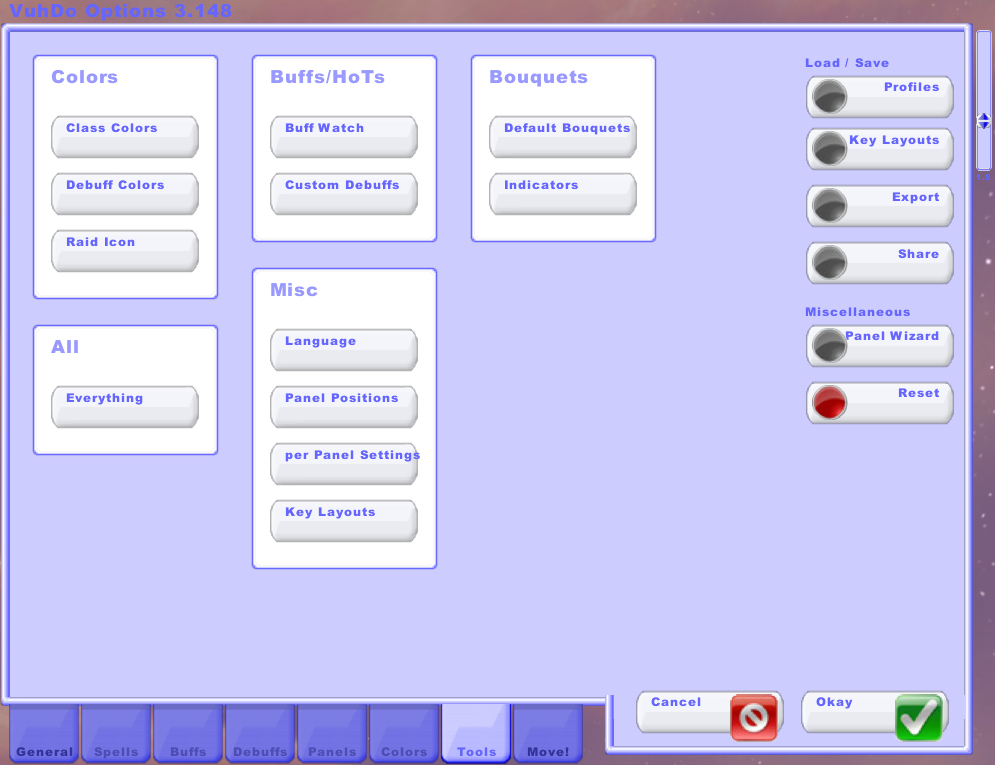
The Tools tab contains settings for profiles and key layouts, as well as import/export/sharing options. Let’s look at each of the pages in this tab which can be accessed by the buttons on the right side of the menu.
The Profiles section is where you can create, swap, install, or save your VuhDo profile. Profiles make it easy to swap and share your addon configuration.
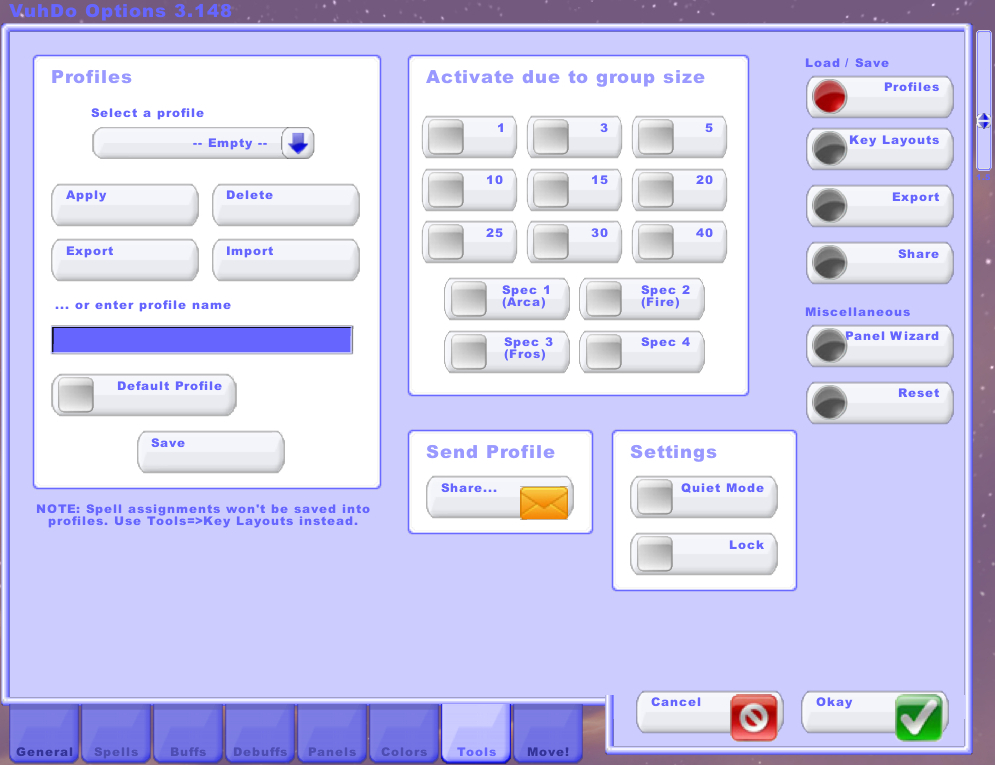
- Profiles
- You can use the dropdown menu to select an existing profile, and click Apply to activate it. You can also choose to save, delete, or export the currently active profile. Tick the Default Profile checkbox to force new characters on your account to use this profile by default.
- You can type a name into the text box and hit Save to create a new profile. You can also use the Import button to load an exported profile.
- Activate due to group size
- Use these checkboxes to indicate situations where the currently active profile should be automatically enabled. You can use these settings to enable specific profiles based on your current group size or talent specialization.
- Send Profile
- Use this button to share your profile with another VuhDo user in game.
- Settings
- If Quiet Mode is checked, you won’t get a warning dialog when you go to overwrite an existing profile. If Lock is checked, you won’t be able to overwrite the current profile at all.
The Key Layouts section is where you can save, swap, install, or share your key layouts. Key layouts are the bindings you have set up in the Spells tab.
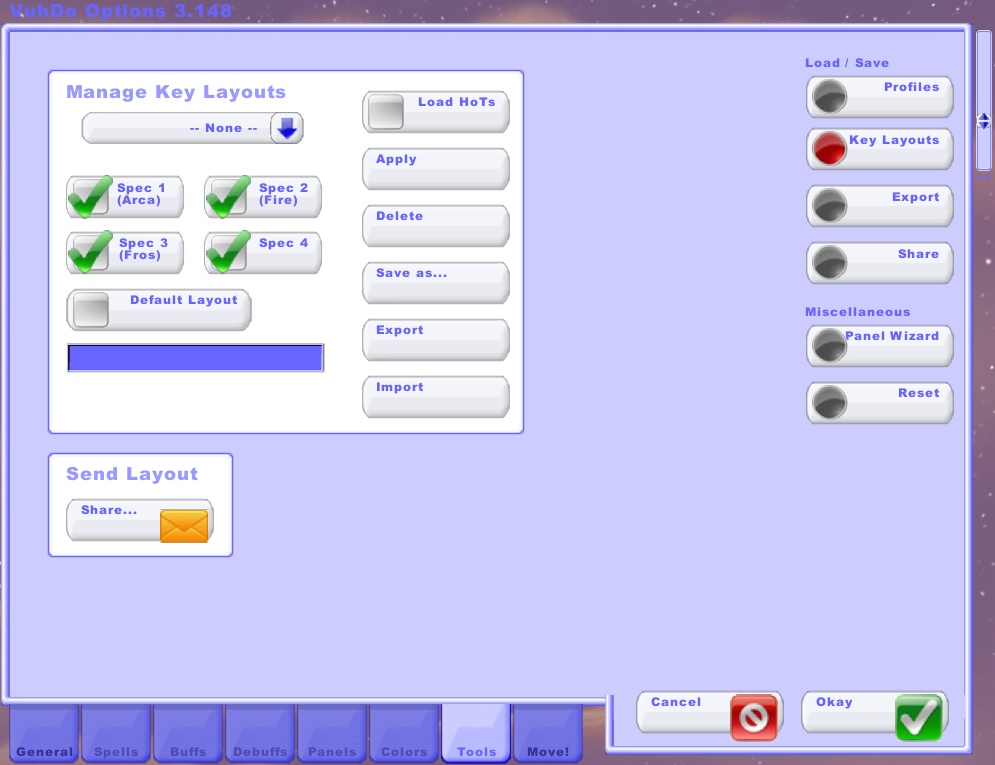
- Manage Key Layouts
- You can choose an existing key layout from the dropdown menu and click Apply to activate it. You can also save, delete, or export it.
- Clicking the Default Layout checkbox will force new characters on your account to automatically use the currently active key layout.
- You can select talent specializations that will automatically use the current key layout.
- If you check the Load HoTs box, the current HoT setup will also load when this key layout does.
- Type a name into the text box and click Save as… to create a new key layout. You can also use the Import button to load exported key layouts.
- Send Layout
- Use the Share… button to share your key layout with another VuhDo user in game.
The Export section is where you can save your current Debuff settings.
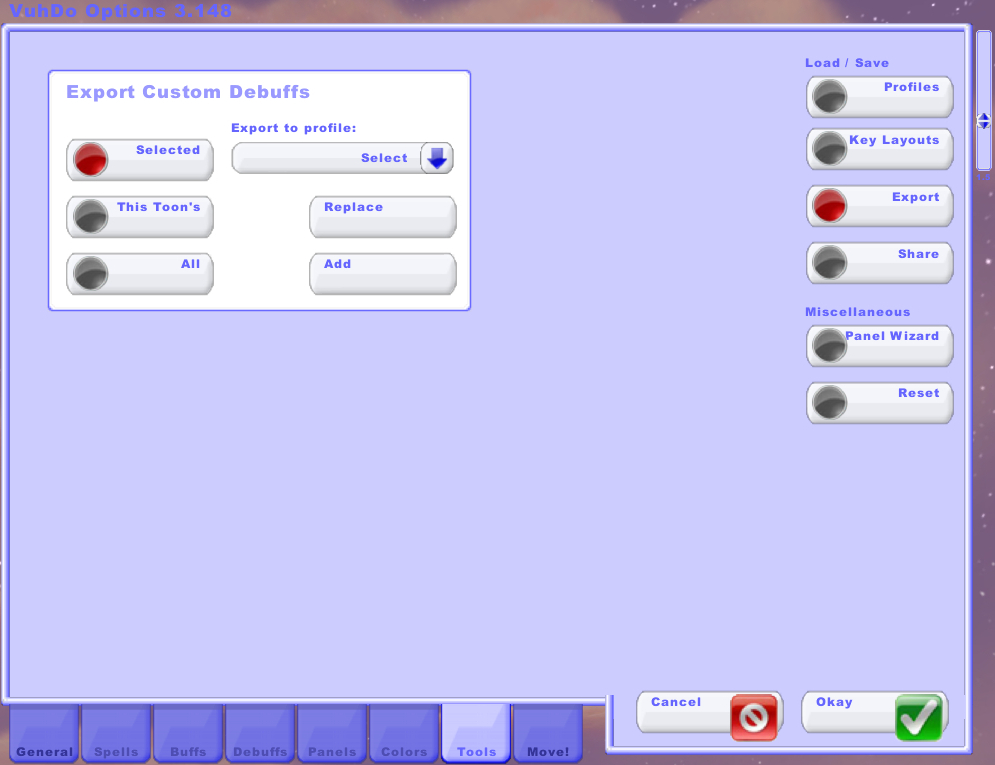
- You can choose to export the custom debuffs from the currently active profile to other profiles. Choose Selected to pick a profile from the dropdown menu to export to. Choose This Toon’s to import to all profiles used by your current character. Choose All to export to all of your currently installed profiles. You can then choose Replace to replace all of the chosen profile debuffs or Add to add onto them.
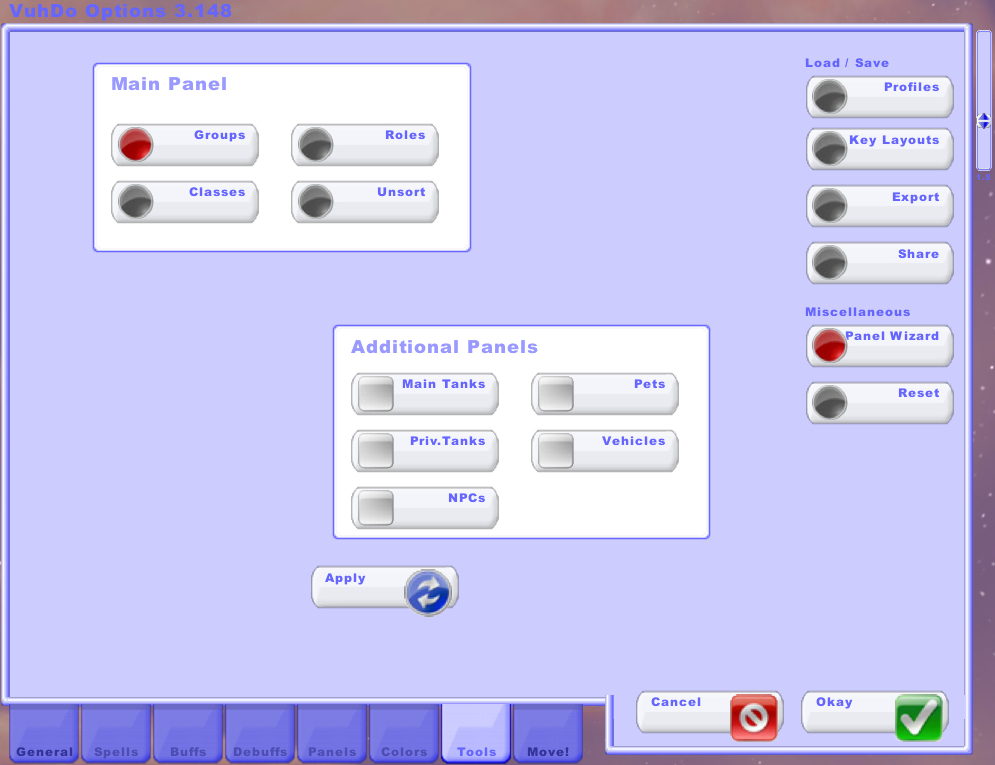
The Panel Wizard section can help you quickly configure how your panels sort and display their unit frames. There are many more options in the Panels tab, but these are a good jumping off point.
- Main Panel
- Choose whether to sort your panels by group number, role, class, or unsorted. Unsorted can be a useful option for PVP or other situations where units frequently leave and join the group, which can cause things to jump around if sorting is enabled.
- Additional Panels
- You can use these checkboxes to quickly create extra panels for main tanks, pets, private tanks, vehicles, and NPCs. Extra panels can also be created and customized in the Move! tab.
- Apply
- Click this button to apply the Panel Wizard settings to all of your panels.
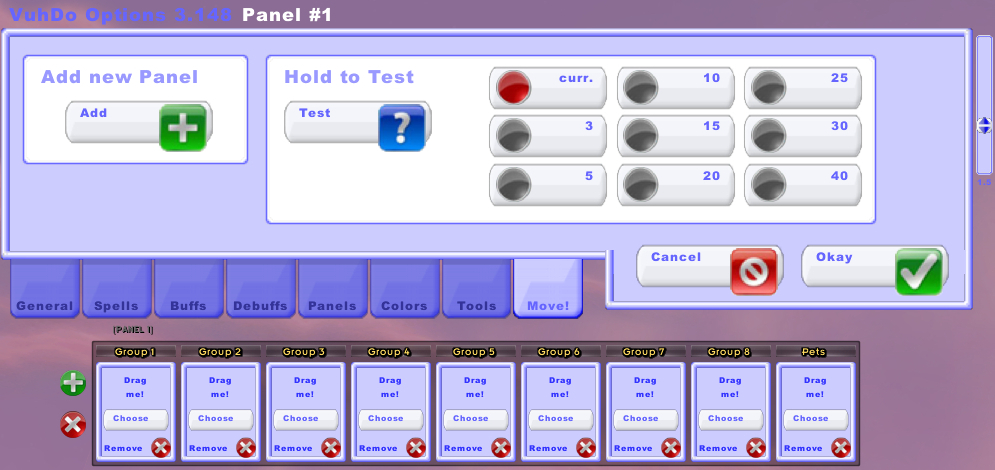
The Move! tab contains settings for adding and testing panels. When you are in this tab, you will also be able to move and modify your VuhDo panels and their contents.
- Add new Panel
- Click the Add button to create a new, empty panel.
- Hold to Test
- Click and hold down your mouse over the Test button to view a test version of your current VuhDo layout. Click the buttons to the right to adjust the group size. Empty group frames will be filled with example units so you can see how everything looks.
- Click the green plus sign on any panel to add a group to the panel.
- Drag groups to rearrange them within panels. Click Choose to select the type of units to display in that group frame. Click Remove to remove the group from the panel.
- Click the red X beside a panel to clear all groups from the panel. Click it again to delete the panel.
- Click on the frame or header of a panel to move it around on the screen.
Backup Your VuhDo Profile!
There’s nothing worse than spending hours on your interface and then having to start over from scratch. You may need to reinstall World of Warcraft for one reason or another, or some kind of error could reset your profile. Make sure you have a backup of your profile on a different hard drive or in cloud storage. You may also want to make a copy of your profile any time you’re going to make significant changes to it, so you can easily go back if you want to.
How to Make a Copy of Your Profile
You can create a new profile by going to the Tools tab in the VuhDo options menu. In the empty text box where it says “… or enter profile name,” type in a name for your new profile and click Save. This will save all of your current settings to a new profile, effectively creating a copy of the profile you had loaded.
To copy your key layout, click on the Key Layouts button on the right side of the menu. Type a name for your copy into the empty text box and click Save as… You should now have a copy of the key layout you had loaded.
How to Save a Backup of Your Profile
To backup your profile, go again to the Tools tab in the VuhDo options menu. Click Export. This will give you a long text strong. Copy the entire thing and paste it into a text file or wherever you want to save your backup. If you need to restore your profile later, you can paste this string into the Import box.
To backup your key layout, click on the Key Layouts button on the right side of the menu. Click Export. This will give you a long text strong. Copy the entire thing and paste it into a text file or wherever you want to save your backup. If you need to restore your key layout later, you can paste this string into the Import box.
About the Author

is it just me or is this addon severely broken??
i have a lot of issues too
My problem is when I go into a raid/dungeon the Key layout doesnt change to the proper spec
I quest in shadow but heal in raid/dungeon so when I pop in to a group it will change to holy on profile but the key layout stay on shadow
Hi, i moved my character from blood elf to void elf. Not had any problems with VuhDo before. But now it keep resetting everything after a do a /rl or restart the game. How can I fix this>
the talent trees option isn’t working on one character but is for others, not sure why that would be. it’s ticked but won’t show on the boxes
I am looking for a mouse that works well with Vuhdo without having to do new bindings. My current mouse is a Logitech G700s and the mouse 4 and mouse 5 buttons do not work with Vuhdo.
Try going to the Spells tab and then to “Keys local.” That’s where I was able to add spells to my G600 buttons.
yes but I need to be able to use the shft + mouse, ctrl + mouse and alt + mouse. I can’t remember what former mouse of mine worked with vuhdo.
when in raid the frames black out and cant be heals suddenly .. its not a range issue the frames just suddenly turn black . a reload ui fixes it but it keeps happening is there a reason y its doin this in raids?
How do i get it to show everyones roles, dps, tank, heals in Vuhdo? can someone link there profile