- Author: Luxrah
- Date: April 12, 2023
- Updated: April 13, 2023
- Expansion: World of Warcraft
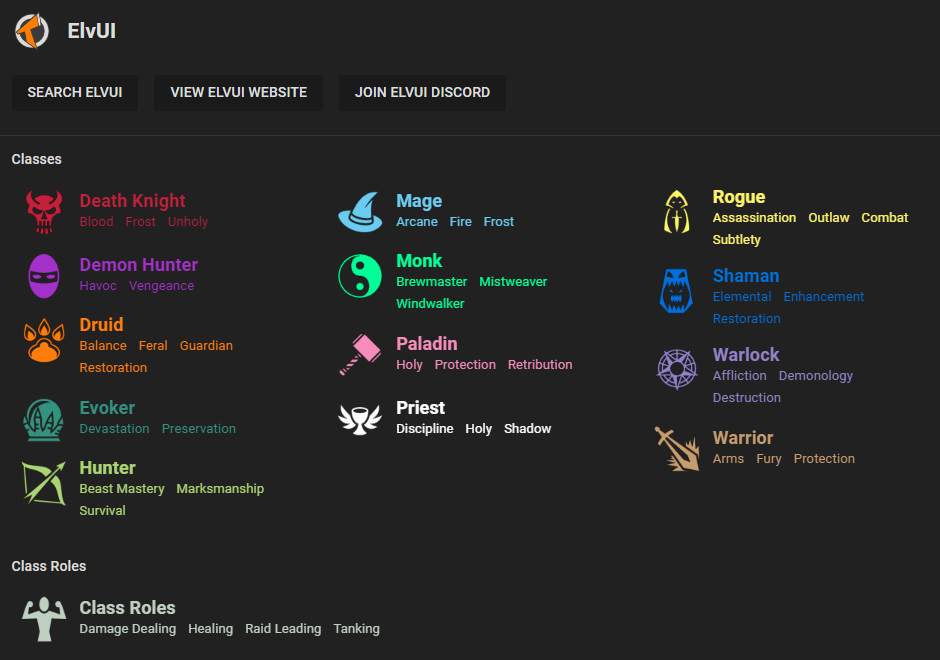
ElvUI is a complete user interface designed to replace the default Blizzard UI. It’s highly customizable and has a large community for support, compatibility, profile sharing, and plugins. It’s a great option for anyone who wants to tweak their entire UI without having to install dozens of individual addons.
This addon can be intimidating for new users due to its size and complexity. A good way to get started is to install one of the many pre-configured profiles that are available. Then you can make tweaks according to your own preferences.
But first, let’s get ElvUI installed!
Installing ElvUI
ElvUI is only available on the Tukui website, so you can’t install it with the Curse Client. You’ll need to install it either via the Tukui Client or manually. The Tukui Client makes it easier to update ElvUI, especially if you wind up installing other plugins from the Tukui website.
If you run into trouble, we have a guide specifically for How to Install and Manage Addons.
Downloading ElvUI
To install ElvUI via the Tukui Client, you’ll first need to download the Tukui Client for your operating system: Windows or Mac.
Find the .zip file in your downloads folder and extract it. Then, run Tukui Setup.msi and follow the instructions in the installer.
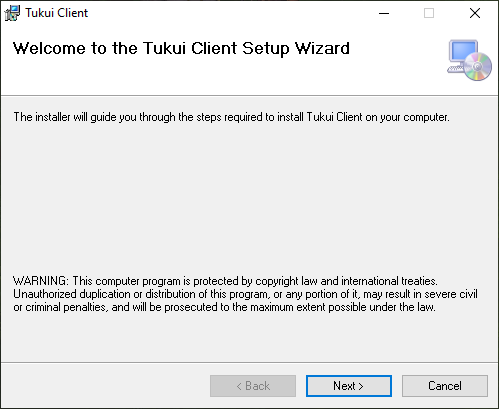
Once the client is installed, launch it.
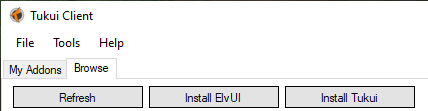
In the lower right-hand corner of the Tukui Client, check that you are in the correct version of WoW. For Dragonflight, this should be “Retail.” There may also be “WOTLK” and “Classic Era” options.
Now click on the Browse tab, and you will see an “Install ElvUI” button. Click that button and wait for the addon to install. When it’s finished, the status bar at the bottom of the window will say “Status: Finished Extracting Addon(s).” You can now close the client. Don’t forget to launch it every now and then to update your addons!
Installing ElvUI manually is fairly straightforward. The only downside is that you will have to manually download it again every time you want to update.
To get started, head to the ElvUI page on the Tukui website and click the big DOWNLOAD button near the bottom. When the download finishes, find the .zip file in your downloads folder and extract it. You should have these folders:
- ElvUI
- ElvUI_Libraries
- ElvUI_Options
Select and copy them.
Now locate your Addons folder in your World of Warcraft installation. By default, this should be C:\ProgramFiles(x86)\WorldofWarcraft\_retail_\Interface\Addons. Paste your three ElvUI folders here. Now you should be all set!
Setting Up ElvUI
So you’ve got the ElvUI files installed on your hard drive. Now it’s time to set the addon up in your game.
Start up World of Warcraft, and on your character selection screen, look for the AddOns button in the bottom left corner. Make sure that the following are enabled:
- ElvUI
- ElvUI Libraries
- ElvUI Options
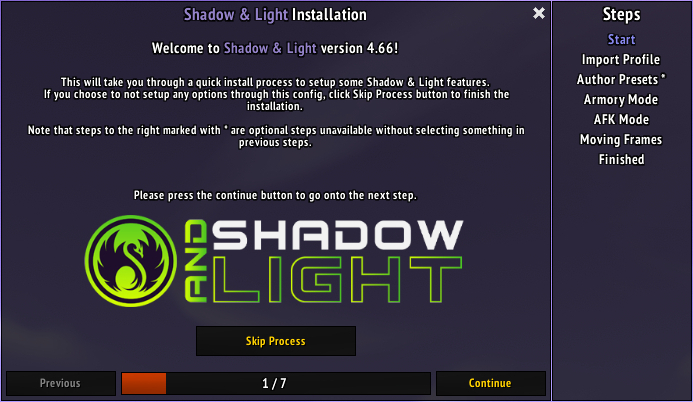
Now load into the game. If this is your first time using ElvUI, the in-game installer will pop up.
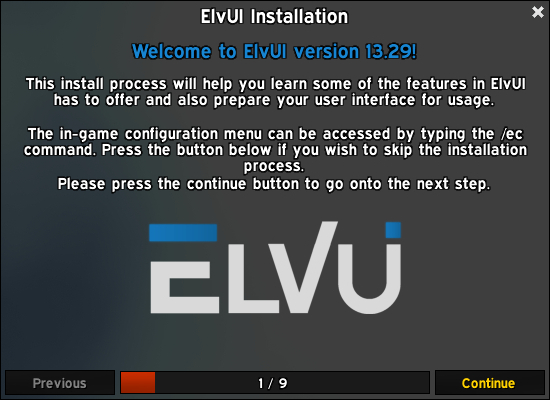
It should say 1/9 at the bottom. We will briefly go through all nine screens in the tabs below:
Nothing needs to be done here. Just click Continue.
Click Setup CVars.
Click Setup Chat.
Decide whether you want to create a new profile for your character or use the default one. You can always change this later in the options. If you choose Shared Profile, you will skip ahead to the last screen.
Choose from a Classic, Dark, or Class theme. You can click each to see what it looks like. These settings can always be changed in the options.
You can scale the interface however you like here, or just let the addon do it automatically with Auto Scale.
Choose from Melee, Healer, or Ranged for your initial layout. This can always be changed in the options.
Choose whether you want buffs and debuffs to show up as bars or icons. This can always be changed in the options.
Click Finished to exit. The game will reload and your UI will be installed!
Installing Profiles for ElvUI
Before you start customizing your ElvUI, you may want to consider installing a pre-configured profile. The best place to find one is in Wago.io’s ElvUI section. Look for one that you like the look of and then you can tweak it.
To install a profile, you’ll need the import string. On Wago.io, there is a COPY IMPORT STRING button at the top of every profile page.
In the game, type /elvui or click the ElvUI button in the game menu. Click the Profiles button on the left side. Click Import Profile near the top. Now paste your import string into the text box and click Import Now.
Addons & Plugins for ElvUI
We have one last thing to go over before we start digging into the options. There are a lot of plugins available for ElvUI – addons for your addon! You can find them on CurseForge and Wago.io as well as the Tukui website. Some of these are basically just profiles in addon form, but most offer extended functionality to the interface. Here are a few of the most popular ones.
The most popular addon for ElvUI, adding a number of features and tweaks to the interface.
Download: Tukui | CurseForge | Wago.io
Adds a whole bunch of features to the interface as well as several ElvUI skins for other popular addons.
Download: CurseForge | Wago.io
Adds a number of skins to make other popular addons match ElvUI.
Download: CurseForge
Adds some features and enhancements to the interface.
Download: CurseForge | Wago.io
A simple addon that adds a bar with location data to the interface. Note that this feature is included in Shadow & Light.
Download: Tukui | CurseForge
A custom profile that also adds a lot of decorative elements to the interface, as well as some new features.
Download: Tukui | CurseForge | Wago.io
A custom profile that also adds some decorative elements and features to the interface.
Download: Tukui | CurseForge | Wago.io
Another custom profile that also adds a few features to the interface.
Download: Tukui | CurseForge | Wago.io
Now that you have your addons and profiles, let’s get to customizing!
Customizing ElvUI
If you’ve taken a look at the ElvUI options, you might be feeling a little overwhelmed. Not to worry, we’ll walk you through what everything does.
ElvUI Chat Commands
First and foremost, here are some chat commands to make customizing and troubleshooting easier.
- Type
/elvuior/ecto open the options menu. - Type
/moveuior/emoveto open edit mode and move things around. - Type
/eresetto reset all frames to their original positions. - Type
/egridif you want to show (or hide) the on-screen grid without entering edit mode. - Type
/kbto enter keybind mode for binding your buttons. - Type
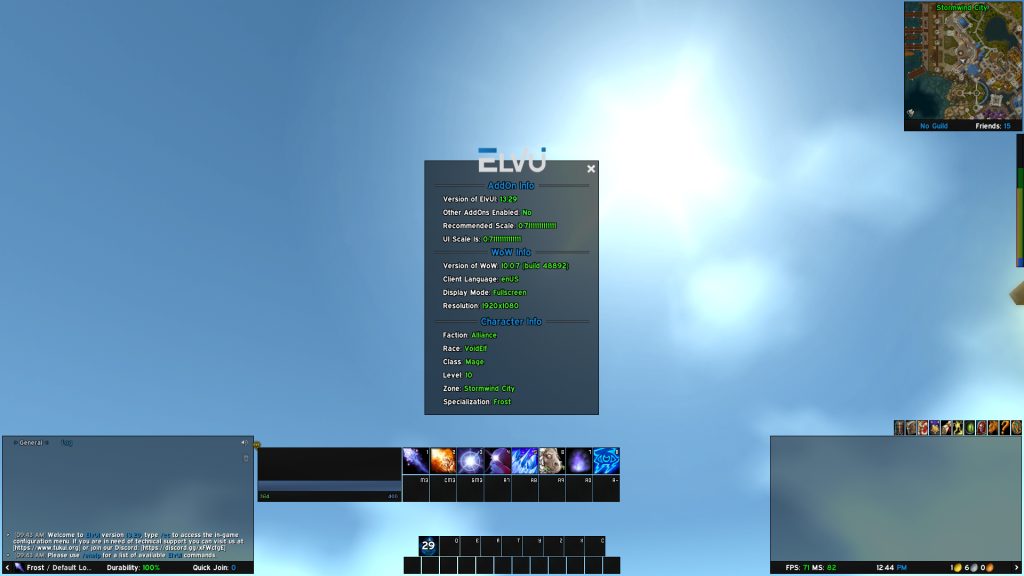
/estatusto see your version number and other ElvUI info. - Type
/edebug onto disable all addons except ElvUI. Type/edebug offto re-enable them. - Type
/bgstatsto show or hide battleground stats. These will appear in place of other DataTexts, such as those in the bars below the chat windows. - Type
/ehelpto view all available commands.
ElvUI Edit Mode
If you want to move anything around in your layout, you’ll have to enter ElvUI’s edit mode. To do this, you can either type /moveui or /emove, or you can click the Toggle Anchors button in the ElvUI options menu. This will show you the position of every element of the UI and allow you to move them around.
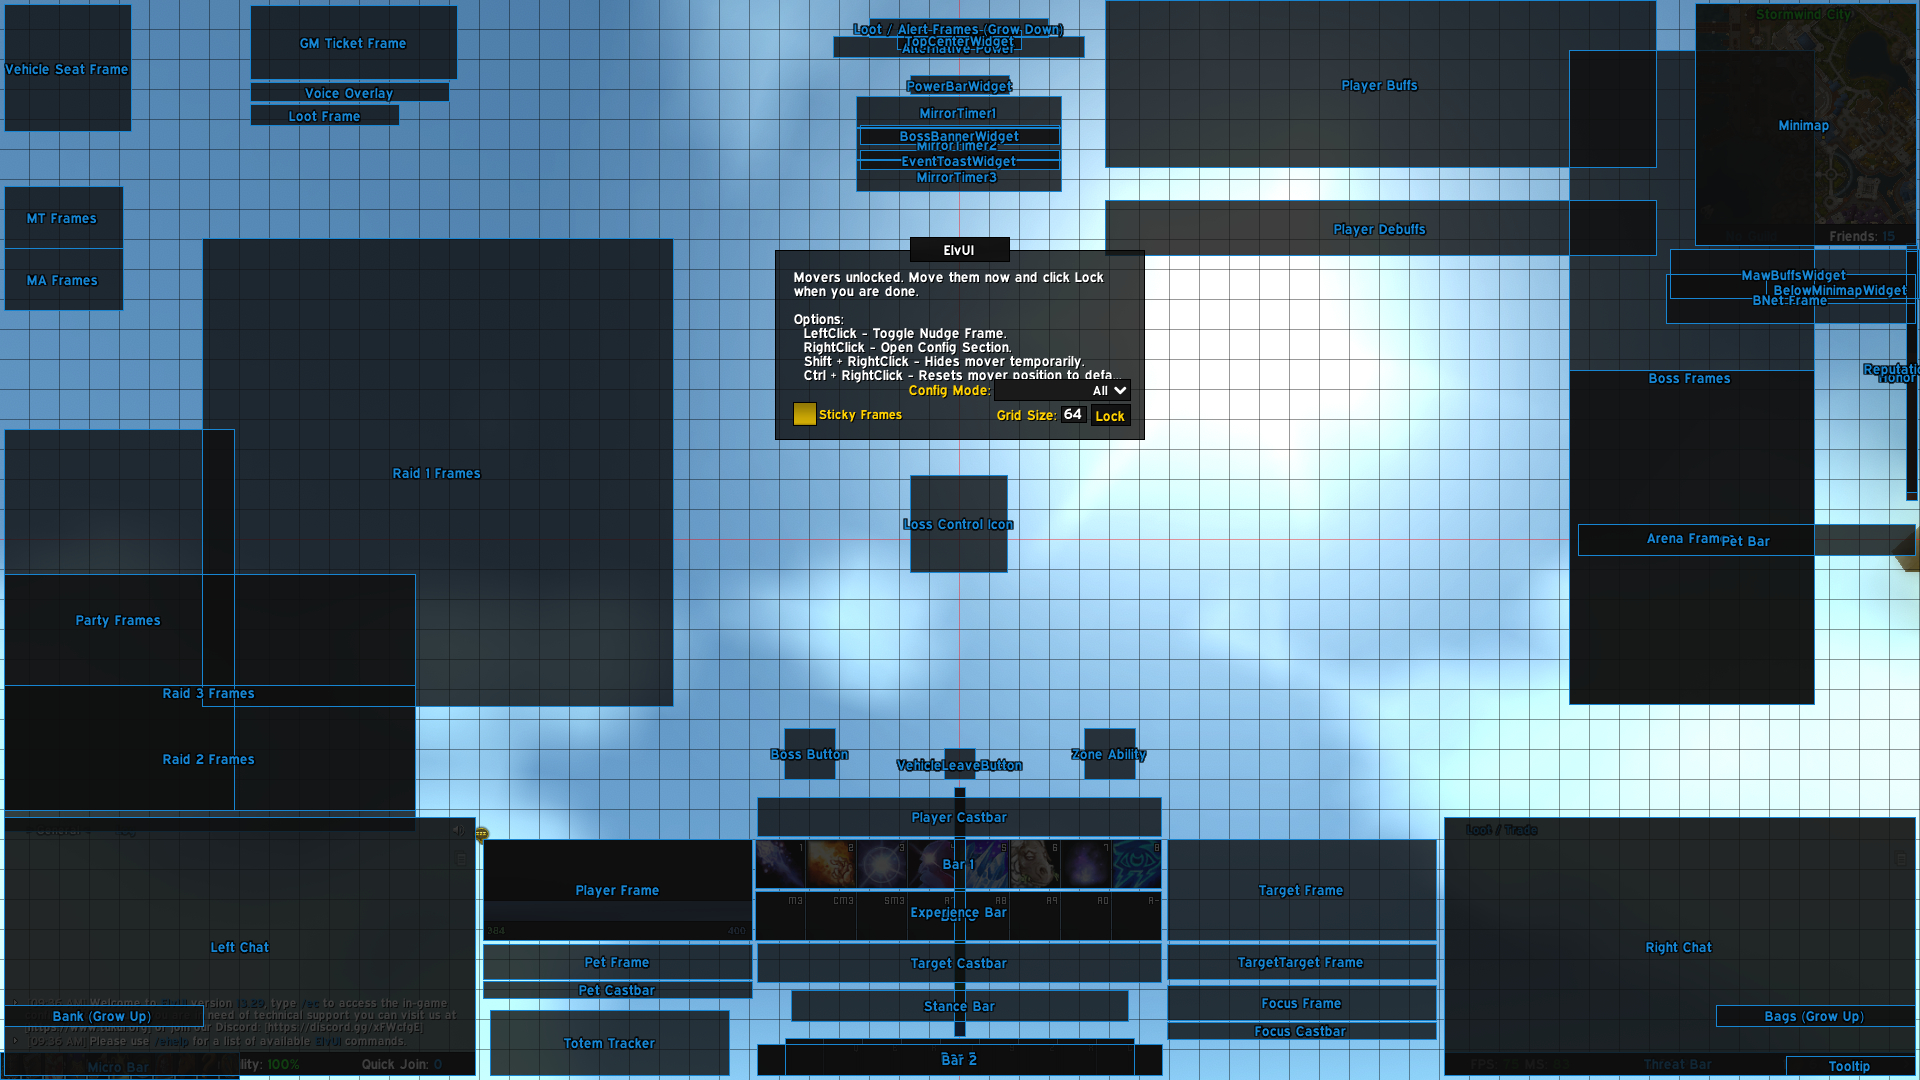
The controls are right there on the center pane:
- Left-click on a frame to bring up a small box with arrows and X/Y coordinates as well as a Reset button. These will allow you to move the frame to the exact position you want.
- Right-click on a frame to open its section in the options menu. This will allow you to tweak any settings related to this frame.
- Shift + right-click on a frame to hide its box temporarily. This can help you get a clear view of other frames around or behind it.
- Ctrl + right-click on a frame to reset it to its default position. This can also be done with the Reset button in the nudge box.
There is a Config Mode dropdown to allow you to see only the relevant frames for different conditions: General, Solo, Party, Arena, Raid, Action Bars, and Blizzard Widgets. This is useful for de-cluttering your screen while you work on a specific setup.
The Sticky Frames checkbox will cause frames to snap to each other when dragged. This can be useful for quickly lining things up.
Finally, you can change the Grid Size to whatever you want. The grid is only visible in edit mode and can help you line things up precisely.
Click the Lock button when you want to exit Edit Mode.
ElvUI Options Menu
Now let’s look at the options menu. There are a lot of settings in here! Some of them are fairly self-explanatory while others might be a little intimidating. We’ll go through section by section.
The first section when you open the menu is the General section. This is where you’ll find settings that affect the entire interface, such as scaling and fonts. We’ll go through the different tabs located at the top of the page.
The first tab, also called General, has a bunch of quality-of-life options.
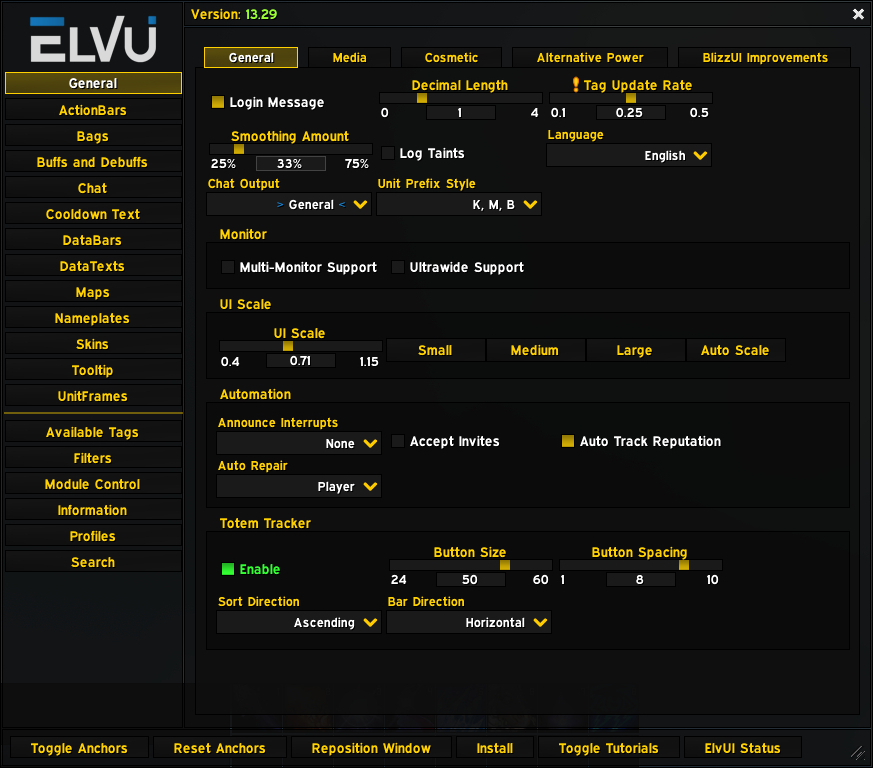
- Login Message
- The login message tells you your current ElvUI version when you log in.
- Chat Output
- You can choose which chat window ElvUI messages will go to.
- Unit Prefix Style
- This determines how shortened numbers will appear on your unit frames. For examble, 10,000 = 10K
- Announce Interrupts
- Sends a message in your chosen chat channel when you successfully interrupt an ability.
- Accept Invites
- Automatically accept group invitations sent by friends and guild members.
- Auto Track Reputation
- Automatically change your reputation bar to show your most recently earned reputation.
- Auto Repair
- Automatically repair any time you visit a vendor who has the repair option. Choose from your own gold or guild bank funds (if enabled by your guild).
- Totem Tracker
- Enable a bar that shows the current totems auras you have up. You can customize its size, spacing, and direction.
This tab contains settings for fonts, colors, and textures in the interface.
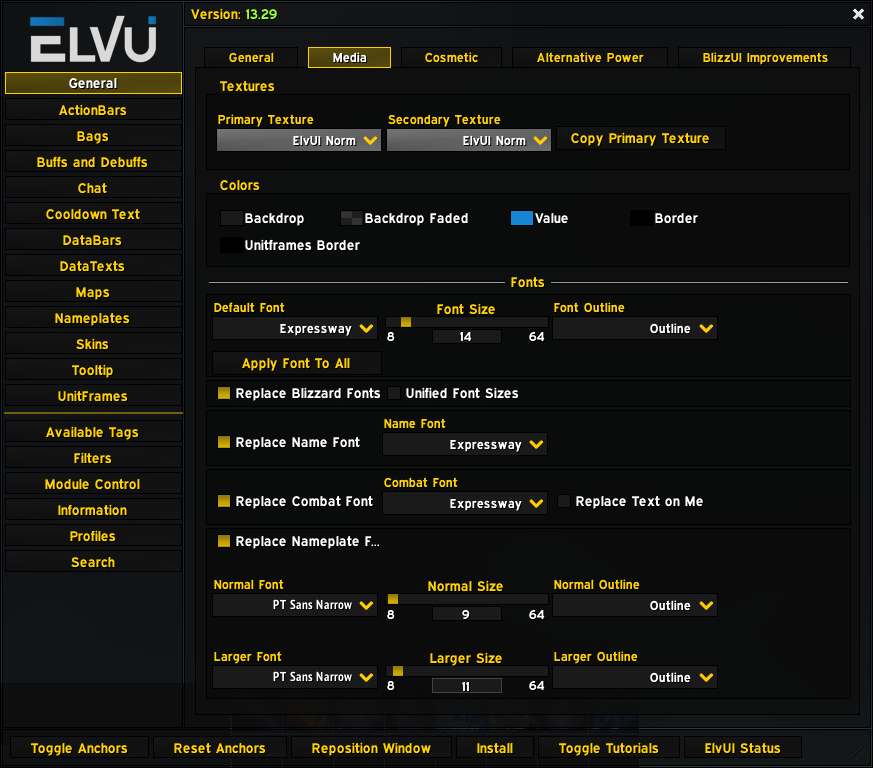
- Primary Texture & Secondary Texture
- You can change the graphical look of status bars (such as mana bars, cast bars, etc.)
- Colors
- You can change the color scheme the interface will use, including backdrops, borders, and values. Most colors can be made transparent as well.
- Default Font
- Choose your the font that most of the interface will use, including size and outline. Note that some frames do not automatically use the default font and will have to be manually edited to match. Most frames also allow you to set a separate font for them if you choose.
- Name Font
- This replaces the font used by the names over NPC and player heads when you are not displaying nameplates.
- Combat Font
- This replaces the font used by combat text, which are the numbers that float around you when you do damage or healing.
- Nameplate Font
- This replaces the font used by Blizzard nameplates. These settings do not affect ElvUI’s nameplates. Even if you have ElvUI’s nameplates enabled, Blizzard nameplates will still be used inside instances, where addons are not allowed to modify friendly nameplates.
This tab allows you to modify borders, panels, and other settings related to your UI’s general appearance.
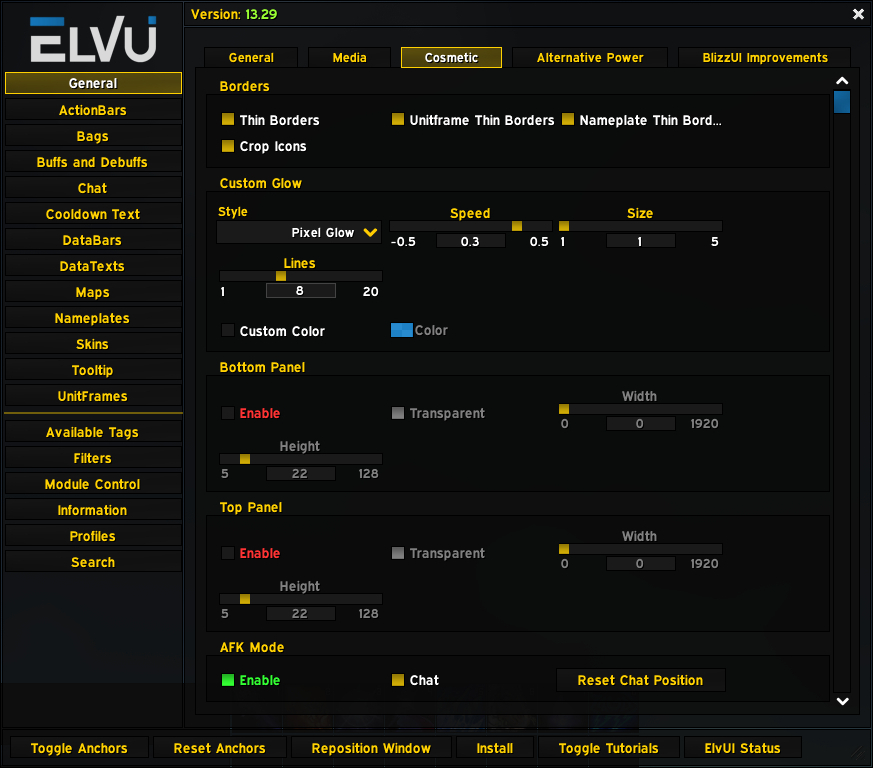
- Borders
- You can choose whether you want thin borders or chunky ones.
- Custom Glow
- You can set a custom graphic for the glow that appears on your bars when an ability procs.
- Bottom Panel & Top Panel
- You can display a bar along the top and/or bottom of your screen, similiar to TitanPanel.
- AFK Mode
- When enabled, your screen will change when you go AFK.
- Chat Bubbles
- You can modify the appearance of dialogue boxes that appear above characters’ heads, such as when they use /say.
This tab allows you to modify the look of special status bars that appear during certain quests and boss fights.
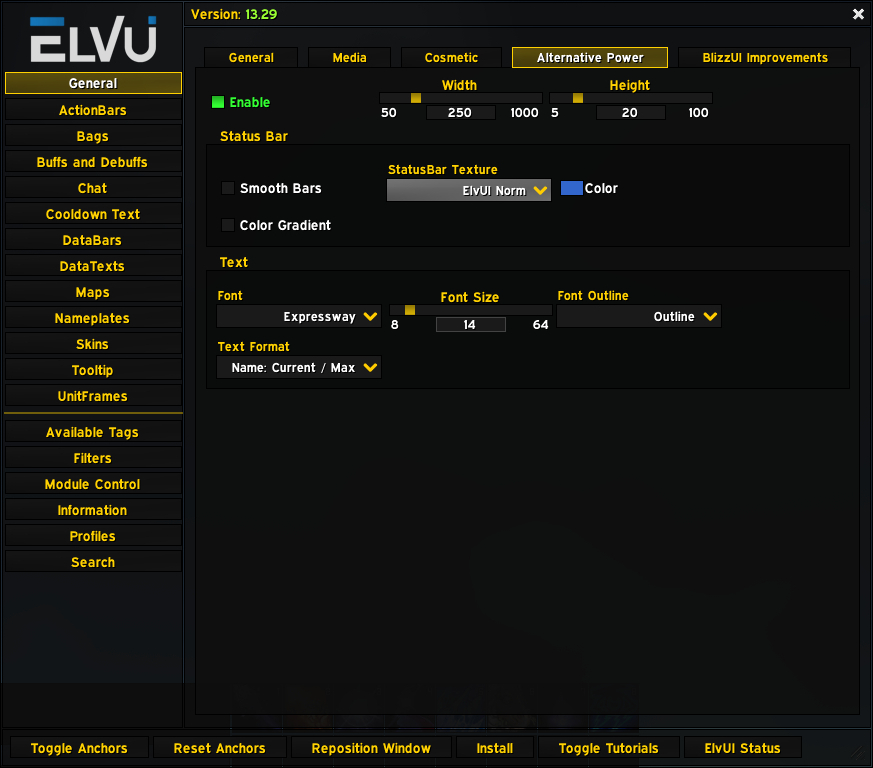
Most of this page should be fairly self-explanatory.
This tab is where you can enable or disable some of ElvUI’s modifications to the default interface.
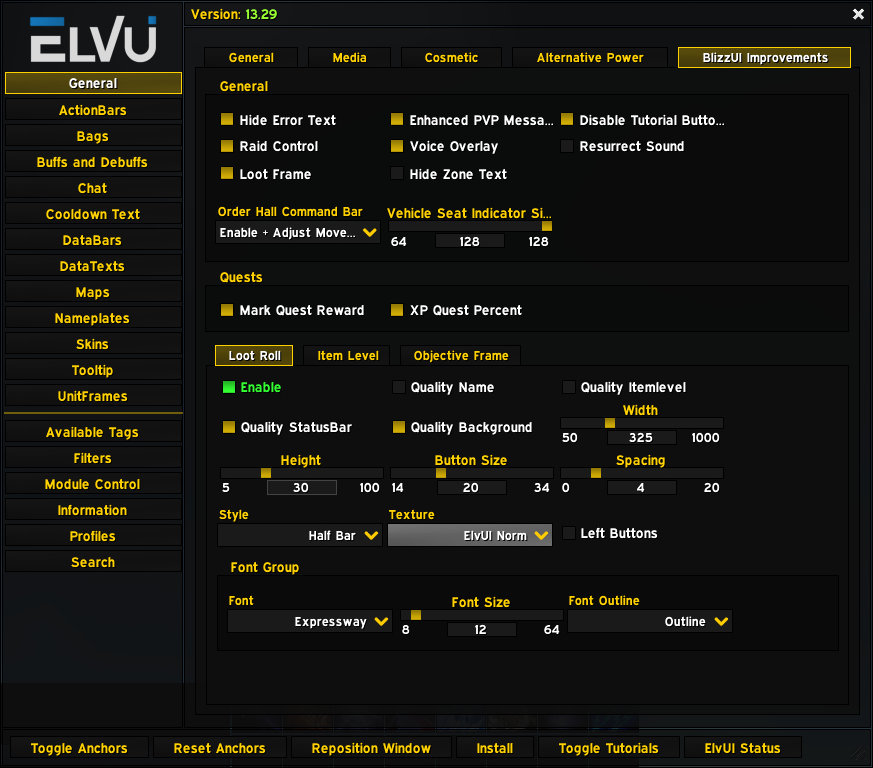
- General
- Most of these checkboxes are fairly self-explanatory. Hovering over them with your mouse will show you what they do. Each one enables/disables some small feature of ElvUI.
- Quests
- Mark the most valuable quest reward with a gold coin, and view quest XP as a percentage.
- Loot Roll
- Enable/disable the ElvUI loot roll frame and modify how it looks.
- Item Level
- Show the item level of each piece of gear in the character and/or inspect frames, and modify how it looks.
- Objective Frame
- Adjust whether your objective frame hides automatically and the positioning of certain elements.
The ActionBars section contains settings for all the ability buttons in your interface. We’ll go through the different tabs located at the top of the page. There is an additional tab available here if you have the Masque addon installed.
Note the Keybind Mode button at the top of the menu here. You can also enter keybind mode by typing /kb in chat.
The General tab has some options that apply to all of your action bars.
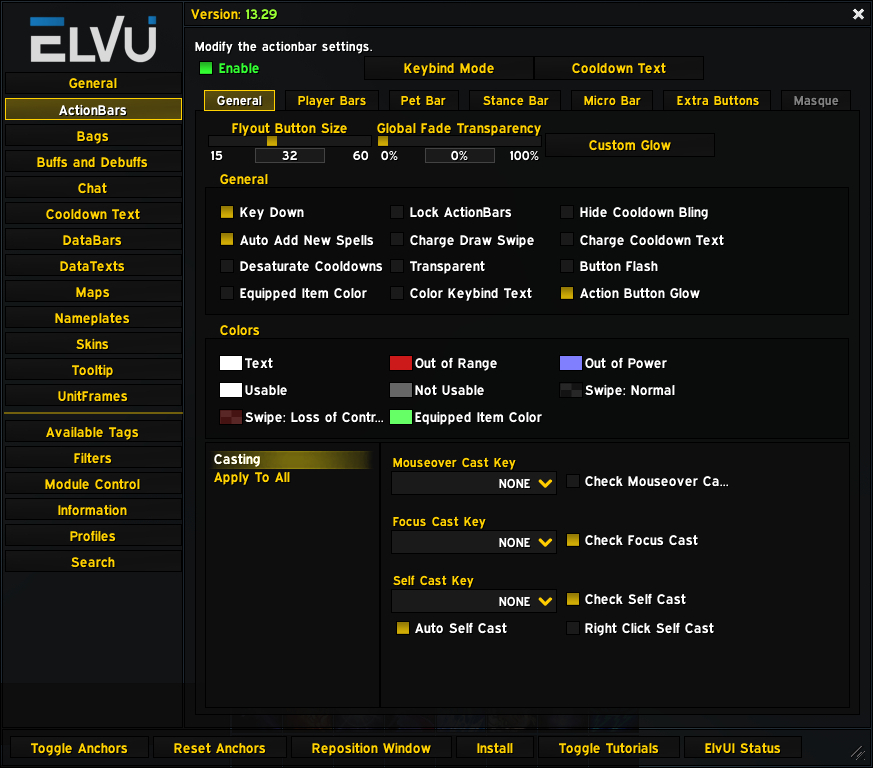
- Flyout Button Size
- Flyout buttons appear when you use an ability that has multiple options, like mage portals or summoning a hunter pet.
- Lock ActionBars
- Check this box to prevent accidentally moving the abilities on your bars.
- Auto Add New Spells
- Check this box to automatically fill your action bars with new spells as you acquire them.
- Colors
- These settings apply color overlays based on certain conditions so you can quickly see what abilities are not usable and why.
- Casting
- Here you can set modifier keys to cast spells on specific targets, including your mouseover target, your focus target, or yourself. These modifier keys will work in combination with all of your keybinds. Note that this may conflict with other addons that provide mouseover casting.
- Apply To All
- This section affects the font and positioning of all action bar text, such as keybind text and cooldown text.
The Player Bars tab has options for all of your regular action bars. Underneath the top tabs is another set of tabs numbered 1-15. Each of these tabs applies settings to a different action bar. There is no way to apply settings to all 15 action bars – they must be adjusted individually.
There are eight action bars available in the game by default. Action bars 9-15 are added by ElvUI.
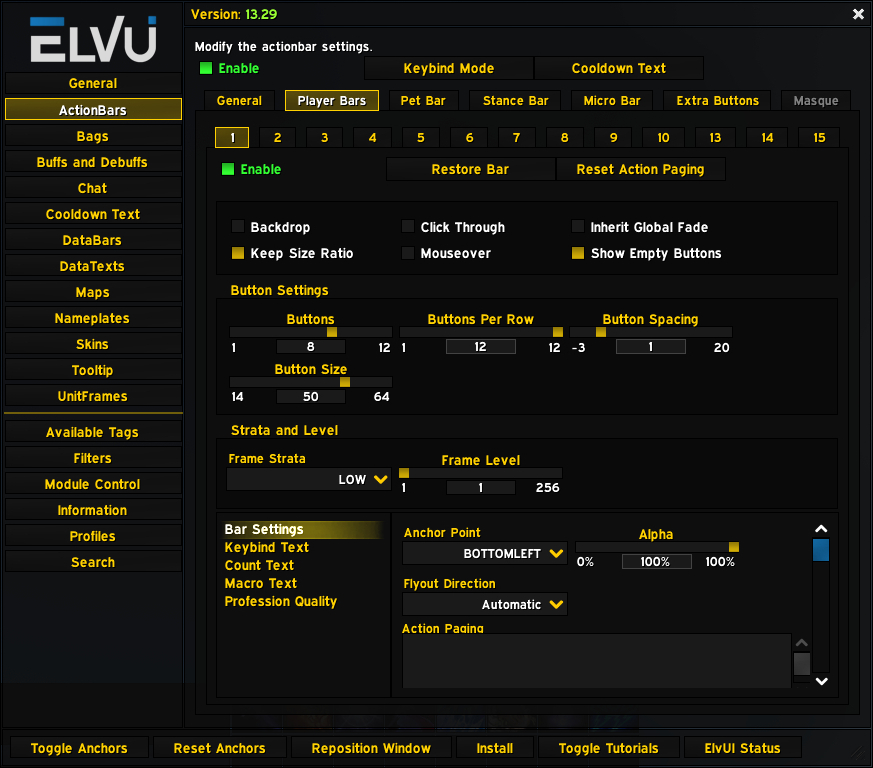
- Enable
- Checking this box on any action bar’s page will allow that action bar to appear on the screen.
- Restore Bar
- Clicking this button will reset all of the settings for the selected bar to the default. Be careful, there’s no undoing this!
- Backdrop
- Checking this box will show a framed box for the selected action bar, instead of just floating buttons.
- Click Through
- If this is checked, the bar will be unclickable. You’ll have to activate the abilities via keybind.
- Mouseover
- If this is checked, you will only see the bar when you mouse over its location on the screen.
- Show Empty Buttons
- If this is checked, buttons that do not have an ability on them will still appear as an empty frame.
- Buttons
- Move this slider to hide some of the buttons on this bar. Setting it to 12 shows all of them.
- Buttons Per Row
- This slider can split up your bar into different columns.
- Strat and Level
- If your bars are appearing behind some other UI element, you may want to adjust these settings to bring it to the front.
- Bar Settings
- You can change the Anchor Point of your bar to determine the direction the bar extends. Flyout Direction applies to buttons that have a menu, such as mage portals and hunter pets.
- Keybind Text/Count Text/Macro Text/Profession Quality
- Each of these sections applies to a type of text that appears on the action bar.
The Pet Bar tab has settings for the pet’s action bar. Most of these settings are the same as those in the Player Bars tab.
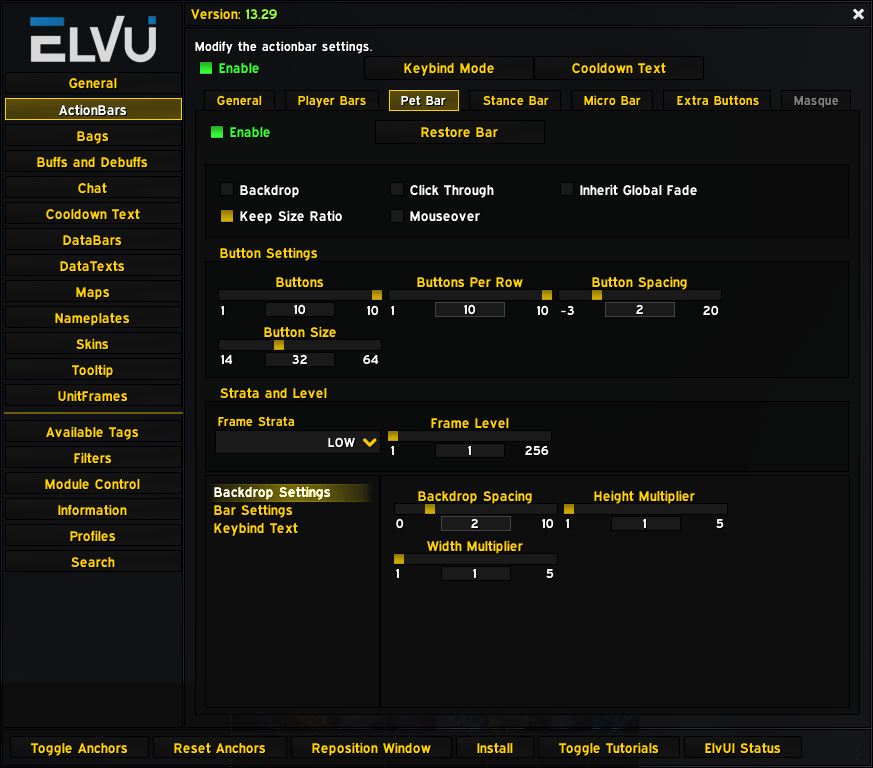
- Backdrop Settings
- You can adjust the Visibility State of the bar here so that it shows or hides under certain conditions.
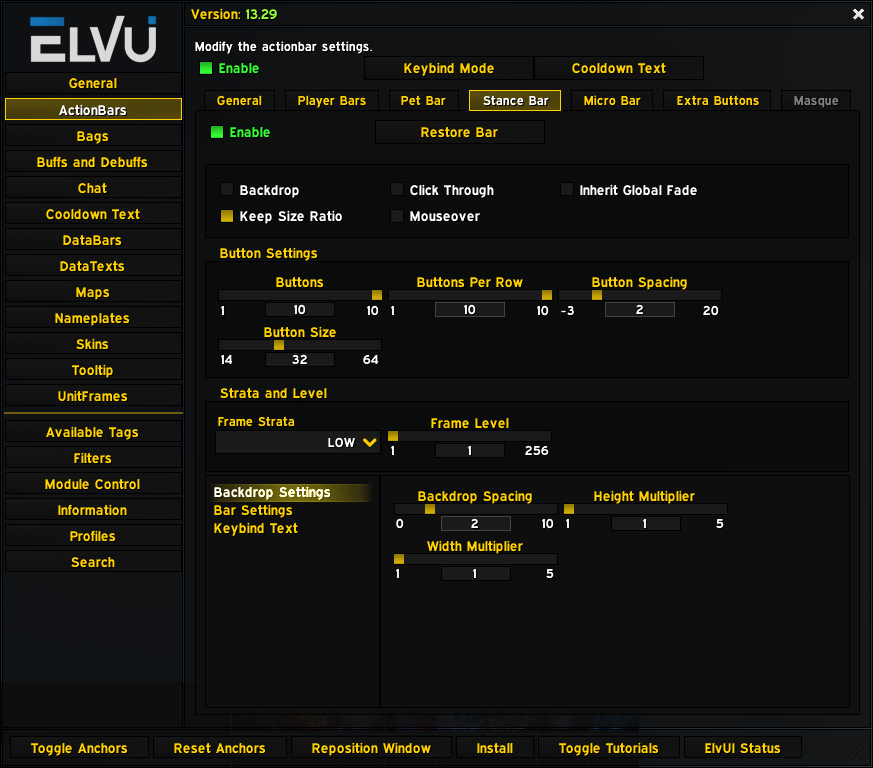
The Stance Bar tab has settings for the stance action bar – a special bar that is used for things like druid shapeshifting. The settings here are exactly the same as those in the Pet Bar.
The Micro Bar tab has settings for the game’s micro bar, which is the bar that has buttons to open game menus like Achievements and Group Finder. Many of the options here are similar to those in the Player Bars tab.
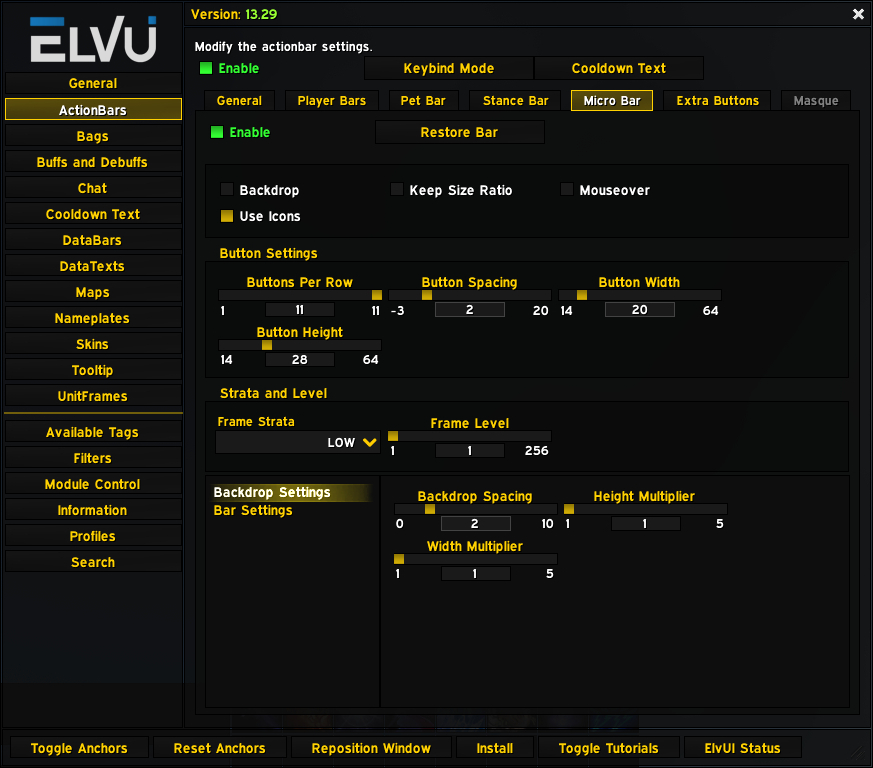
- Use Icons
- Checking this will use the game’s icons for the menu. Unchecking it will use grayscale ElvUI buttons.
- Bar Settings
- You can adjust the Visibility State of the bar here so that it shows or hides under certain conditions.
The Extra Buttons tab has settings for various special buttons that appear in the middle of your screen when you are in certain zones or in a vehicle.
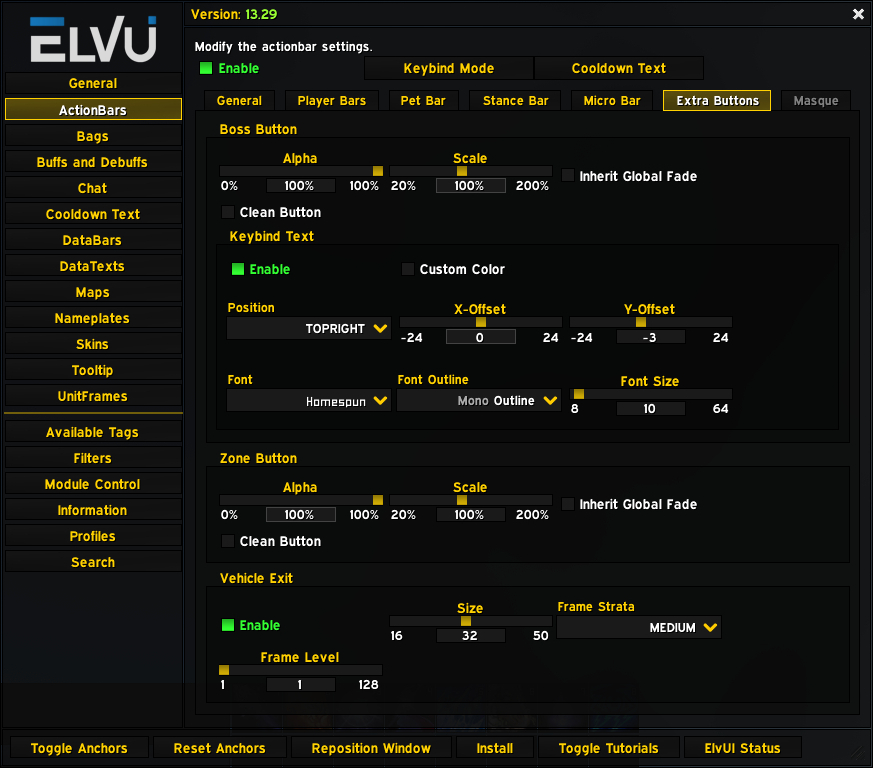
- Boss Button
- This section has settings for the big button that appears when you are fighting a boss and a special ability becomes available.
- Clean Button
- This option will get rid of the frame around the button and make it a plain ElvUI style button instead.
- Keybind Text
- Here you can enable the associated keybind to appear on the button as text, and adjust how it looks.
- Zone Button
- These settings apply to buttons that only appear in certain zones.
- Vehicle Exit
- These settings apply to the red arrow button that appears when you are in a vehicle or on a flight path.
The Bags section has all of the settings for your bags as well as a couple of neat organizing features for your inventory. We’ll go through the different tabs located at the top of the page.
The General tab covers settings that apply to bags overall.
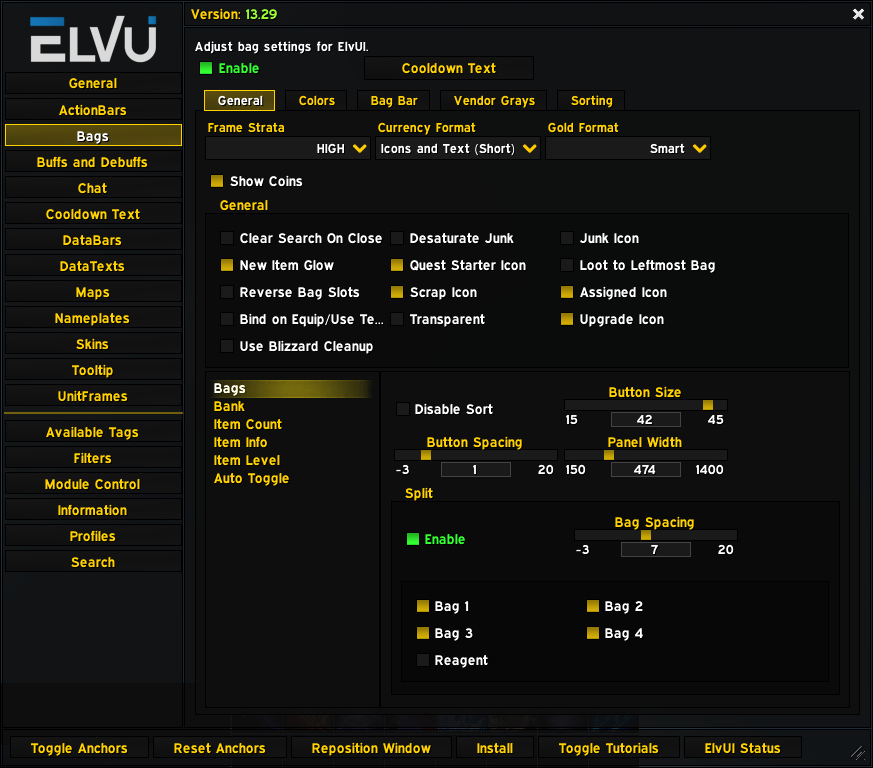
- General
- There are several checkboxes here to make loot stand out in your bags for easier organizing. They are either self-explanatory or have some helpful text if you hover over them.
- Bags
- These settings apply to your character’s inventory.
- Bank
- These settings apply to your character’s bank inventory.
- Item Count/Item Info/Item Level
- These settings apply to the text that appears on individual items in your bags.
- Auto Toggle
- Automatically open your inventory any time you access certain game menus.
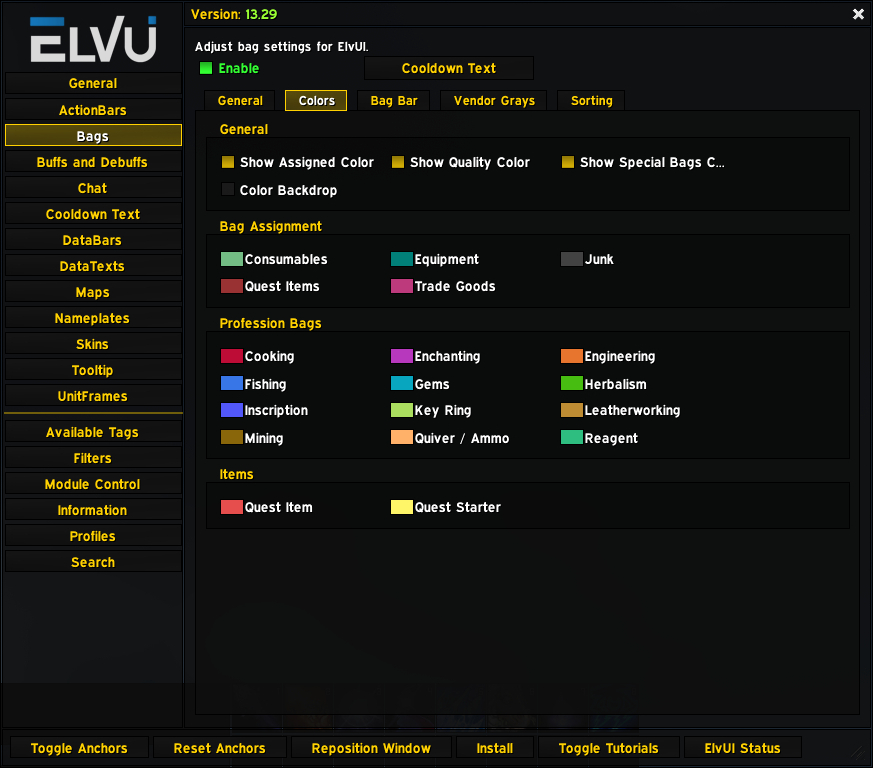
The Colors tab has settings to change the border that appear around items in your bags based on their quality, purpose, and other settings.
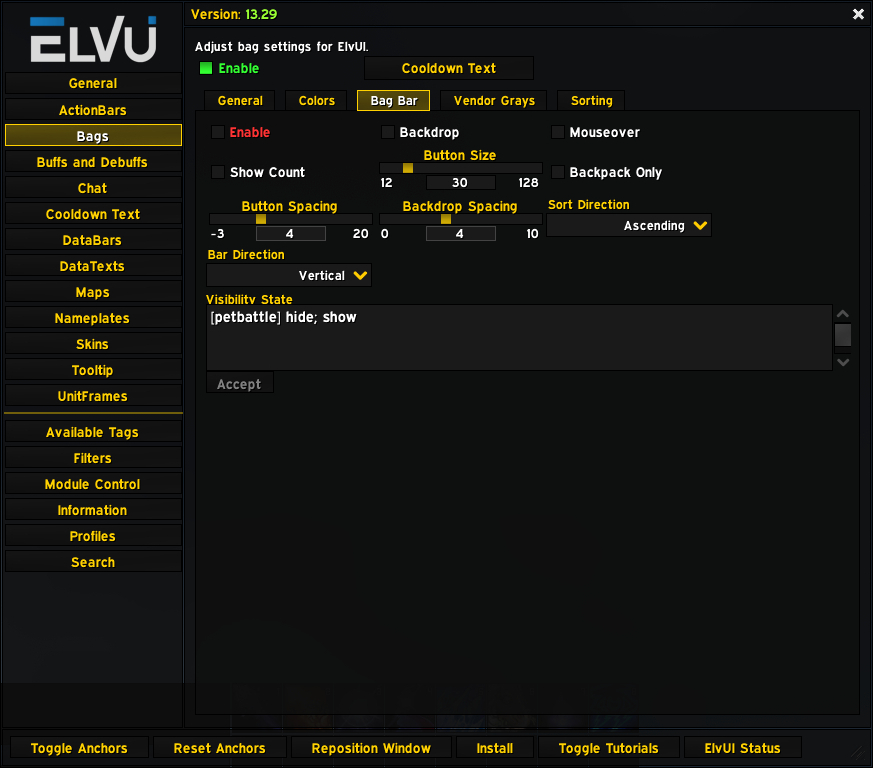
The Bag Bar has settings to affect the display of your inventory bags as an action bar. You can select Backpack Only to have the backpack appear as a lone button, or you can display or hide the full bar.
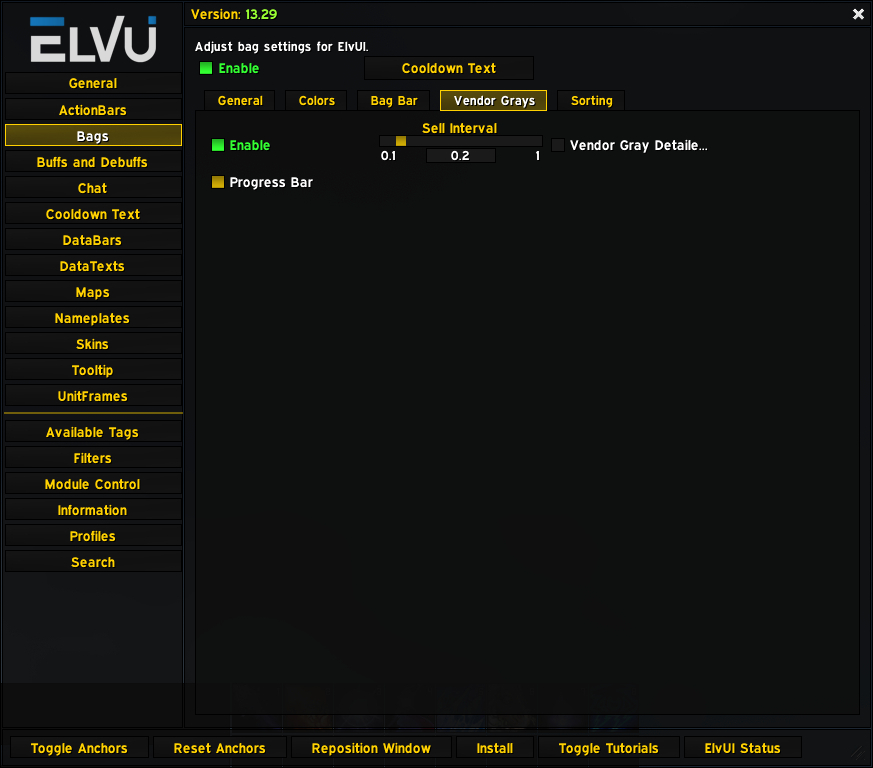
The Vendor Grays tab has options to automatically sell all of your junk when you visit a vendor.
The Sorting tab has options for automatic inventory sorting. This page determines what happens when you hit the Sort Bags button in your inventory.
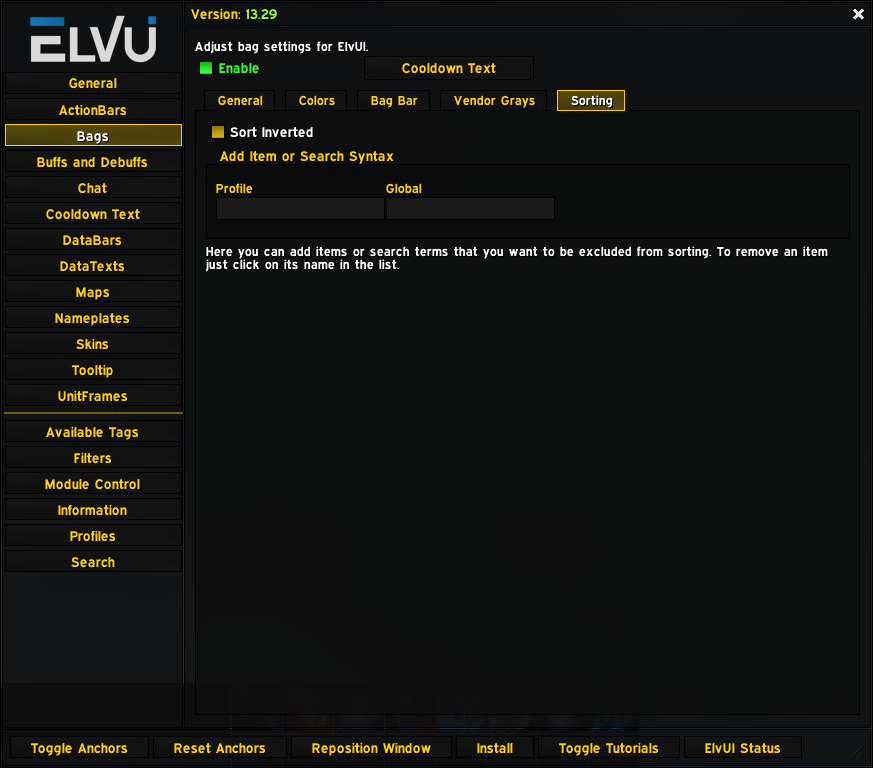
- Sort Inverted
- If checked, this setting will reverse the direction the Sort Bags function will place your items.
- Add Item or Search Syntax
- Items entered into these text boxes will be excluded from sorting. Choose to exclude for a specific profile or globally.
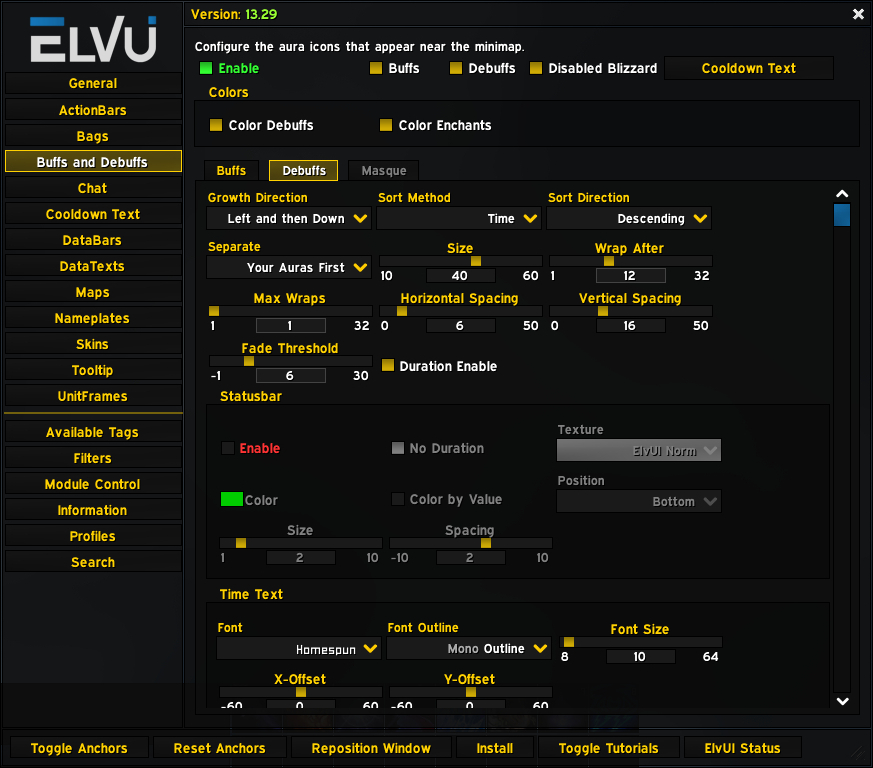
The Buffs and Debuffs section lets you configure how your auras appear. The tabs for Buffs and Debuffs are identical. There is an additional tab available here if you have the Masque addon installed.
The Buffs tab contains settings that are specific to your beneficial auras.
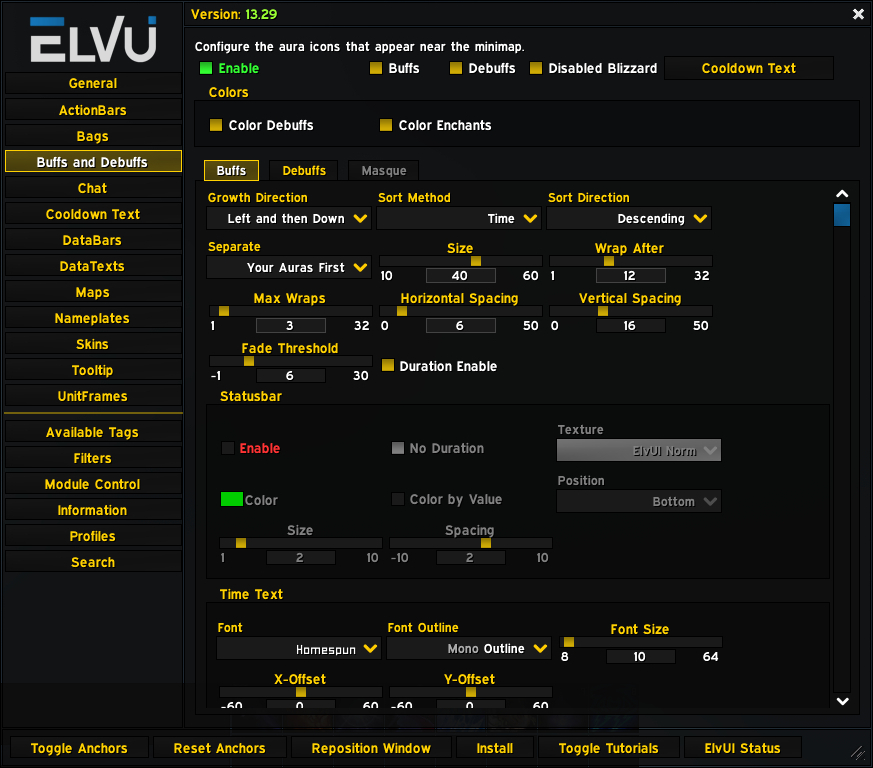
- Growth Direction
- This determines which direction your icons extend from their origin.
- Sort Method/Sort Direction
- Choose what order the UI will put your aura icons in.
- Separate
- Choose whether your own auras will appear separately from those cast on you by others.
- Statusbar
- Settings to enable and adjust a timer bar underneath each aura’s icon.
- Time Text/Count Text
- Settings to change how count and timer text will appear on your buff icons.
The Buffs tab contains settings that are specific to your hostile auras. The options are all exactly the same as those in the Buffs tab.
The Chat section is where you can customize your chat frames. We’ll go through the two tabs located at the top of the page.
The General tab has most of the chat settings – anything not related to the panels themselves.
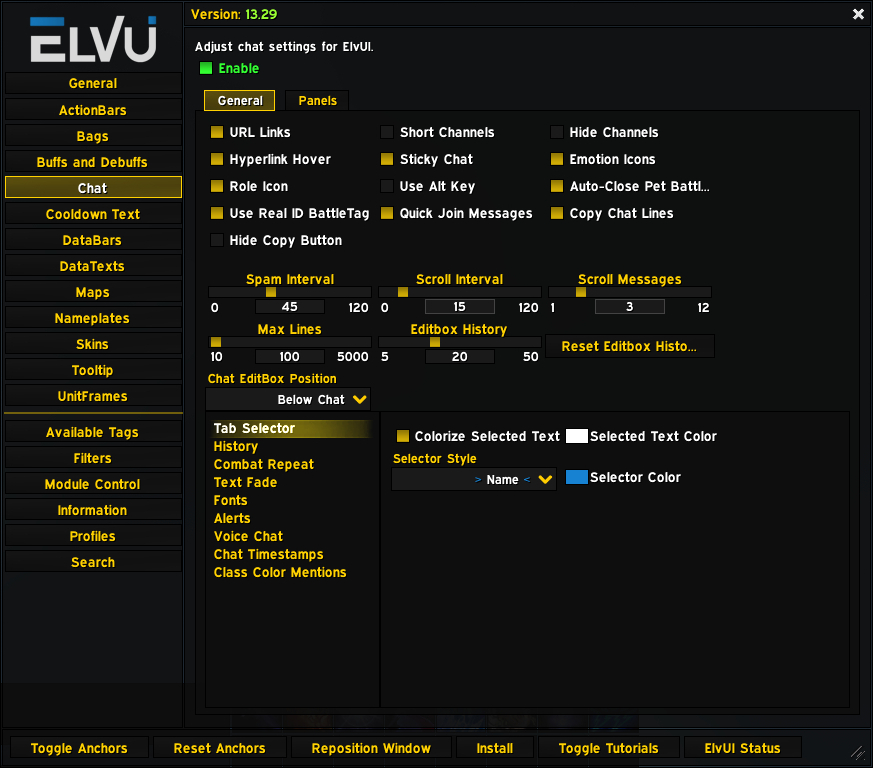
- There are several checkboxes at the top of the pane for enabling/disabling various chat features. Hover over each to view a helpful tooltip.
- Spam Interval
- Hide repeated messages within a certain window of time. Great for reducing clutter in a busy or spam-prone chat channel such as Trade.
- Editbox History
- Hitting the up and down arrows on your keyboard with the chat edit box open will let you scroll through previously typed messages. Useful when you need to repeat yourself. This setting controls how many previous messages are stored.
- Chat EditBox Position
- Choose whether you will type your messages above or below the chat pane.
- Tab Selector
- Choose the symbols and color that will indicate your currently selected chat tab.
- History
- Decide what will be stored from your chat history when you log out or reload.
- Combat Repeat
- This feature closes the chat text box when you repeat characters while in combat, so you don’t accidentally type out your rotation into your chat.
- Text Fade
- Fades the chat window after a configurable amount of inactive time has passed.
- Fonts
- Settings for the chat window and tab font.
- Alerts
- Set up alerts for activity in certain channels, or based on keywords. An alert for whispers is set up by default but can be disabled here.
- Voice Chat
- Settings for the voice chat buttons on the chat window.
- Chat Timestamps
- Choose how timestamps will appear in your chat channels.
- Class Color Mentions
- You can color character names by class, with an option to exclude certain names.
The Panels tab has settings for the background panels that frame the chat windows.
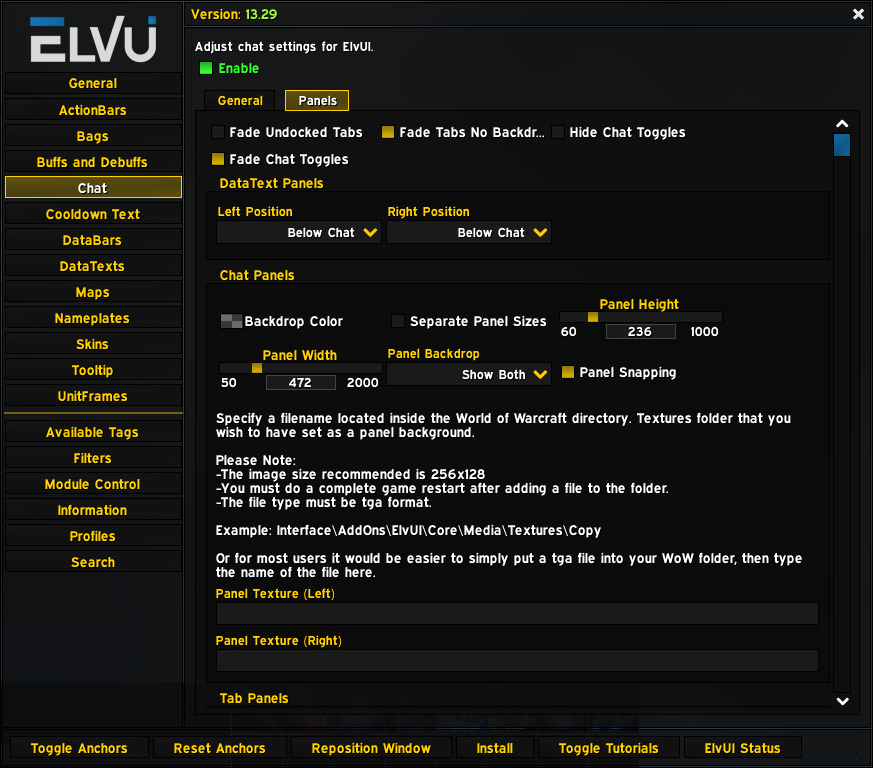
- Fade Undocked Tabs/Fade Tabs No Backdroup/Fade Chat Toggles
- Check these boxes to determine what chat window elements will fade with inactivity.
- DataText Panels
- These are the info panels that appear below the chat windows by default. You can change their location here.
- Backdrop Color
- This option lets you select not only the color, but the transparency of the chat panels.
- Separate Panel Sizes
- Check this box to set the sizes of the two chat panels independently. Otherwise they will use the same sliders.
- Panel Backdrop
- Choose whether to show a backdrop behind one or both chat windows.
- Panel Texture
- Here you can select a custom graphic to display behind either chat panel. Detailed instructions for how to do this are right above the text boxes.
- Tab Panels
- You can toggle the backdrop and transparency for the tabs at the top of the chat windows.
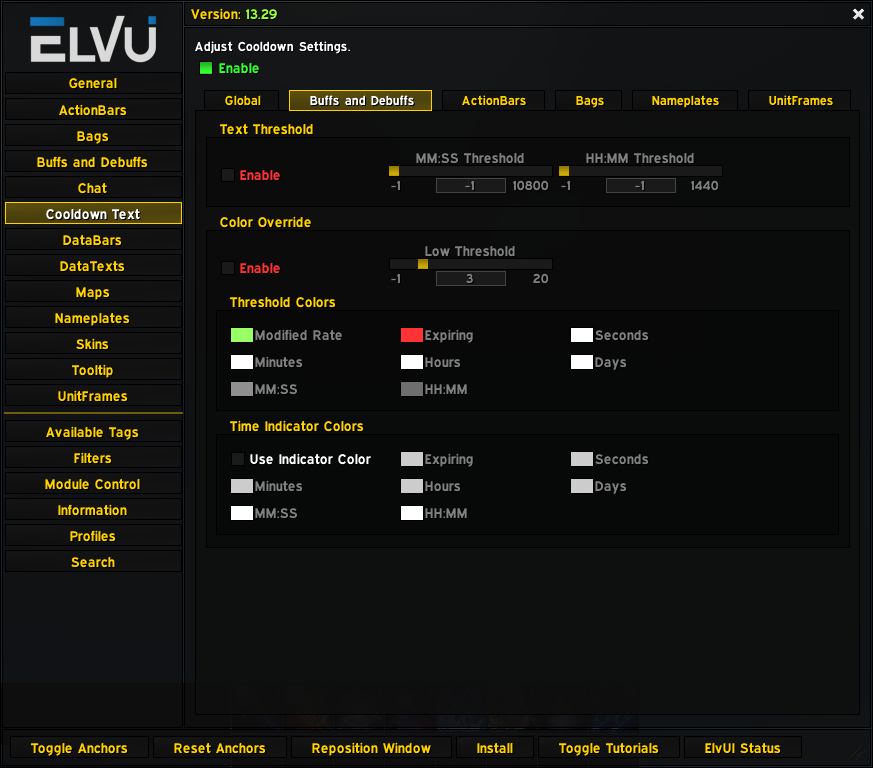
The Cooldown Text section lets you customize the way that text appears on your abilities when they are on cooldown. Most of the tabs in this section are very similar.
The Global tab has some general settings that affect all of the different types of cooldown text.
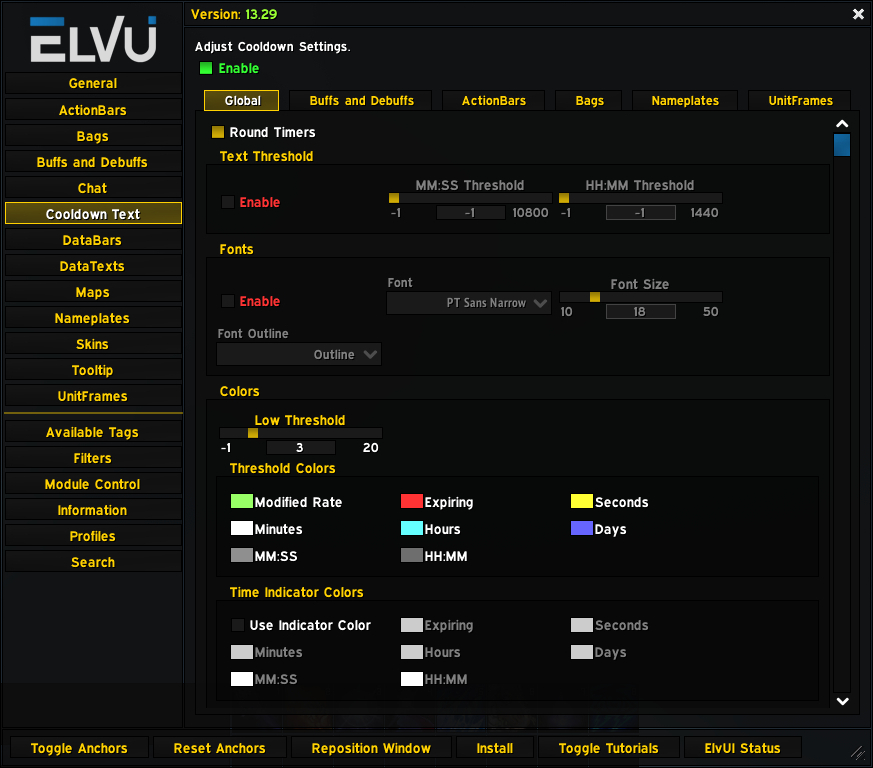
- Round Timers
- If this option is checked, times will be rounded instead of shown exactly.
- Text Threshold
- These settings adjusts when timers are shown in terms of hours versus minutes.
- Fonts
- These settings adjust the font style and size of all cooldown text.
- Colors
- These settings adjust the coloring of cooldown text based on certain conditions.
The Buffs and Debuffs tab has settings for buff and debuff cooldown text. These settings override any settings in the Global tab.
The ActionBars tab has settings for cooldown text that appears on action bars. These settings override any settings in the Global tab. There are also a couple of settings here that are not available globally.
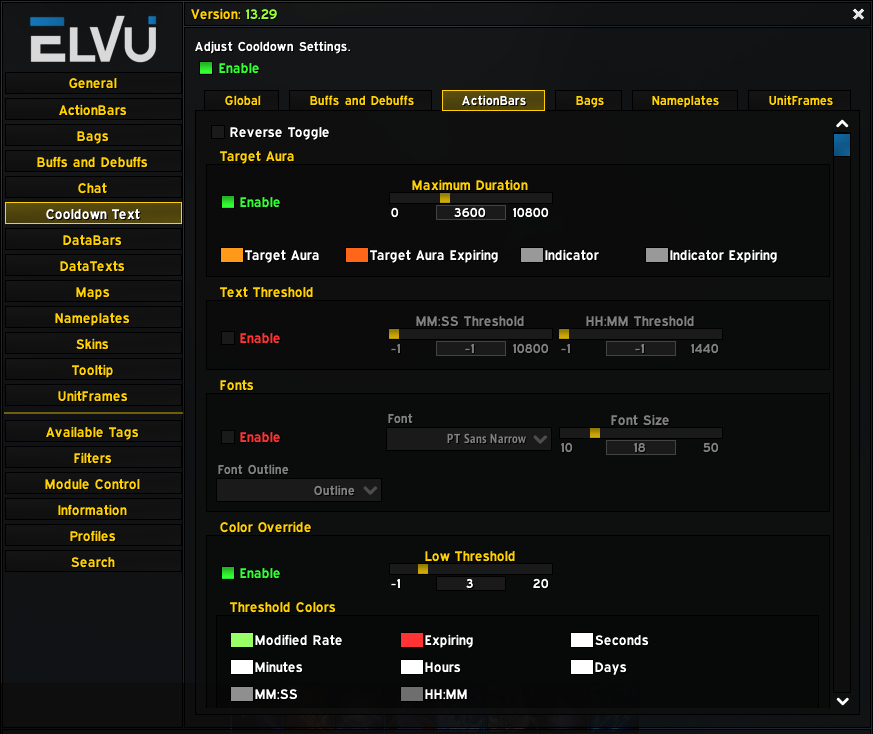
- Reverse Toggle
- If this is checked, action bar cooldown text will show if the global setting is disabled, or hide if the global setting is enabled.
- Target Aura
- These settings adjust the cooldown text on a buff or debuff based on your current target.
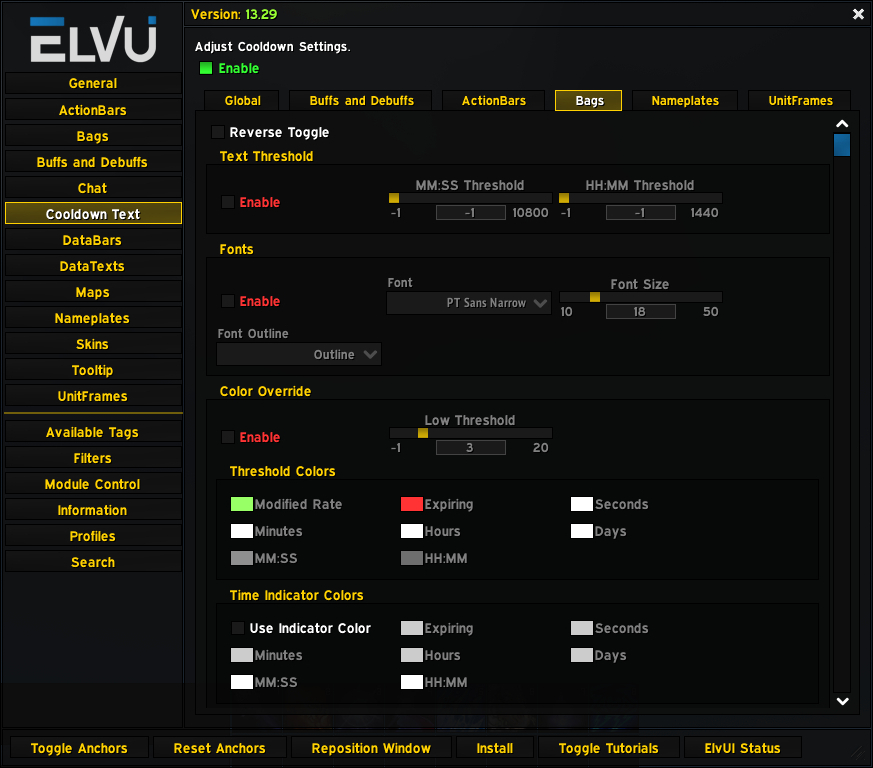
The Bags tab has settings for cooldown text that appears in inventory windows. These settings override any settings in the Global tab.
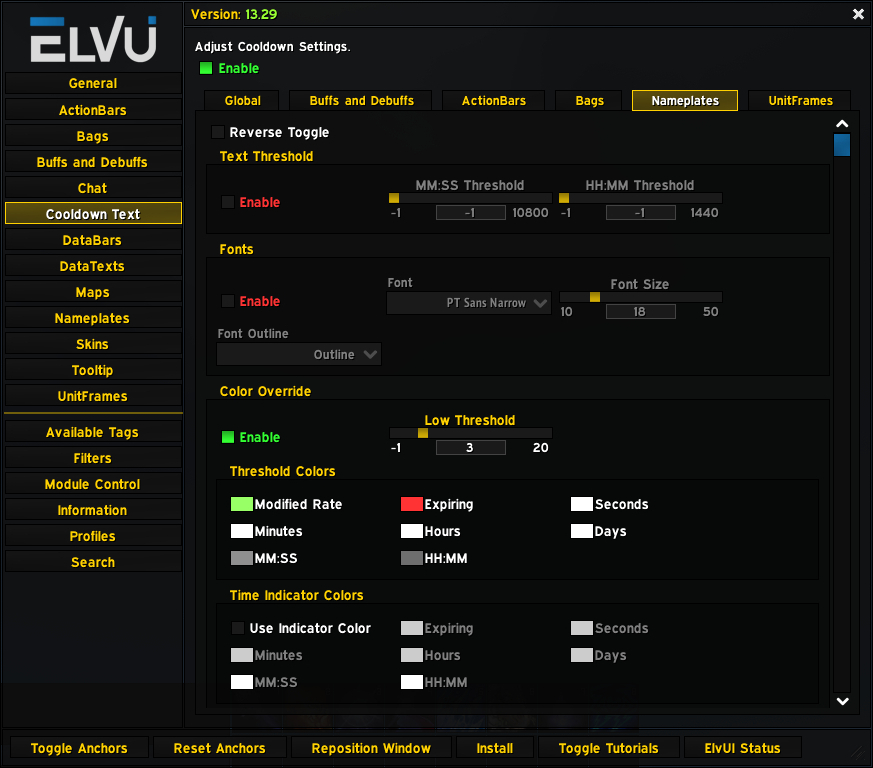
The Nameplates tab has settings for cooldown text that appears on nameplates. These settings override any settings in the Global tab.
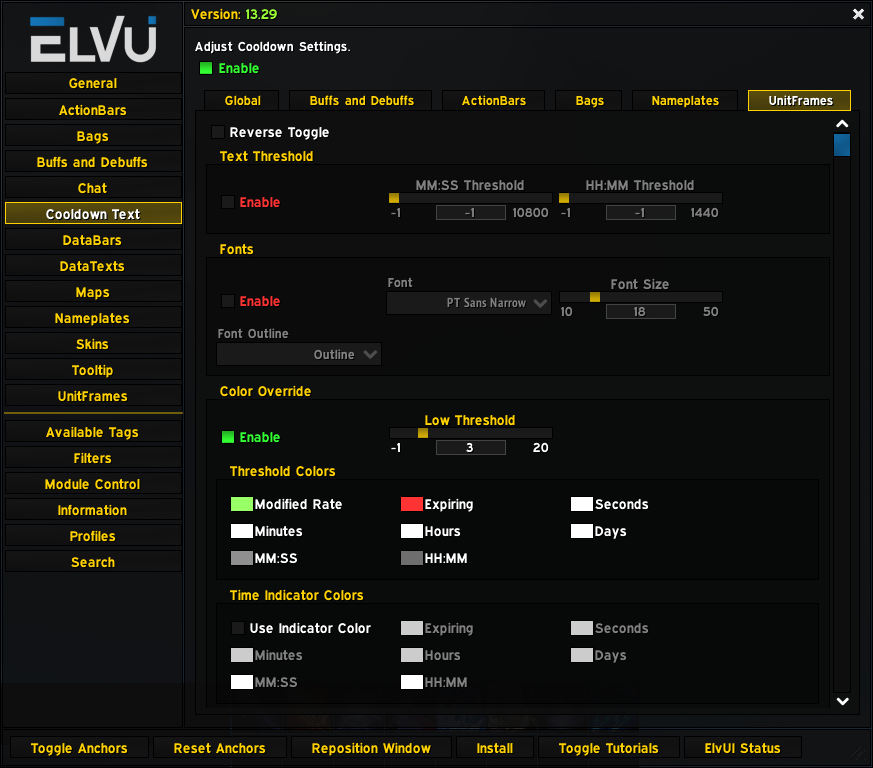
The UnitFrames tab has settings for cooldown text that appears on unit frames. These settings override any settings in the Global tab.
The DataBars section is where you can edit the bars for experience, reputation, and the like. We’ll go through the tabs located at the top of the page.
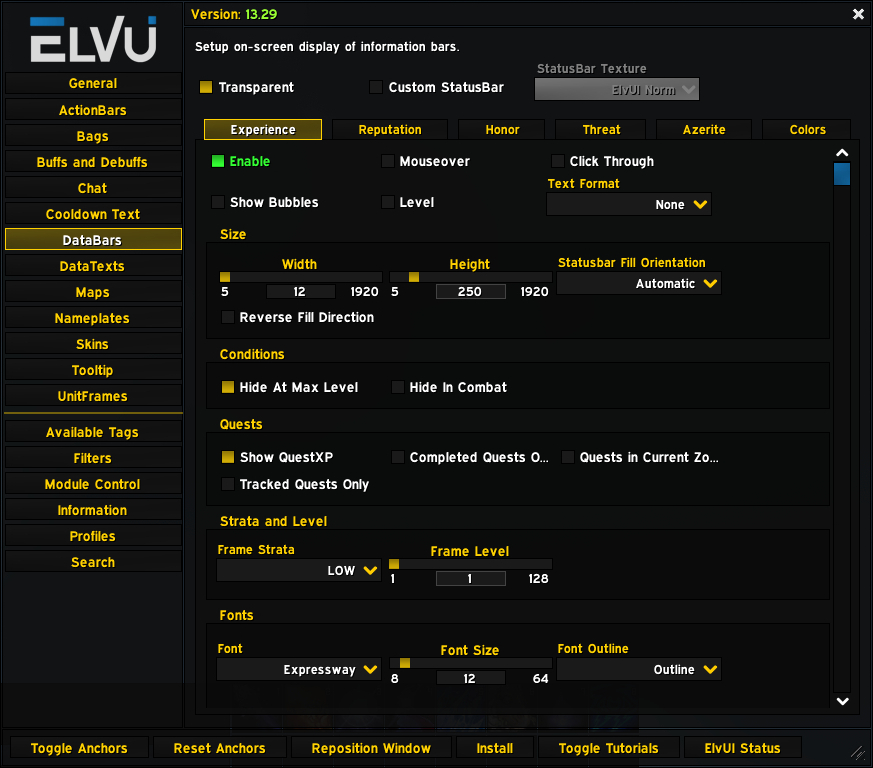
The Experience tab is where you can modify the appearance of your experience bar.
- Mouseover/Click Through
- Choose if your experience bar only appears when you mouse over it, and whether it can be clicked.
- Show Bubbles
- This option enables incremental lines within the bar, similar to the default UI’s “bubbles.”
- Level
- Choose whether to show your current level on the bar. This will only show up if the Text Format dropdown is not set to None.
- Size
- In this section you can choose the dimensions of your experience bar as well as its direction.
- Conditions
- Here you can choose to hide the experience bar under certain conditions.
- Quests
- These options will fill your progress bar according to the quests you are currently working on so you can see how far you will level when you turn them in.
- Strata and Level
- If your experience bar is blocking or being blocked by another UI element, you can adjust its position here.
- Fonts
- You can change the look of the text that appears on your experience bar.
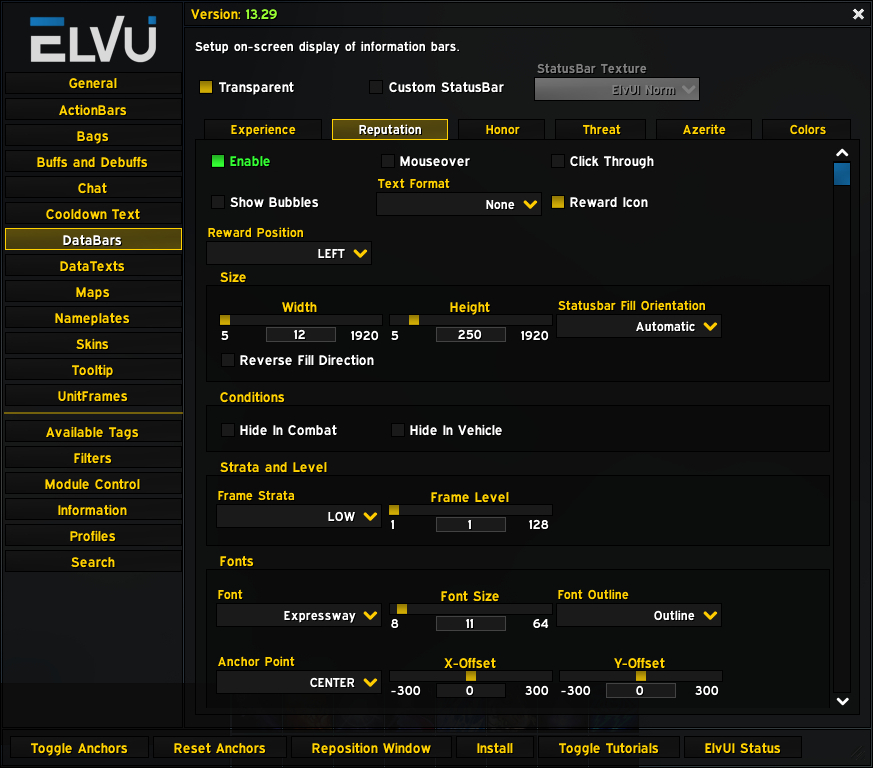
The Reputation tab is where you can modify the look of your reputation bar. The settings here are mostly the same as those in the Experience tab.
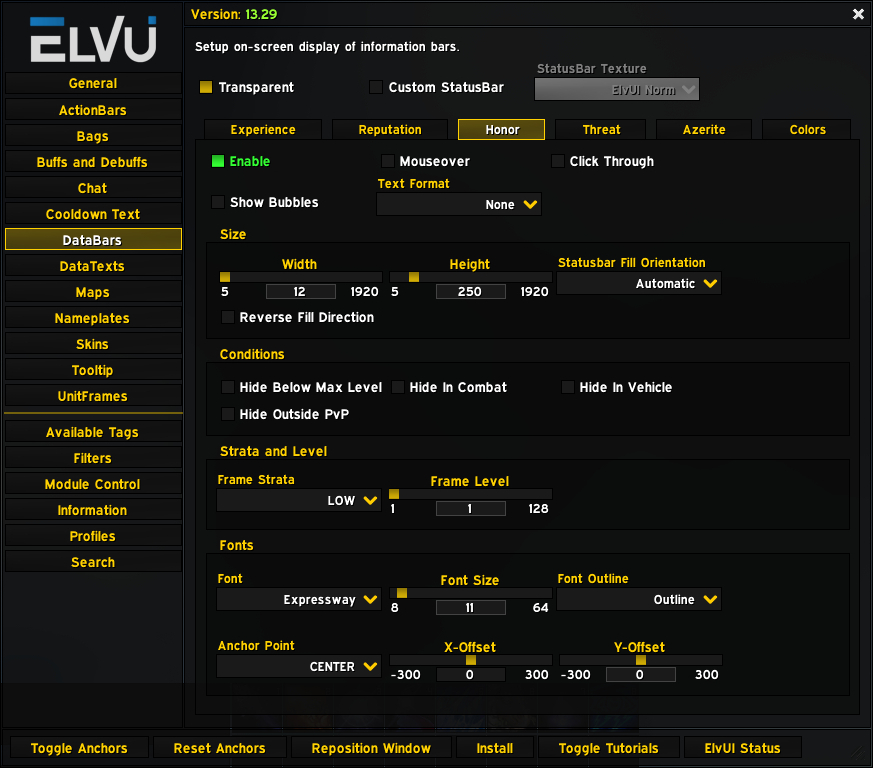
The Honor tab is where you can modify the look of your honor bar. The settings here are mostly the same as those in the Experience tab.
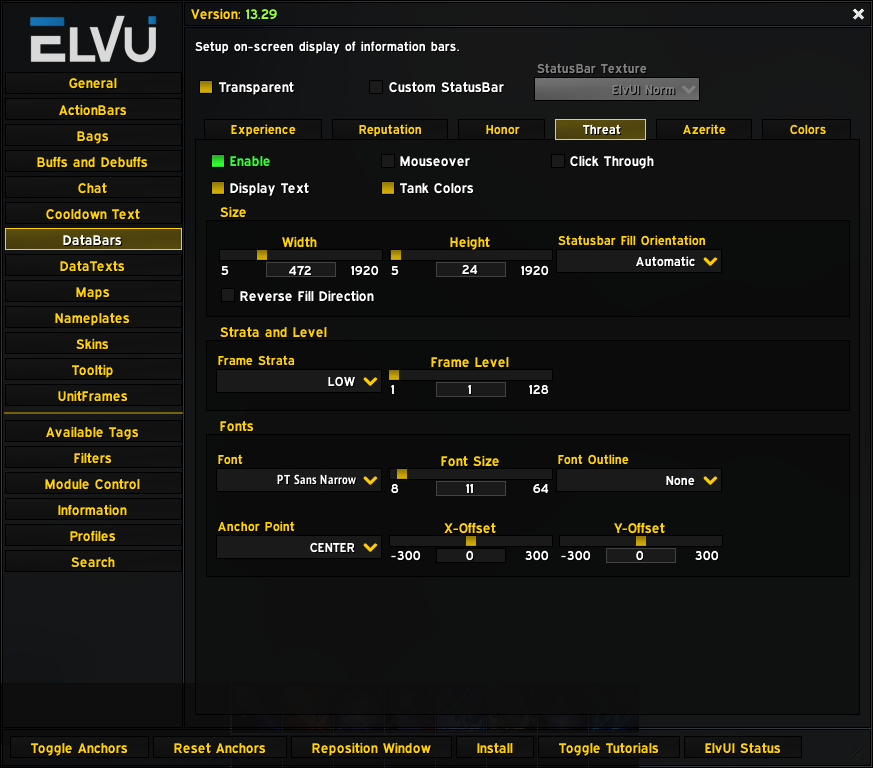
The Threat tab is where you can modify the look of your threat bar. The settings here are mostly the same as those in the Experience tab.
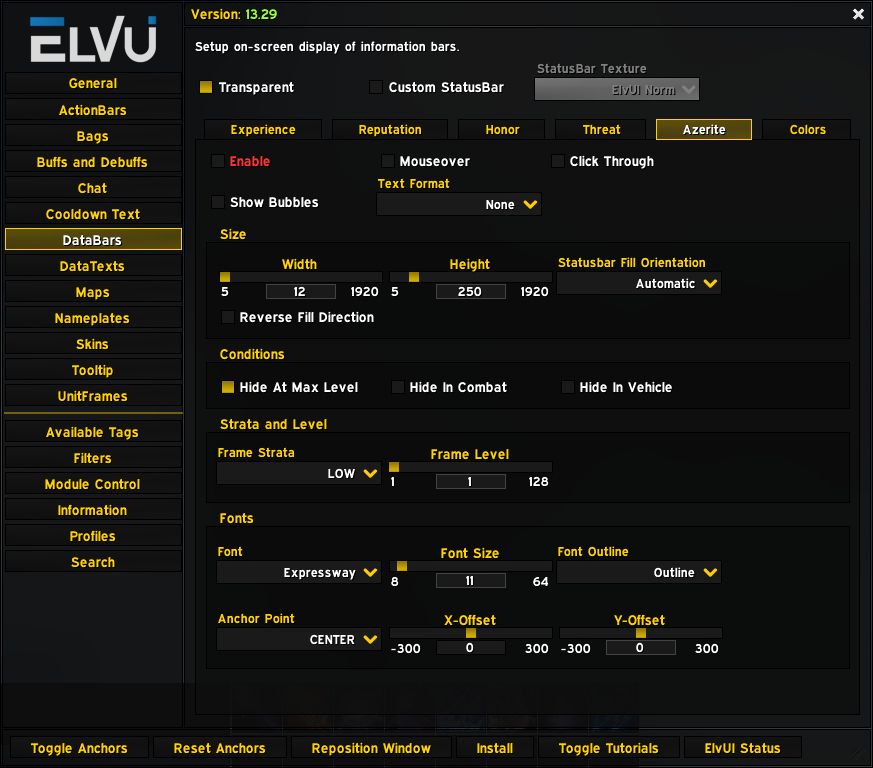
The Azerite tab is where you can modify the look of your azerite bar. The settings here are mostly the same as those in the Experience tab.
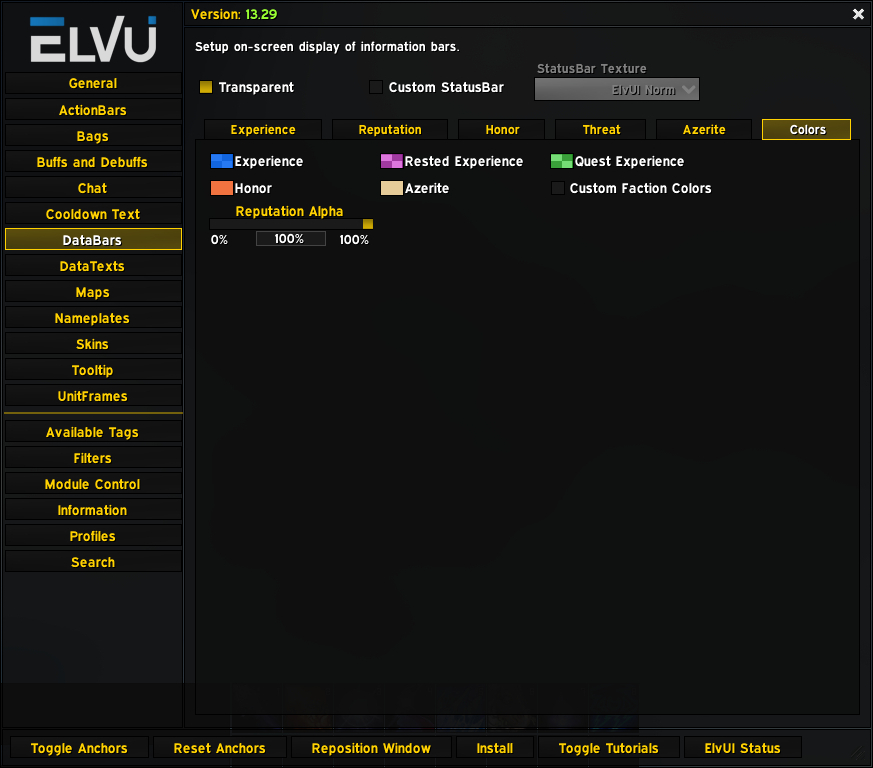
The Colors tab is where you can adjust the colors and transparency of your various data bars.
The DataBars section is where you can customize the info texts that display in your panels. We’ll go through the tabs located at the top of the page.
The General tab has some settings that affect all of your datatexts.
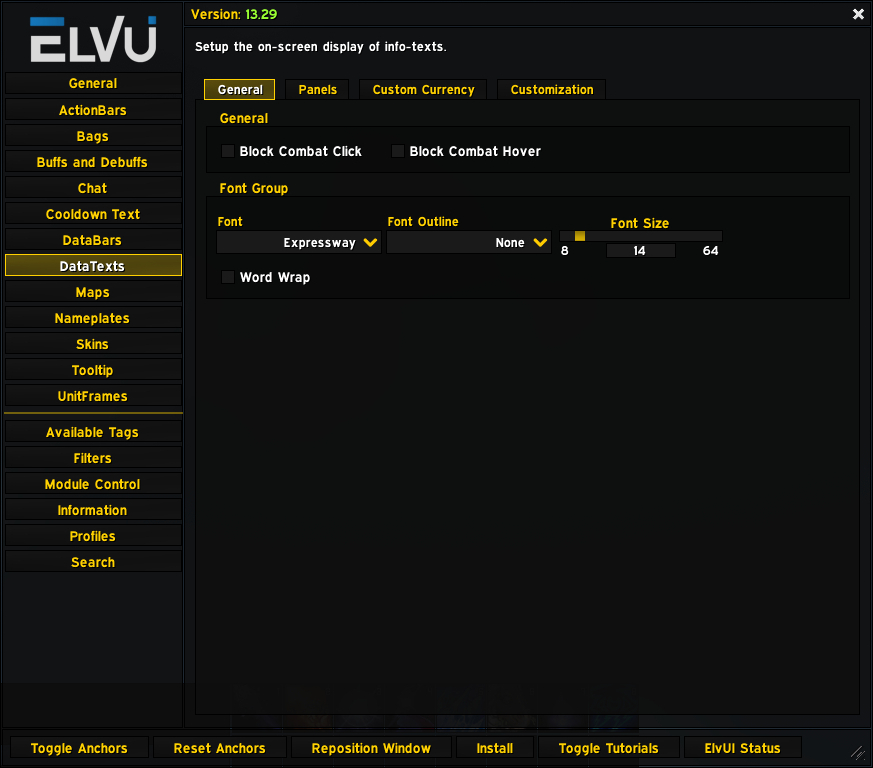
- Block Combat Click
- Check this box if you don’t want to be able to click on datatexts during combat.
- Block Combat Hover
- Check this box if you don’t want to be able to see datatext tooltips when you hover over them in combat.
- Font Group
- Here you can change the look of the text in all of your datatexts.
The Panels tab has settings that are specific to each datatext panel, including which datatexts appear inside them.
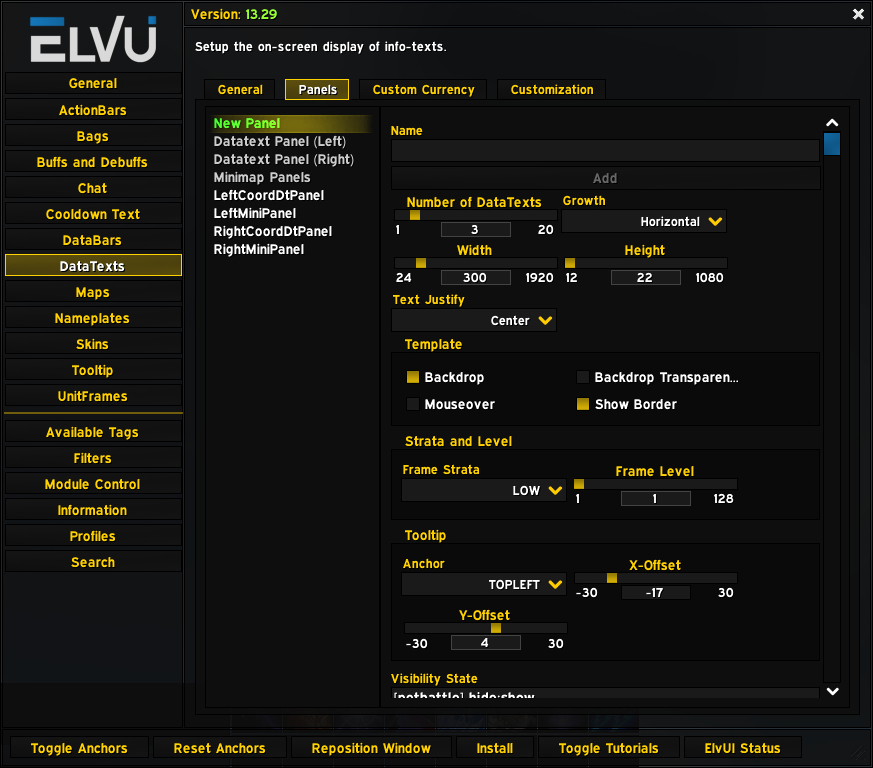
- New Panel
- Here you can create your own custom datatext panel and adjust its appearance.
- Datatext Panel (Left)/Datatext Panel (Right)
- These are the panels that appear underneath the chat windows by default. You can choose up to three datatexts for each of them, and enable or disable their backdrop, border, and transparency.
- Minimap Panels
- This is the panel that appears underneath the minimap by default. You can choose up to two datatexts to appear here.
- There may be other panels here, especially if you have other addons installed. The settings for these should be similar to the others.
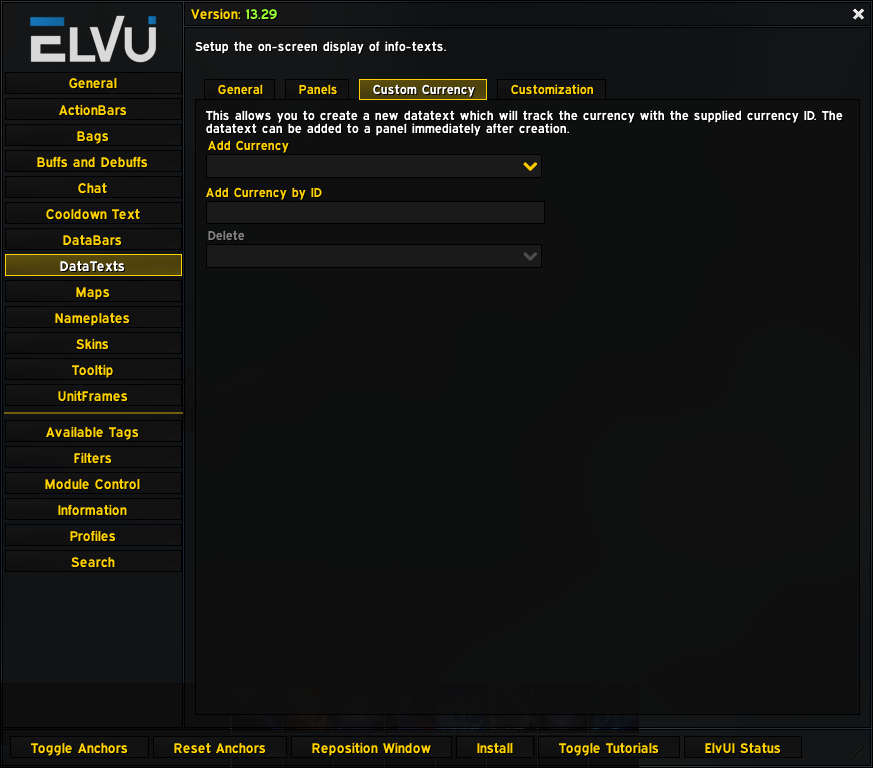
The Custom Currency tab allows you to track any currency you choose in a custom datatext. You just need the currency’s in-game ID number.
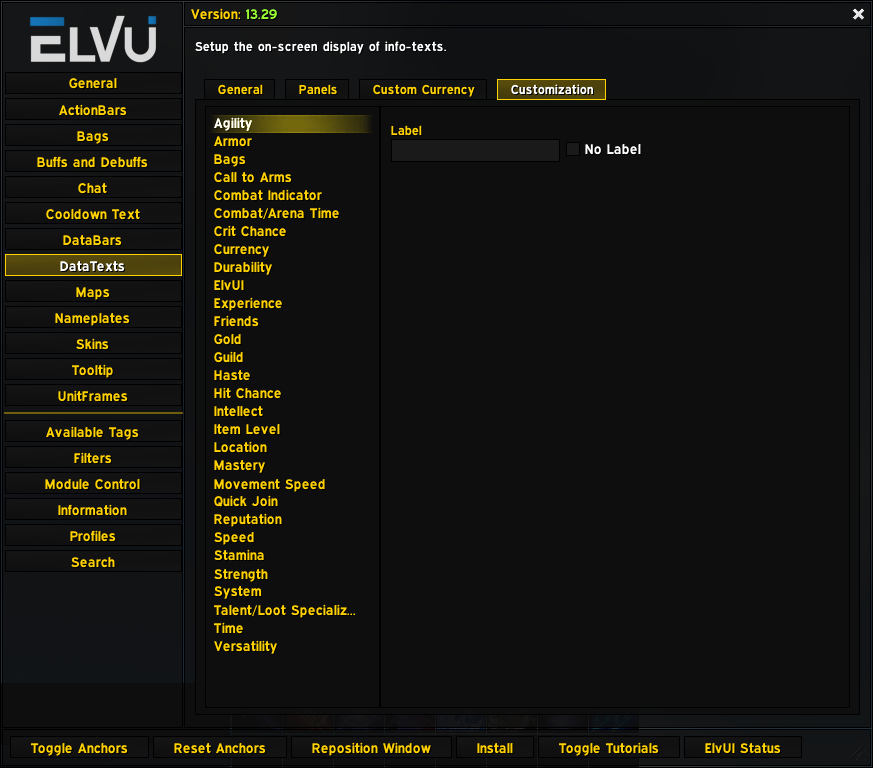
The Customization tab is where you can modify settings for specific datatexts. Most of these options have an option to change how it is labeled in the data panels. Others have a few other settings and toggles.
The Maps section is where you can customize your world map and minimap. We’ll go through the two tabs located at the top of the page.
The World Map tab has settings that are specific to the large map you see when you hit the M key.
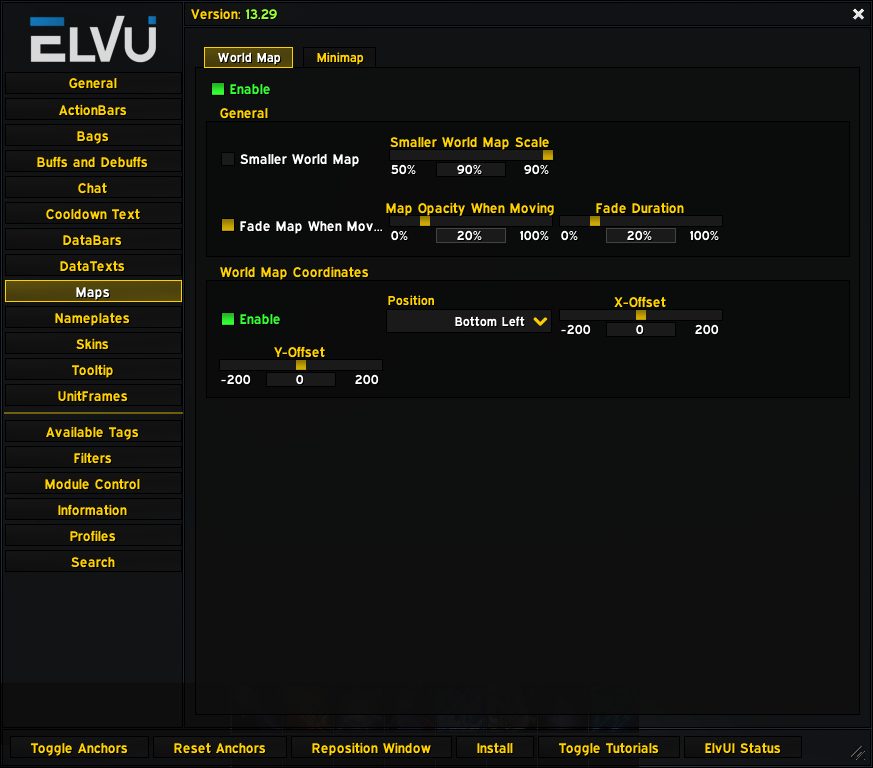
- Fade Map When Moving
- You can fade the world map when moving, and adjust how much it fades. A faded map can make it easier to see where you’re going, but harder to see the map itself.
- World Map Coordinates
- Adds zone coordinates to the world map – very useful for finding specific locations.
The Minimap tab has settings that are specific to the minimap, which is the smaller map that stays open in your UI.
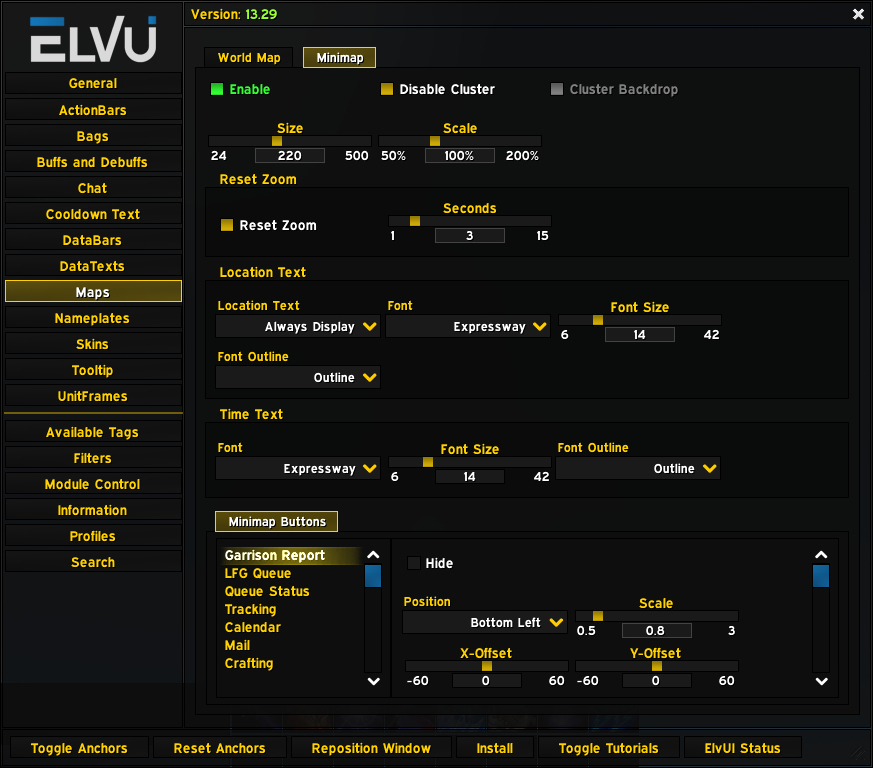
- Disable Cluster/Cluster Backdrop
- If Disable Cluster is unchecked, the current location info on the minimap will have its own panel and backdrop.
- Size/Scale
- Adjust Size to make the minimap bigger or smaller. Adjust Scale to also make the pins and nodes on the map bigger or smaller.
- Reset Zoom
- If checked, the minimap will automatically zoom all the way out after the given interval has passed.
- Location Text
- You can adjust when and how to display the name of your current location on the minimap.
- Minimap Buttons
- You can adjust the position and appearance of various Blizzard minimap buttons.
The Nameplates section is where you can modify the look of your nameplates. We’ll go through the two tabs located at the top of the page.
The General tab has settings that apply to all of your nameplates.
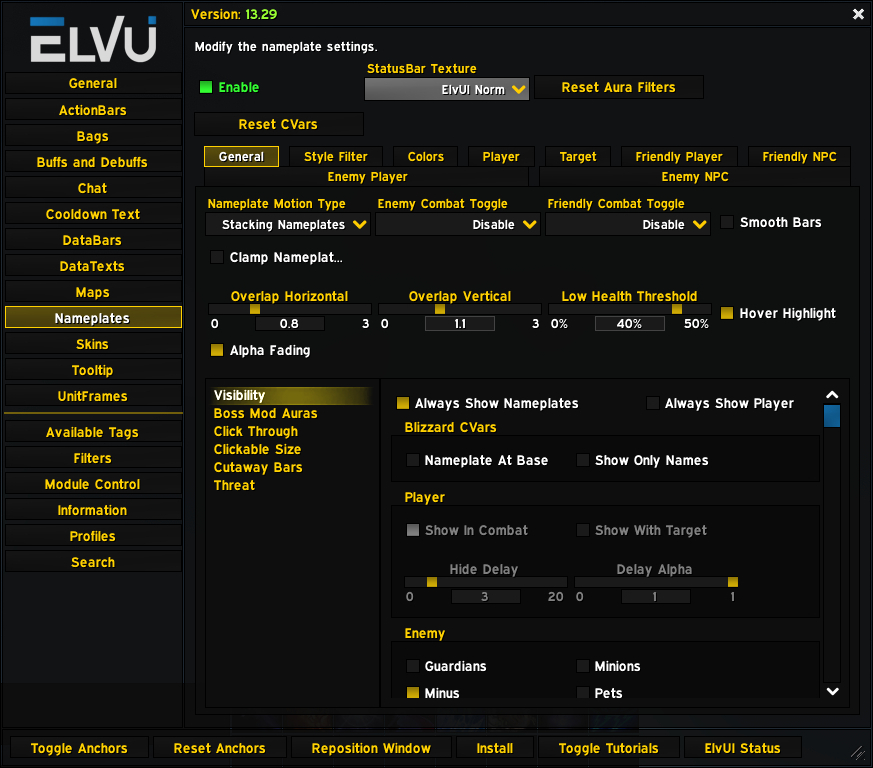
- Nameplate Motion Type
- This dropdown configures whether multiple nameplates in close proximity will overlap with each other or stack.
- Enemy/Friendly Combat Toggle
- Enable these to toggle nameplates when in combat. The toggle will switch from the default setting. So if nameplates are disabled by default, enabling here will enable nameplates in combat.
- Clamp Nameplates
- Check this box to always show nameplates, even when they are off screen.
- Visibility
- Choose which nameplates to enable. Overrides default Blizzard settings.
- Boss Mod Auras
- Adjust the settings for auras that are added to nameplates by boss mods.
- Click Through/Clickable Size
- Settings to determine which nameplates can be clicked and where.
- Cutaway Bars
- Shows chunks of health or power bars in a different color after they go up or down.
- Threat
- Adjust how you see your current threat status on nameplates.
The Style Filter tab allows you to customize your nameplates based on certain conditions.
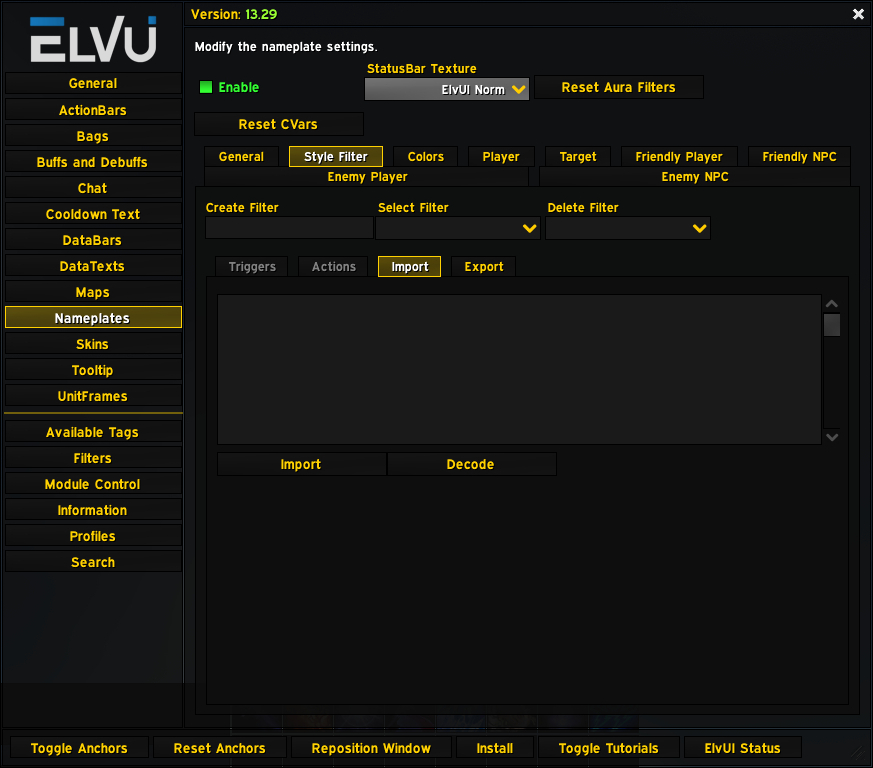
- Create/Select Filter
- Choosing a filter will open up a lot of options in the lower tabs.
- Triggers
- Select from a variety of triggers that will cause the style to apply to a nameplate.
- Actions
- Select what style will be applied when the trigger conditions are met.
- Import/Export
- You can use these options to share your style filters or install filters made by others.
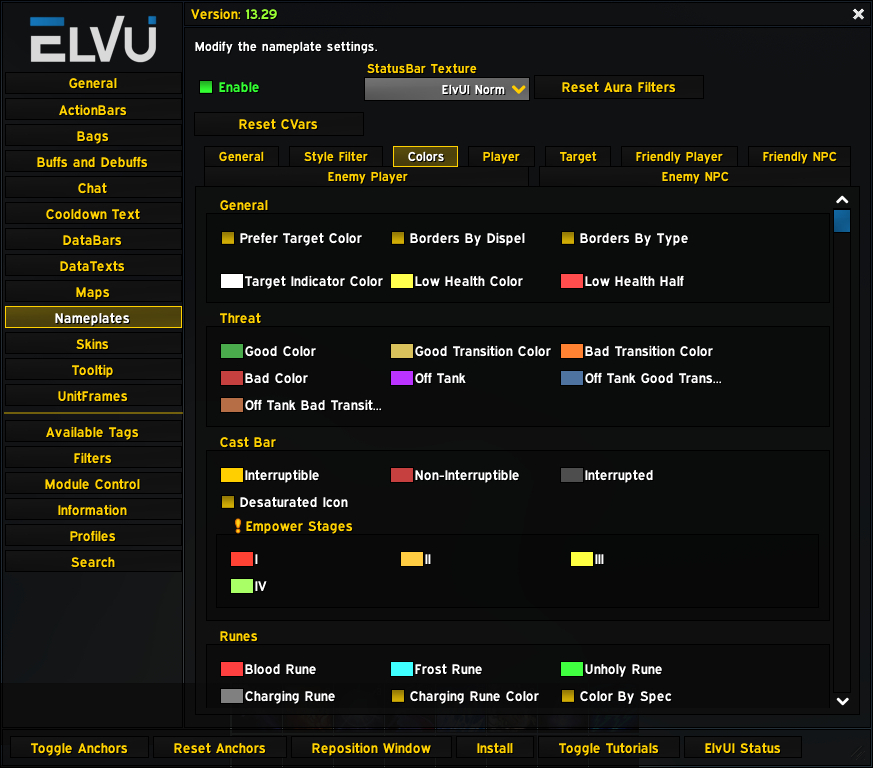
The Colors tab has options for changing the color and transparency of just about any element of the nameplates.
The Player tab has options for modifying the look of your own character’s nameplate.
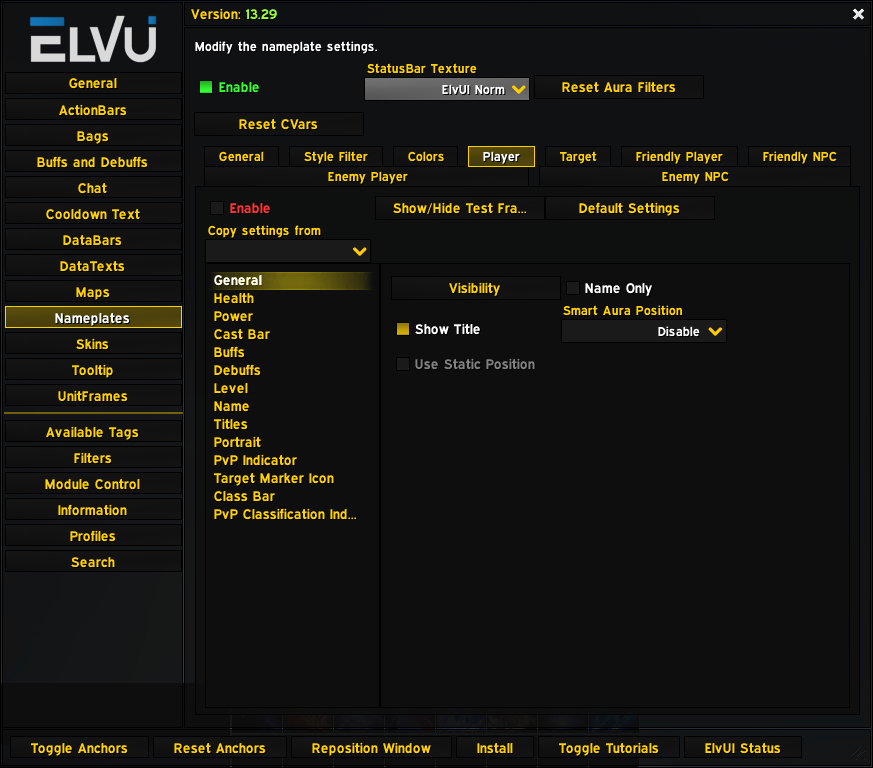
- Show/Hide Test Frame
- Enable an example version of the nameplate so you can see how everything displays.
- Copy settings from
- This dropdown allows you to copy all of the configuration options from another nameplate type.
The Target tab contains settings for your target’s nameplate. These settings are applied on top of the base nameplate (e.g., a friendly NPC nameplate if your target is a friendly NPC).
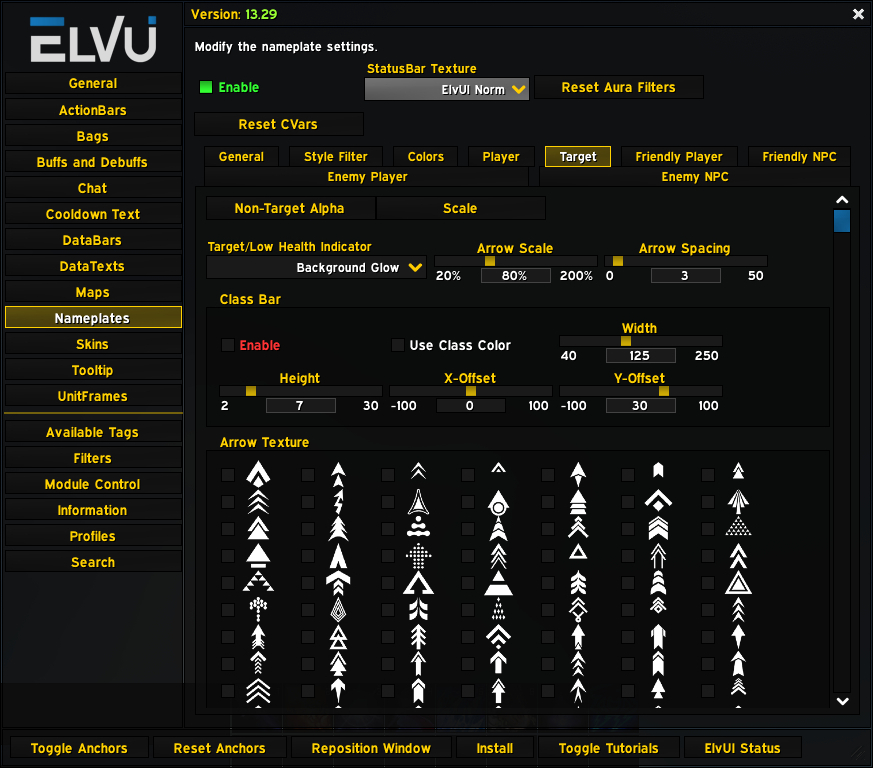
- Arrow Scale/Arrow Spacing
- These settings determine where the target indicator arrows appear on the nameplate.
- Class Bar
- You can give your target a class bar to see their combo points or other secondary resource.
- Arrow Texture
- You can choose the graphic used for the target indicator arrows.
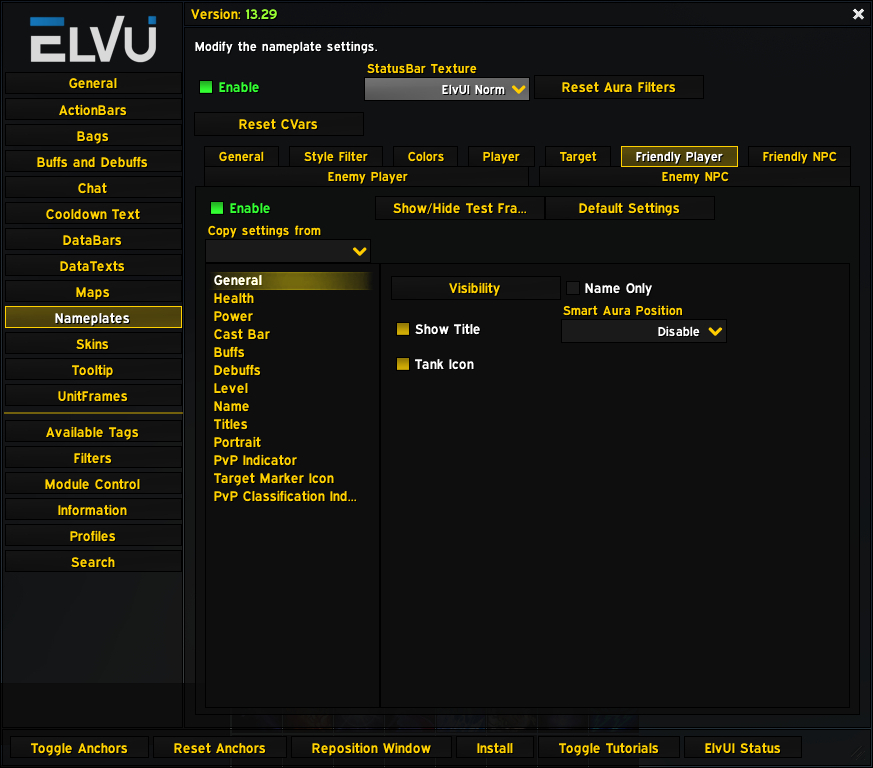
The Friendly Player tab contains settings for friendly player nameplates. These settings are mostly the same as the ones in the Player tab.
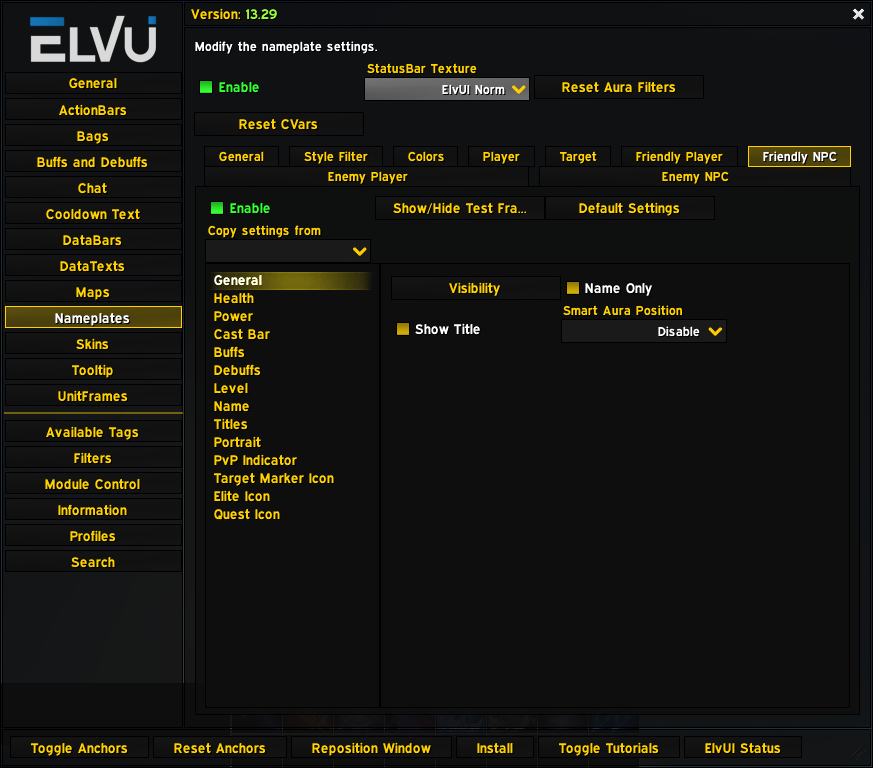
The Friendly NPC tab contains settings for friendly NPC nameplates. These settings are mostly the same as the ones in the Player tab.
The Enemy Player tab contains settings for enemy player nameplates. These settings are pretty much the same as the ones in the Player tab.

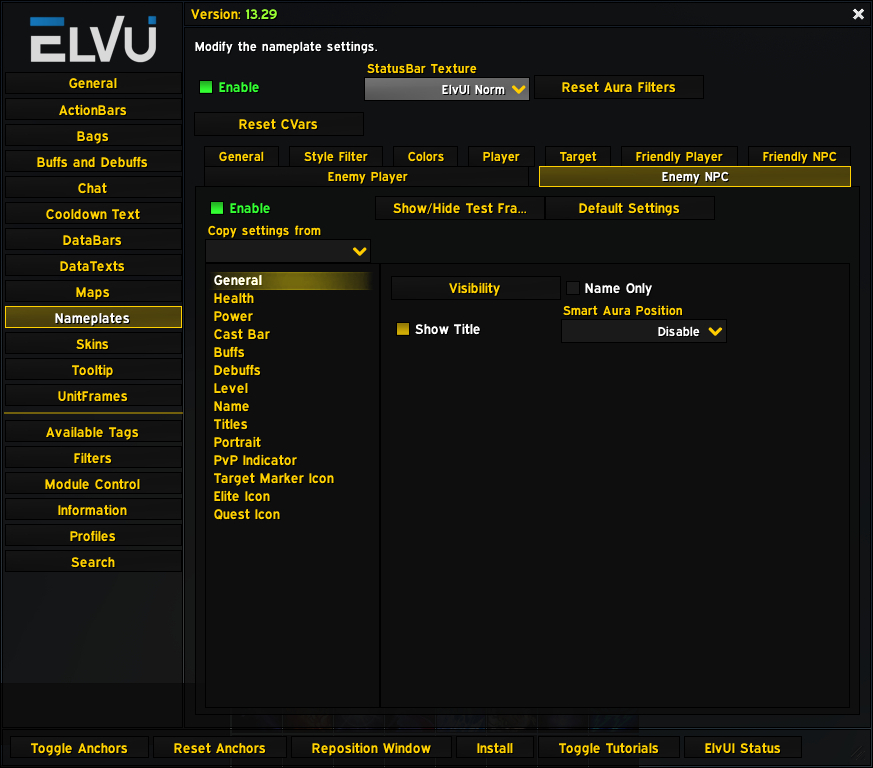
The Enemy NPC tab contains settings for enemy NPC nameplates. These settings are pretty much the same as the ones in the Player tab.
The Skins section is where you can enable or disable ElvUI’s skinning of various UI elements.
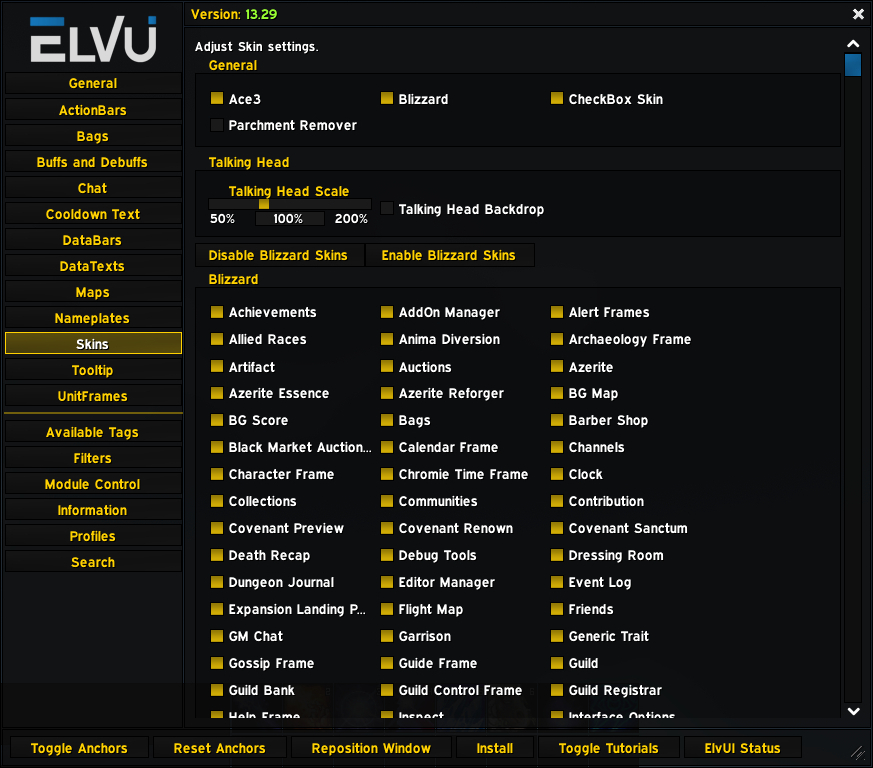
- Ace3
- If this is checked, ElvUI will modify the look of all Ace3 elements, including those added by other addons. Ace3 allows the creation of custom frames in the interface.
- Blizzard
- If this is checked, ElvUI will modify the look of all Blizzard frames.
- Checkbox Skin
- If this is checked, checkboxes such as the ones in this very section will be modified by ElvUI.
- Parchment Remover
- If this is checked, you will not see the default Blizzard parchment paper background in any frames, such as the spellbook or quest log.
- Talking Head Scale/Talking Head Backdrop
- These settings affect the frames that sometimes appear when NPCs talk during a quest.
- Blizzard
- The large grouping of checkboxes that make up the rest of this page are all elements of the default Blizzard UI that you can individually choose whether to modify via ElvUI or not.
The Tooltip section is where you can adjust settings related the tooltips that appear when you hover over various UI elements.
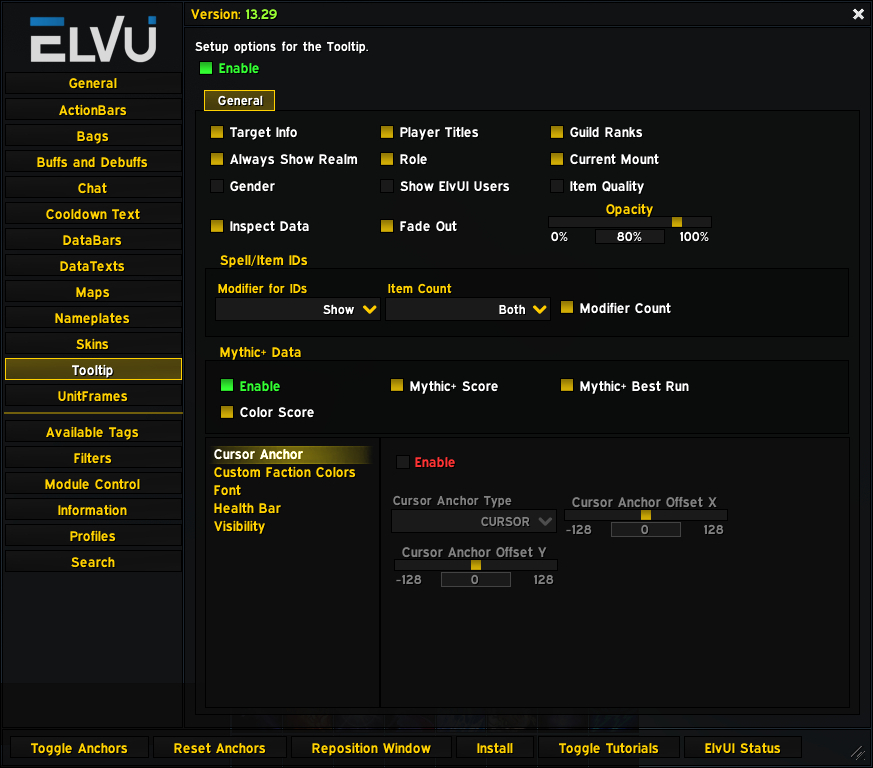
- The first several checkboxes are all related to player tooltips.
- Spell/Item IDs
- Choose whether to show ID numbers in your tooltips and how to display them.
- Mythic+ Data
- Choose whether to show player characters’ current Mythic+ data in your tooltips.
- Cursor Anchor
- Choose whether to anchor the tooltip to the cursor rather than a set location on the screen.
- Visibility
- Choose what UI elements will show a tooltip when you mouse over them.
The UnitFrames section is where you can modify the appearance of all of your unit frames, including your player and target frame as well as your group frames. We’ll go through the tabs located at the top of the page.
The General tab has settings that apply to all of your unit frames.
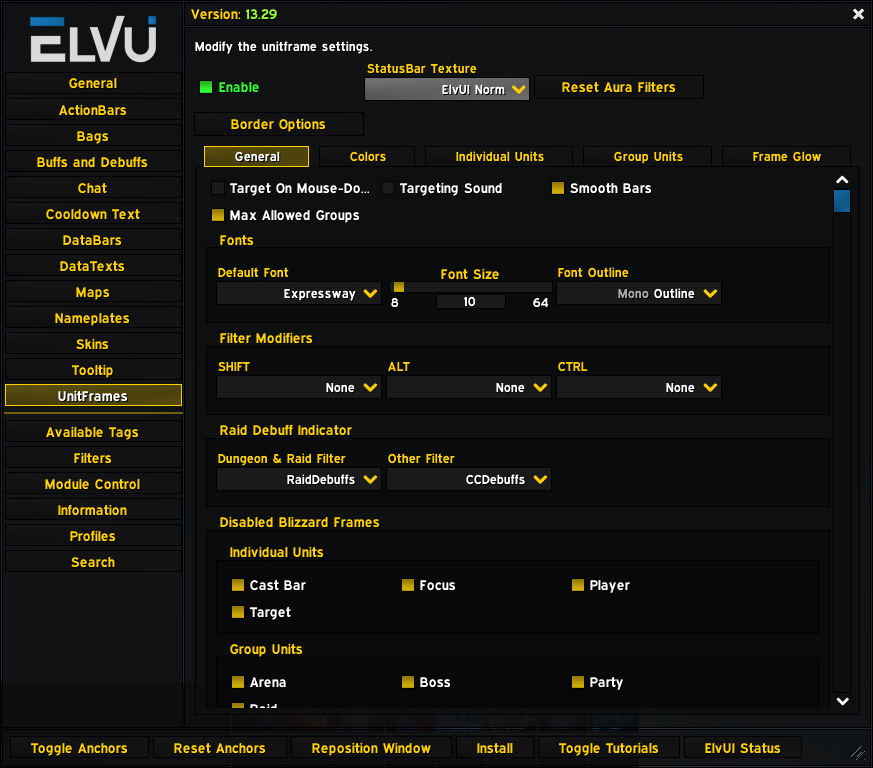
- Fonts
- Here you can customize the main font for all unit frames.
- Filter Modifiers
- By pressing a modifier key, you can change the filtered auras that appear on a unit frame.
- Raid Debuff Indicator
- These dropdowns are where you can choose the filters to use for debuffs on raid frames.
- Disabled Blizzard Frames
- By default, ElvUI disables all the Blizzard frames it replaces. You can re-enable them here.
The Colors tab has options for changing the color and transparency of all unit frame elements.

The Individual Units tab has sub-tabs for single unit frames: Player, Pet, Target, TargetTarget, TargetTargetTarget, Focus, FocusTarget, and PetTarget. We will look at the Player tab. The other tabs have similar settings.
Note that TargetTarget is your target’s target, and TargetTargetTarget is the TargetTarget’s target. TargetTargetTarget is not a default Blizzard unit frame and has to be enabled in ElvUI before it will appear on your screen.
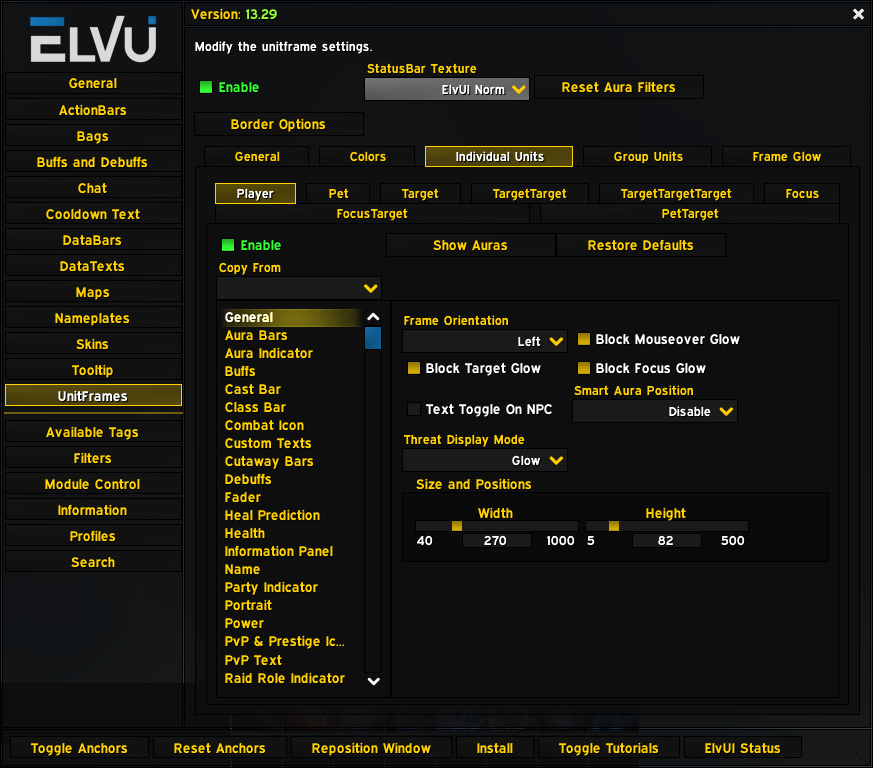
- Show Auras
- If you click this button, you will see some example buffs/debuffs displayed on the unit frame.
- Restore Defaults
- This button resets all the settings for this unit frame to their defaults. Be careful, you will lose your customizations!
- Copy From
- This dropdown allows you to select another unit frame to copy its settings.
- There are quite a lot of sections in the bottom part of this page. These options modify very specific elements of the unit frame, such as icons and text and power bars.
The Group Units tab has sub-tabs for all of the group unit frames: Arena, Assist, Boss, Party, Raid 1, Raid 2, Raid 3, Raid Pet, and Tank. We will look at the Party tab. The other tabs have similar settings.
The Assist and Tank frames are special raid frames that only show characters that are marked as tanks or raid assistants. By default, the Party frame appears when you are in a group of 2-5 players, Raid 1 when you are in a group of 6-20 players, Raid 2 when you are in a group of 21-30 players, and Raid 3 for 31-40 players. These settings can be changed. The options for the three Raid frames are identical, but the Party frames have additional options for Cast Bar, Combat Icon, Pet Group, and Target Group.
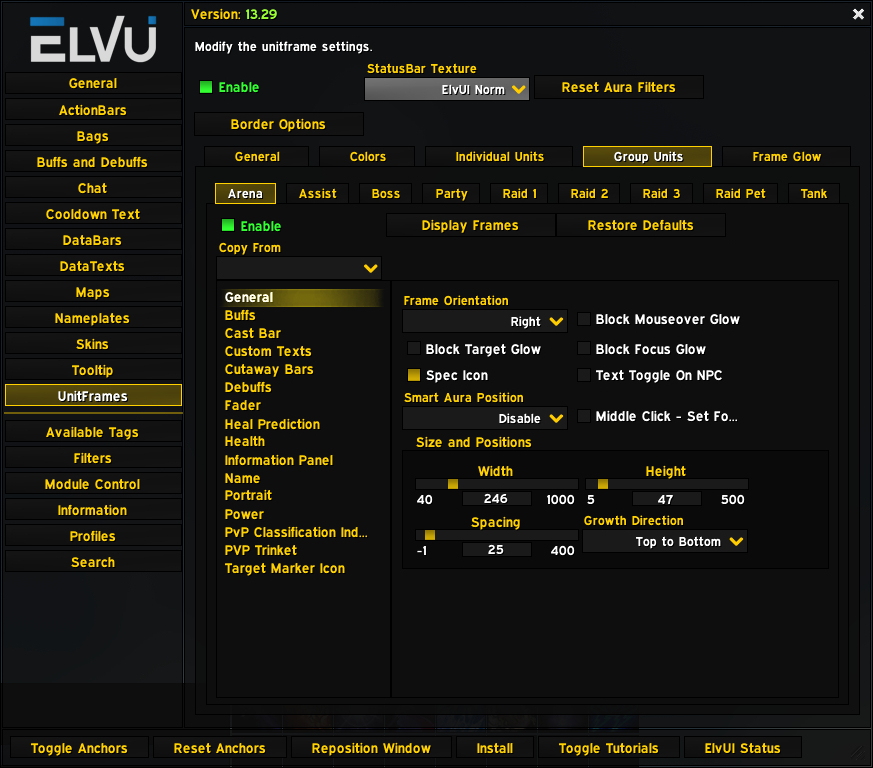
- Display Frames
- Click this button to see an example version of the frame on your screen. Useful for testing purposes.
- Restore Defaults
- This button resets the unit frame’s settings to their defaults. Be careful, you will lose your customizations!
- Copy From
- Using this dropdown, you can choose another unit frame to copy settings from.
- There are a lot of sections in the bottom part of this page. These options modify very specific elements of the unit frame, such as icons and text and power bars.
The Frame Glow tab has settings for creating a glow around a specific unit based on certain conditions.
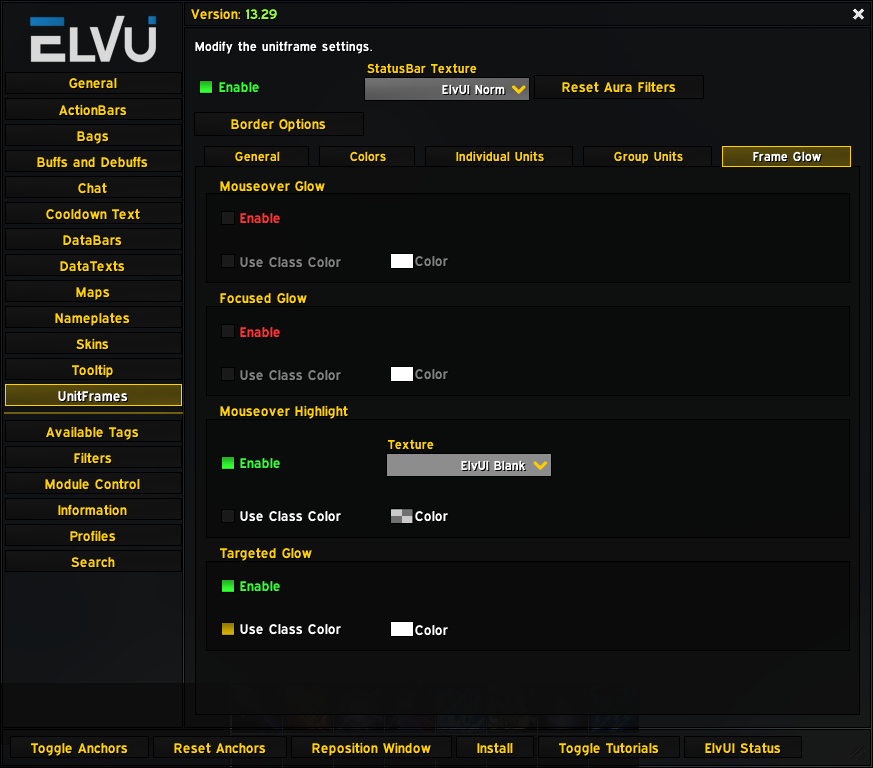
- Mouseover Glow
- This option creates a glow around the frame your mouse is currently hovering over.
- Focused Glow
- This option creates a glow around your current focus target.
- Mouseover Highlight
- This option highlights the target your mouse is currently hovering over by changing the background of the frame.
- Targeted Glow
- This option creates a glow around a unit frame if you currently have that unit targeted.
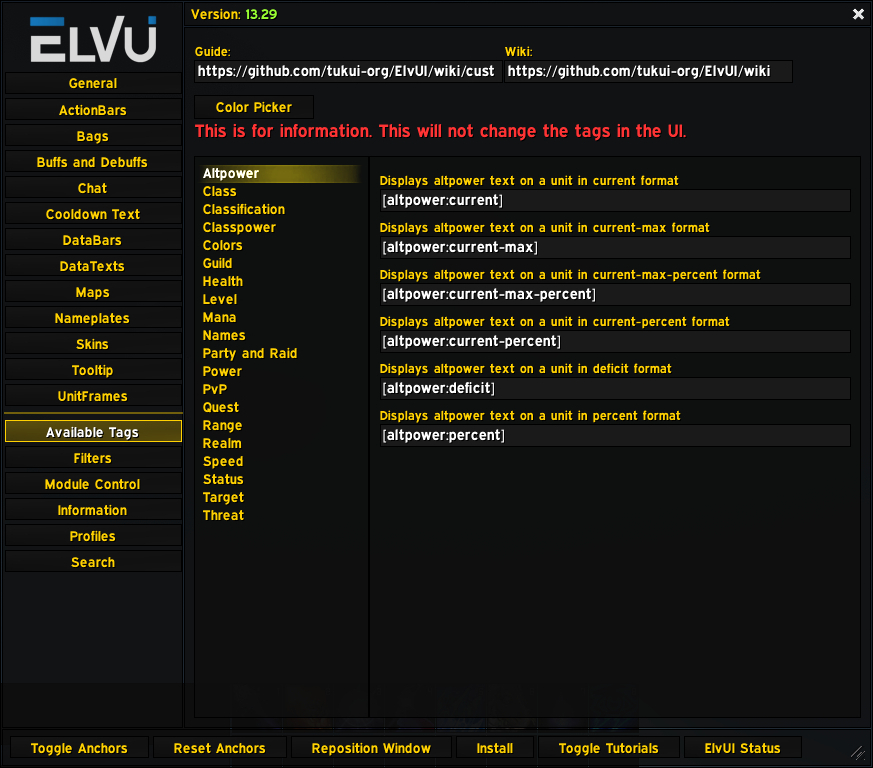
The Available Tags section lists some of the tags you can use in ElvUI. These tags dictate how certain information is displayed, such as choosing to show health as numbers or percentages.
The Filters section is where you can customize your aura filters, which determine which buffs and debuffs appear and where.
The Main Options tab is where you can create and modify your aura filters.
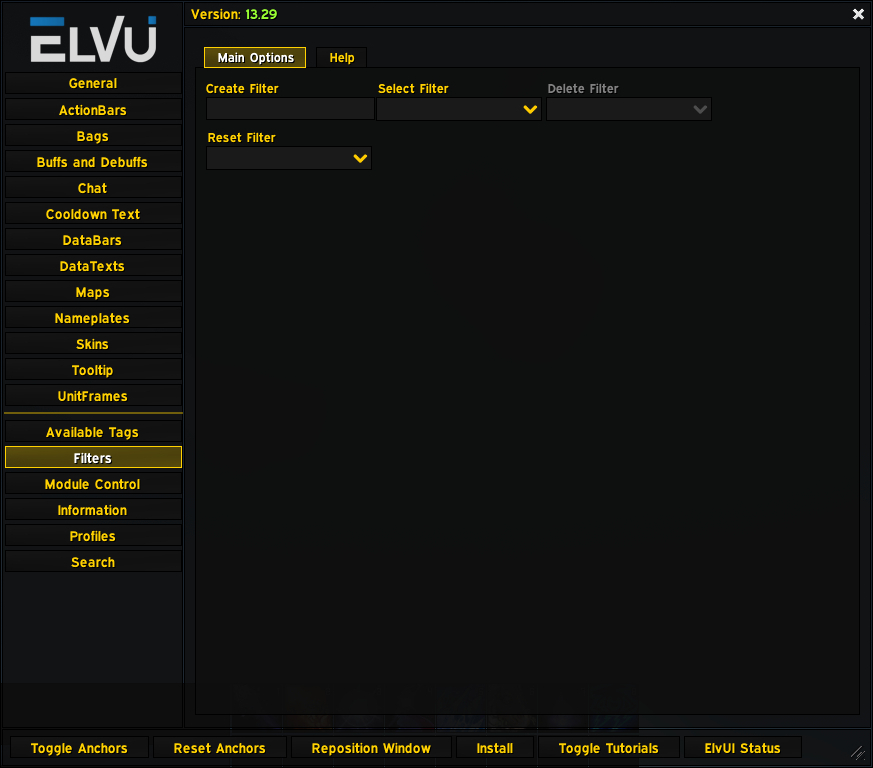
- Create Filter
- Type a name into this field to create a new filter list for your auras.
- Select Filter
- Use this dropdown to select an existing filter list.
- Delete Filter
- Use this dropdown to delete an existing filter list. Be careful, you won’t be able to get it back!
- Reset Filter
- Use this dropdown to restore a filter list to its default state. Be careful, you won’t be able to get your customizations back!
Choose any filter from the Select Filter dropdown to see these options:
- Select a Spell
- This dropdown contains auras that are currently included in the filter you are working with. You can select one of them to modify its settings.
- Filter Search
- Use this text box to search the current auras in the filter.
- Remove Spell
- Selecting an aura from this dropdown will remove it from the filter list.
- Add SpellID
- This is where you can add a new aura to the filter list. You will need the spell ID, which you can get from hovering over the aura’s icon in your buffs or debuffs. The ID number will be at the bottom of the tooltip.
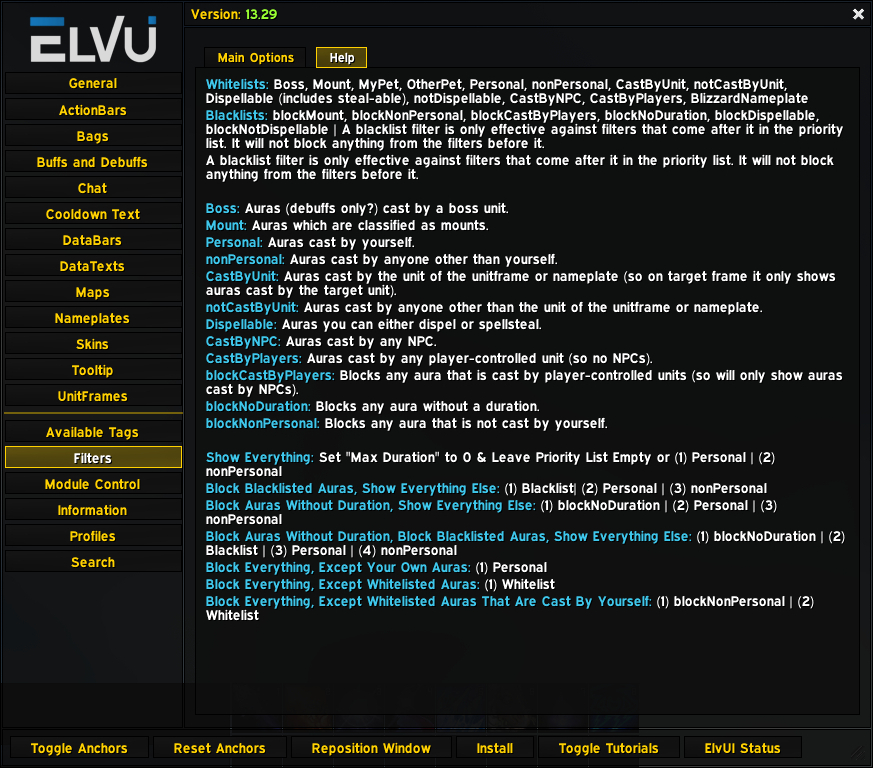
The Help tab has some useful information for working with aura filters.
The Module Control section is where you can copy settings for specific modules from one profile to another. Note that in the Profiles section, you can copy a complete profile’s settings to another. This section offers a more a la carte approach.
The Module Copy tab has all of the settings available to be copied.
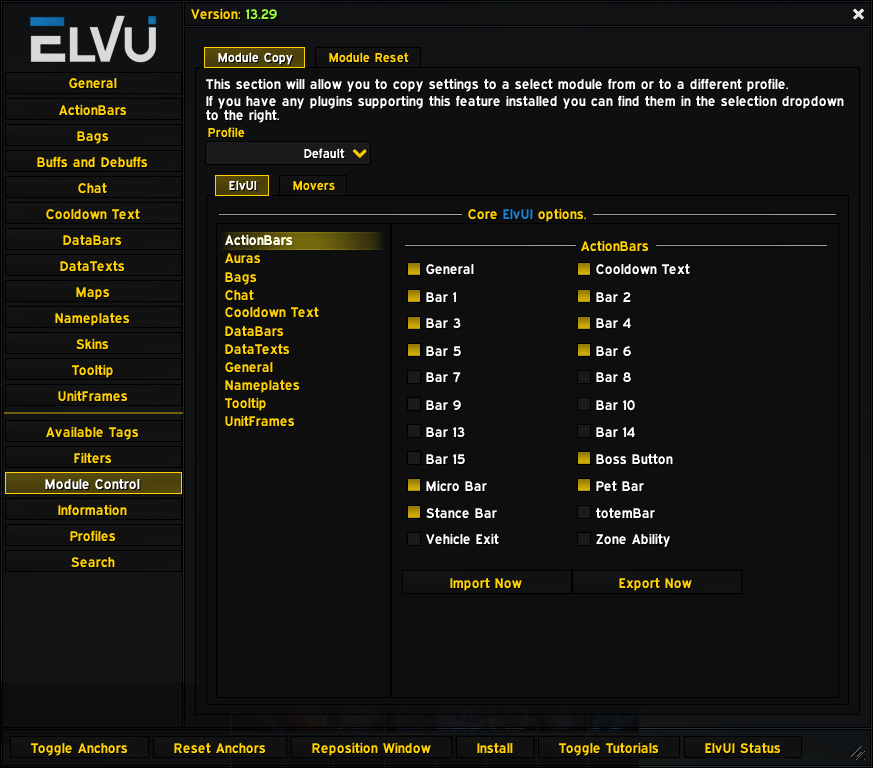
- Profile
- Use this dropdown to select the profile you want to copy your settings from. The settings will be copied into your currently active profile.
- ElvUI
- Here you can choose settings to copy for just about every element of ElvUI. Just check the appropriate box(es) and click Import Now.
- Movers
- Here you can copy the positioning of any frame or UI element as it appears in edit mode. Simply check the appropriate box(es) and click Import Now.
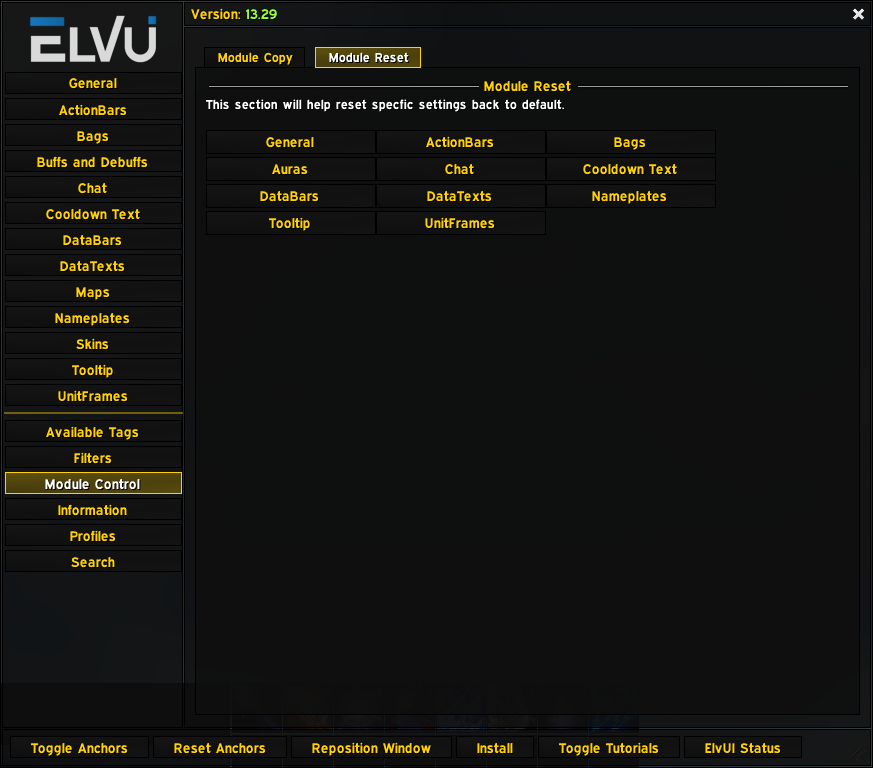
The Module Reset tab is where you can restore individual modules to their default settings.
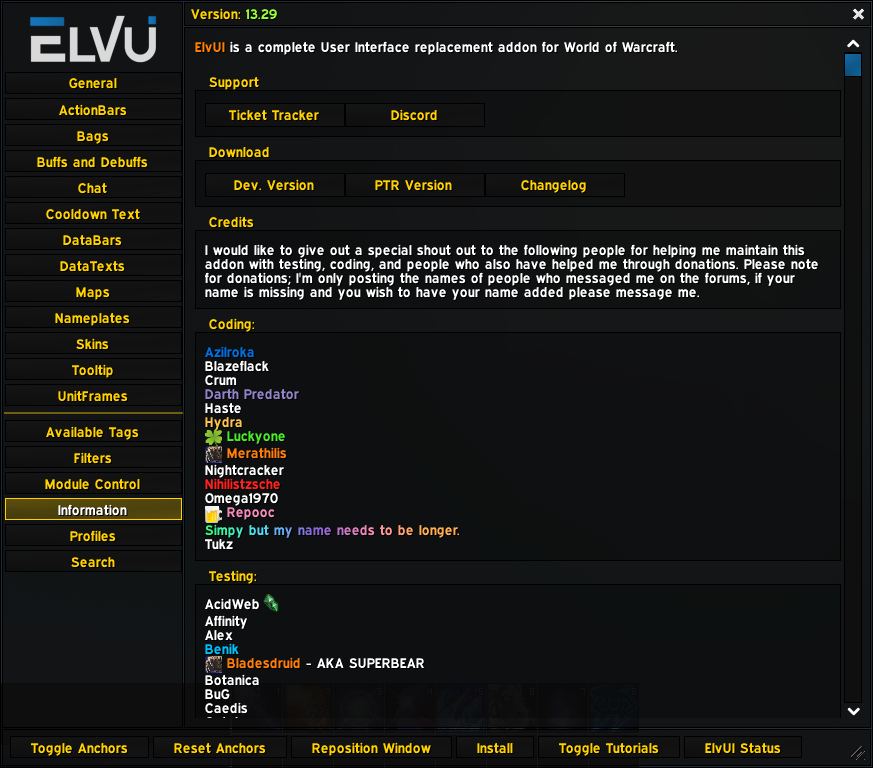
The Information section contains some basic information about ElvUI, including some links and a list of credits.
The Profiles section is where you can create, import, delete, and export your ElvUI settings as custom profiles.
At the top of the page are buttons to Export and Import Profiles. For help with importing a profile, scroll up in this guide to the section Installing Profiles for ElvUI.
The Allow Sharing button will allow you to use the Share Current Profile and Share Filters buttons at the top of the menu. These buttons will send your current filters or profile to a targeted player if they also have this option enabled.
The Profile tab is where you can save and modify your ElvUI profile, which stores most of your settings.
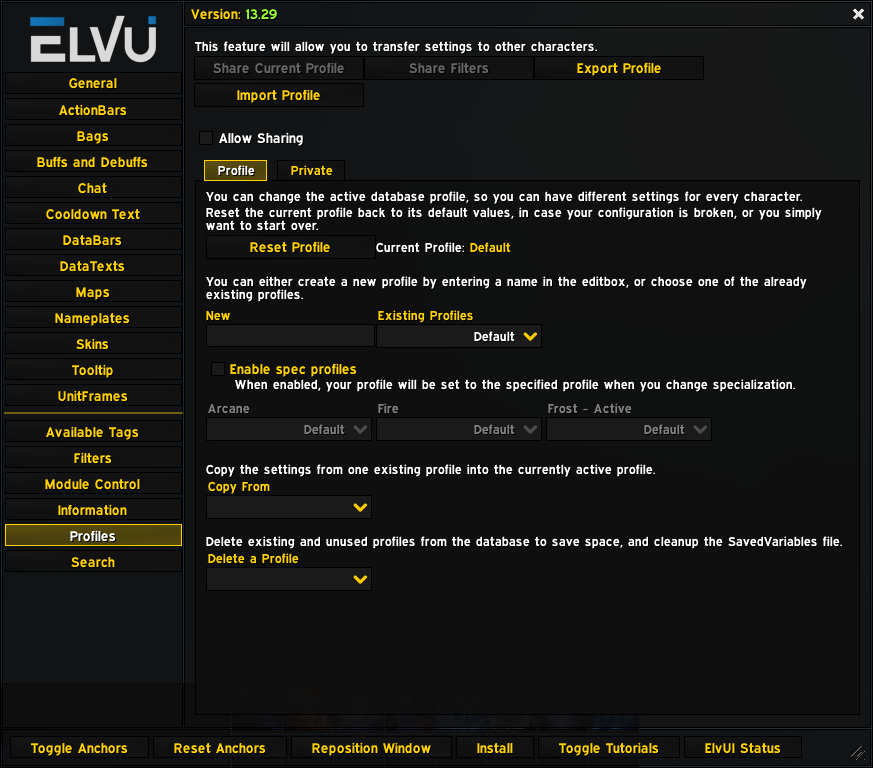
- Reset Profile
- Clicking this button will reset your current profile to default settings. Be careful with this, it can’t be undone!
- New/Existing Profiles
- Here you can choose to create a new profile by entering a name into the text box, or you can choose an existing one from the dropdown menu.
- Enable spec profiles
- When this is checked, you can use different ElvUI profiles for each of your talent specializations.
- Copy from
- Selecting a profile from this dropdown will copy its settings to your current profile. Be careful with this, it can’t be undone!
- Delete a Profile
- Selecting a profile from this dropdown will delete it completely. Caution: you won’t be able to get it back!
There are a few different ways you can lose your profile or settings. Be sure to read the last section of this guide, Backup Your ElvUI Profile.
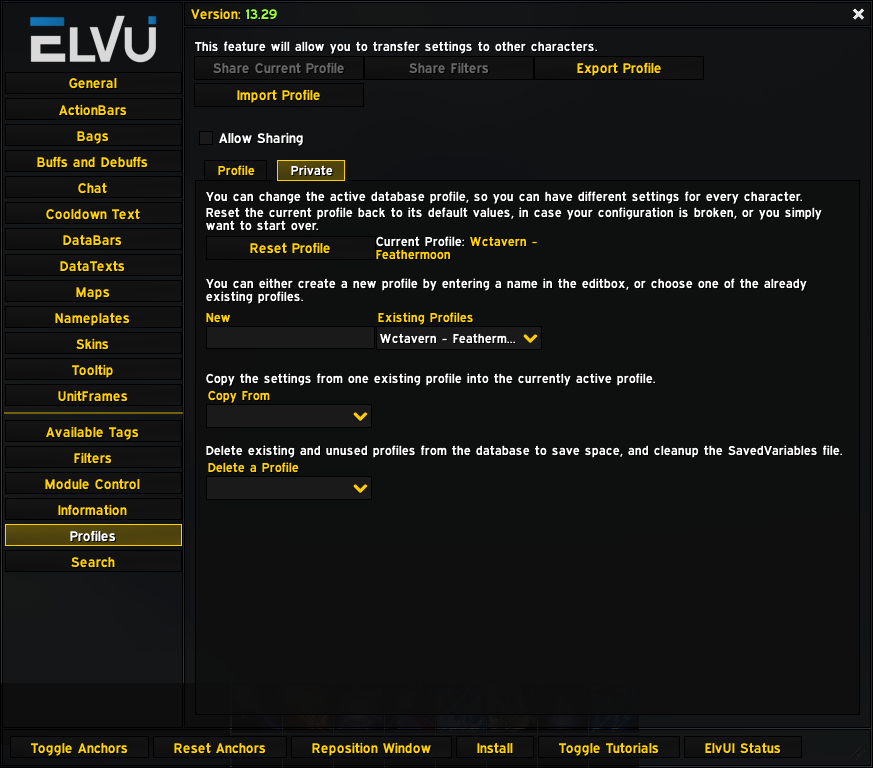
The Private tab is where you can save and modify for your private ElvUI settings, such as fonts and textures, which don’t get saved with your profile. The settings in this tab are the same as those in the main Profile tab.
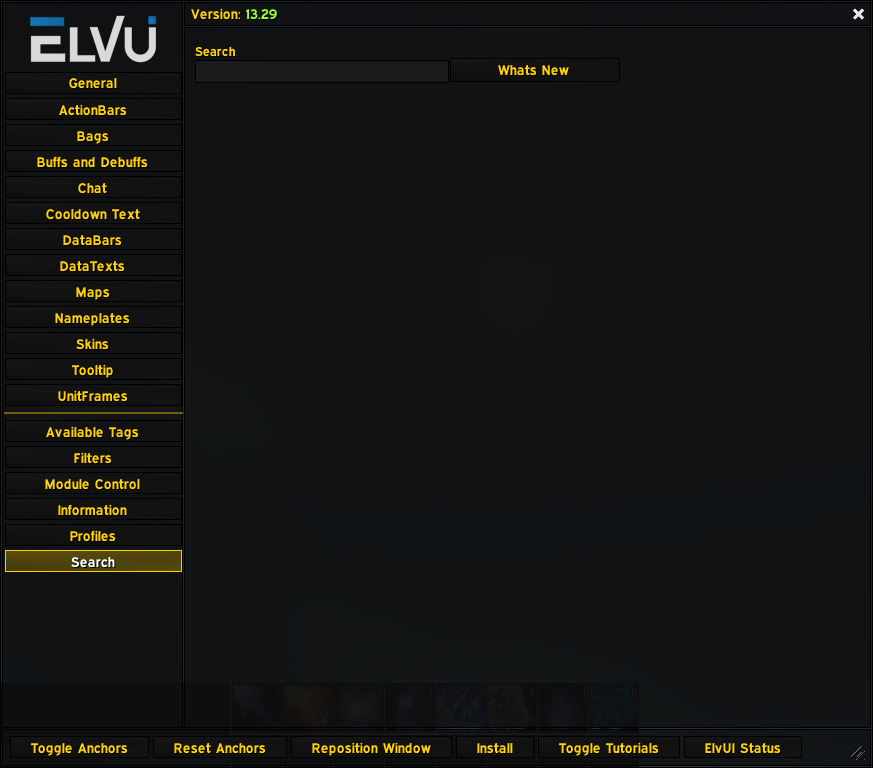
The Search section is where you can search the ElvUI menu – a pretty useful feature for finding a particular setting without digging through its many, many pages. There is also a What’s New button where you can quickly see settings that have been recently added to the menu.
Backup Your ElvUI Profile!
There’s nothing worse than spending hours on your interface and then having to start over from scratch. You may need to reinstall World of Warcraft for one reason or another, or some kind of error could reset your profile. Make sure you have a backup of your profile on a different hard drive or in cloud storage. You may also want to make a copy of your profile any time you’re going to make significant changes to it, so you can easily go back if you want to.
How to Make a Copy of Your Profile
You can create a new profile by going to the Profiles page in the ElvUI options. Look for the text box labeled “New,” and type in a name for your profile, then click Okay. You’ll have a new copy of the default ElvUI profile. You can copy the settings from any other profile you have installed by using the Copy From dropdown menu.
How to Save a Backup of Your Profile
To backup your profile, go again to the Profiles page in the ElvUI options. Click Export Profile. You have a few options at the bottom here for what you want to export:
- Profile
- Private (Character Settings)
- Global (Account Settings)
- Aura Filters
- NamePlate Style Filters
You may want to come back and save each of these to be sure you have everything backed up. For now, choose Profile.
Now you will choose the format. The easiest option is Text. This will give you a long text strong. Copy the entire thing and paste it into a text file or wherever you want to save your backup. If you need to restore your profile later, you can paste this string into the Import Profile box.
About the Author
