RareScanner Addon Guide
The RareScanner addon allows you to track rare NPCs, treasures, and events using your map, a special explorer window, and alerts that pop up when a tracked NPC or event is detected nearby. The addon makes it easy to find missing items from your collections. It can also be useful for completing achievements.
There are a few different addons available with similar features, but RareScanner is the most widely used. We’ll walk you through all of the addon’s features and settings. But first, let’s get RareScanner installed and set up.
Installing RareScanner
RareScanner is available to download from CurseForge and Wago. It can be installed manually or using the addon manager of your choice. If you need some help installing, check out our guide How to Install and Manage Addons.
Setting Up RareScanner
Once you have RareScanner installed in your Addons folder, you can enable it in your game. To do this, go to the character selection screen in World of Warcraft and look for the AddOns button in the bottom left corner. Make sure that the box beside RareScanner is checked and click Okay. Now you should see the RareScanner button on your minimap when you enter the game.
Using RareScanner
There are three different tools included in RareScanner for tracking rares and collectibles. We’ll go through each of them now.
RareScanner Alerts
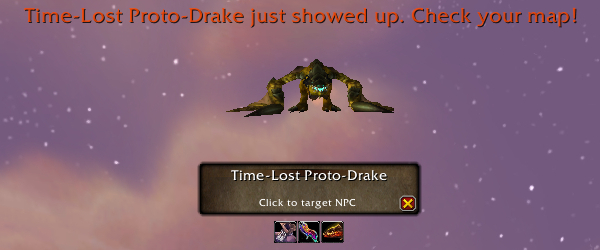
RareScanner provides alerts when it detects a tracked item or NPC nearby. A large button will appear in the middle of your screen with information about what has been detected and a sound will play. The addon will alert you in your chat messages and with a large text message near the button. Your World of Warcraft window will also flash in the task bar if you are alt-tabbed. Any of these alert elements can be disabled in the settings if desired.
The alert will include a 3D model of the entity detected, as well as icons representing the loot you can get from it. If it is an NPC, left-clicking the button will target the creature. You can also hover over the loot icons to view a tooltip with information about the item.
After an entity has been detected, its icon on the map will change to a bright pink color for two minutes. Then it will return to normal.
RareScanner Map Markers
RareScanner adds icons to your world map for every tracked item and NPC. There are a few ways you can interact with these icons:
- Hover over an icon to view a tooltip with information about the entity, such as whether you’ve seen it before and any loot you can obtain from it.
- Left-click an icon to show every location where that entity can spawn.
- Shift right-click an icon to add a waypoint to its location.
- Alt-Shift left-click an icon to filter it, excluding it from alerts and map icons.
RareScanner also works with the reputation filter for world events in Dragonflight zones. Click the button in the lower left corner of the map and select a faction. All icons for entities that grant reputation with that faction will be highlighted.

RareScanner Explorer
RareScanner comes with a built-in explorer window that you can use to check zones for missing collectibles. The explorer window can be opened by left-clicking the RareScanner minimap button or by typing /rarescanner explorer in chat.
If this is the first time you have opened the explorer window, or if the database has been updated, the explorer window will prompt you to start a scan. The addon will look through your collections and see which ones you are missing. It may take up to 20 seconds to complete. When it finishes, you will see the explorer window populated with items you are missing.

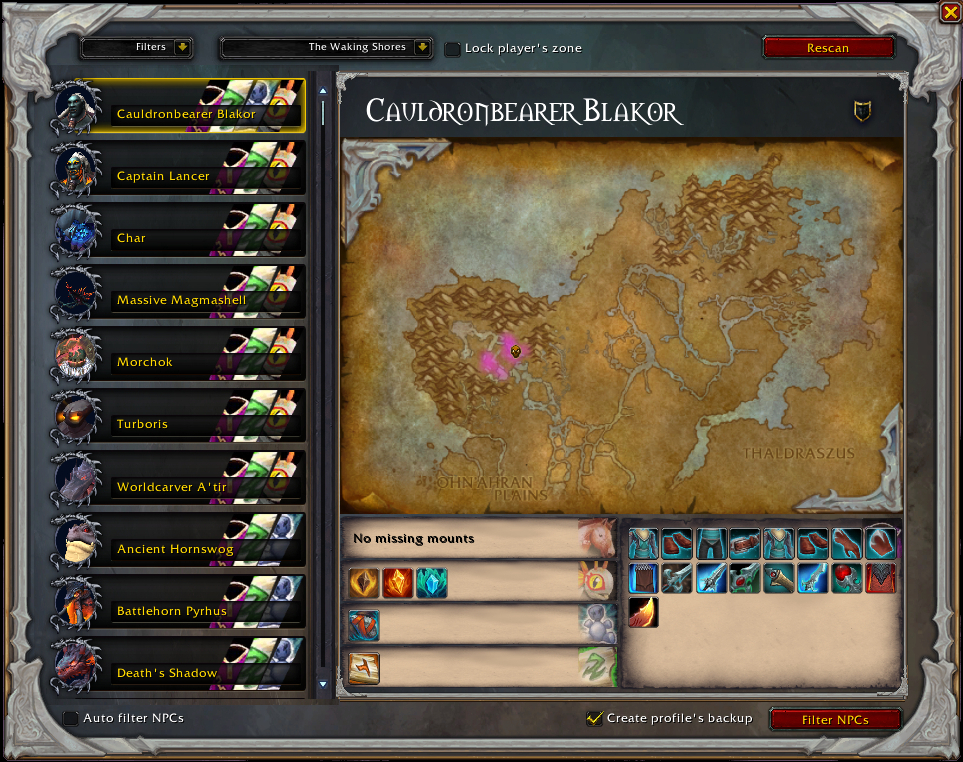
There are a several different elements to the explorer window once it has been populated:
- Filters: This dropdown menu allows you to filter the list of NPCs on the left side of the window. You can filter by the types of collectibles they drop or by their state (already killed, filtered, or no missing collectibles). To apply your filters, use the Filter NPCs button in the lower right corner of the window.
- Next to the Filters menu is a dropdown menu where you can select a zone to view in the explorer. This will display your missing collectibles in the zone and the NPCs you can loot them from. If a zone isn’t in the list, it means you have no missing collectibles that drop from NPCs in that zone.
- Lock player’s zone: If this box is checked, the explorer window will default to your current zone when it is opened, if it’s available to view.
- Rescan: Press this button to manually scan your collectibles again if you think RareScanner has missed some.
- On the left side of the window is a list of NPCs in the zone that match your current filters. Each NPC has a portrait, name, and some icons representing the types of collectibles they drop. The color of the NPC’s name reflects its current state: golden means it’s alive, blue means it’s dead, and gray means it’s filtered. You can left-click on an NPC to view its location on the map and the collectible loot it drops. You can right-click on an NPC to exclude it from alerts.
- The map on the right side shows the location of the NPC on the zone map.
- Above the map there may be an icon if the NPC is associated with an incomplete achievement. Hover over the icon to view the achievement’s tooltip.
- Below the map are some icons representing collectible items the NPC drops that you have not collected yet. You can hover over an icon to view the item’s tooltip. Ctrl left-click an icon to view the item in the dressing room. Shift left-click to link the item in chat.
- Auto filter NPCs: If this is checked, the addon will automatically filter NPCs that do not drop any collectibles you need.
- Create profile’s backup: If this is checked, RareScanner will store a backup of your profile in case you make changes to the filters that you want to revert.
- Filter NPCs: Use this button to apply the filters you selected in the Filters dropdown menu.
Customizing RareScanner
RareScanner has several settings that can be configured in the options menu.
RareScanner Chat Commands
Before we get into the settings for RareScanner, here are some chat commands that will come in handy for using and configuring the addon:
- Type
/rarescanner explorerto open the explorer window. - Type
/rarescanner tmito toggle all RareScanner icons on the world map on or off. - Type
/rarescanner tato toggle all RareScanner alerts on or off. - Type
/rarescannerfor a complete list of chat commands.
RareScanner Options Menu
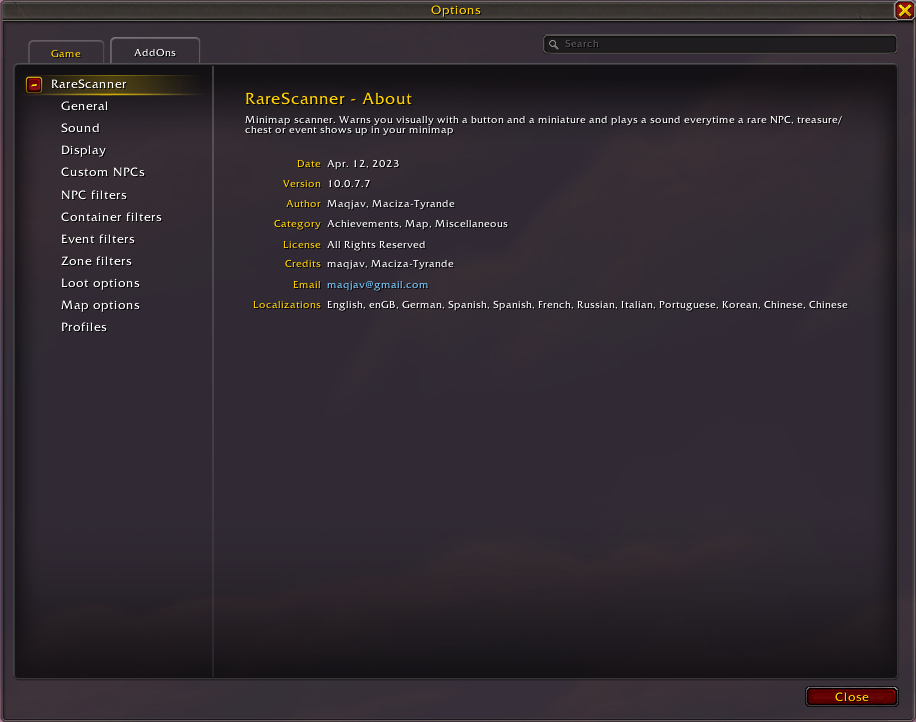
The RareScanner options menu can be opened by right-clicking the RareScanner icon on the minimap or through the game’s options menu (Esc key -> Options -> AddOns tab -> RareScanner). There are several pages you can access from the menu on the left side of the window. We’ll look through those pages below.
When you open the RareScanner options menu or click on RareScanner in the left side of the window, you will see an About page with basic information about the addon such as its current version.
The General page of the RareScanner options menu has a lot of basic options for alerts.
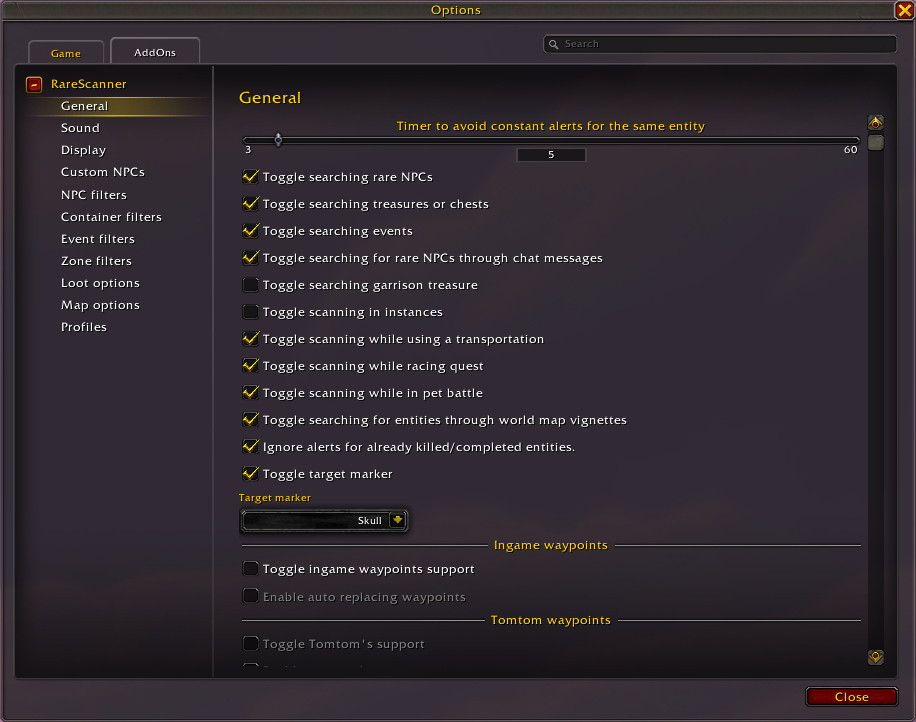
- There is a slider at the top of the page for adjusting the amount of minutes between alerts for the same entity. Increasing this will reduce alert spam.
- There is a long list of checkboxes to toggle alerts for different types of entities. You can choose to disable tracking for types you don’t care about to reduce alert spam.
- There is a checkbox to add a target marker to NPCs when you click on the RareScanner button to target them. You can select the target marker used from the dropdown menu below this checkbox.
- There are some checkboxes for using in-game or TomTom waypoints when an entity is detected.
The Sound page of the RareScanner options menu has settings related to the addon’s sound alerts.
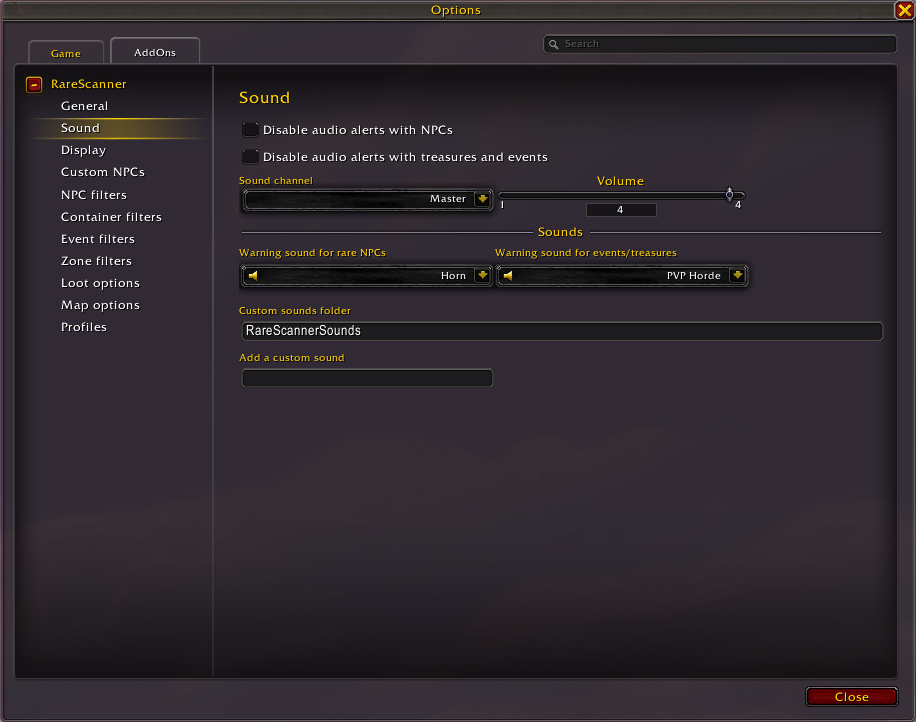
- There are two checkboxes to disable audio alerts for NPCs or treasures and events. If you don’t want to hear the sound alerts at all, check these boxes.
- You can change the sound channel for the alerts with a dropdown menu, and adjust the volume with a slider.
- You can change the warning sound that plays for either entity type with a dropdown menu.
- You can choose to use a custom sound by entering the name of a folder in the folder text box, and the name of the file in the add a custom sound text box.
The Display page of the RareScanner options menu has settings related to the alert graphics that appear when an entity is detected.
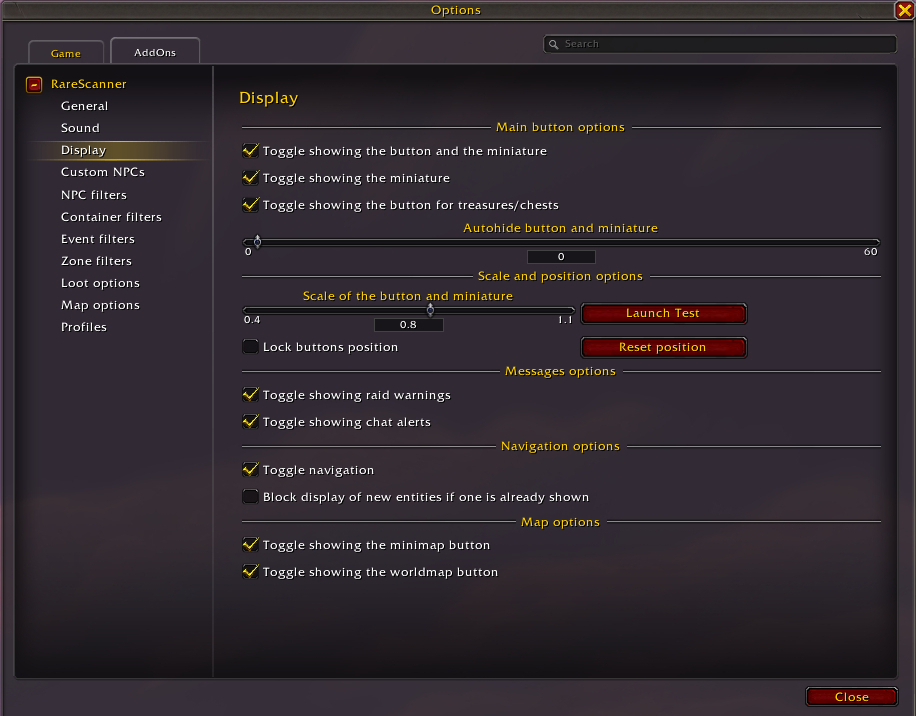
- You can toggle the button and miniature using the checkboxes at the top of the page. If both are disabled, the graphic alert won’t display at all, but the sound and chat alerts still will if they are enabled.
- You can autohide the button and miniature by using the slider to set a time in seconds at which they will hide.
- There is a slider to adjust the scale of the button and miniature.
- You can use the Launch Test button to view a sample alert.
- You can use the Reset position button to reset the positioning of the alert on the screen.
- You can check the Lock buttons position box to prevent moving it around.
- There are checkboxes for toggling the raid warnings that display as text in the middle of the screen and the chat alerts that appear in the chat window.
- There are checkboxes to toggle navigation in the alert between different entities that have recently been detected.
- There are checkboxes to toggle buttons on the world map and minimap.
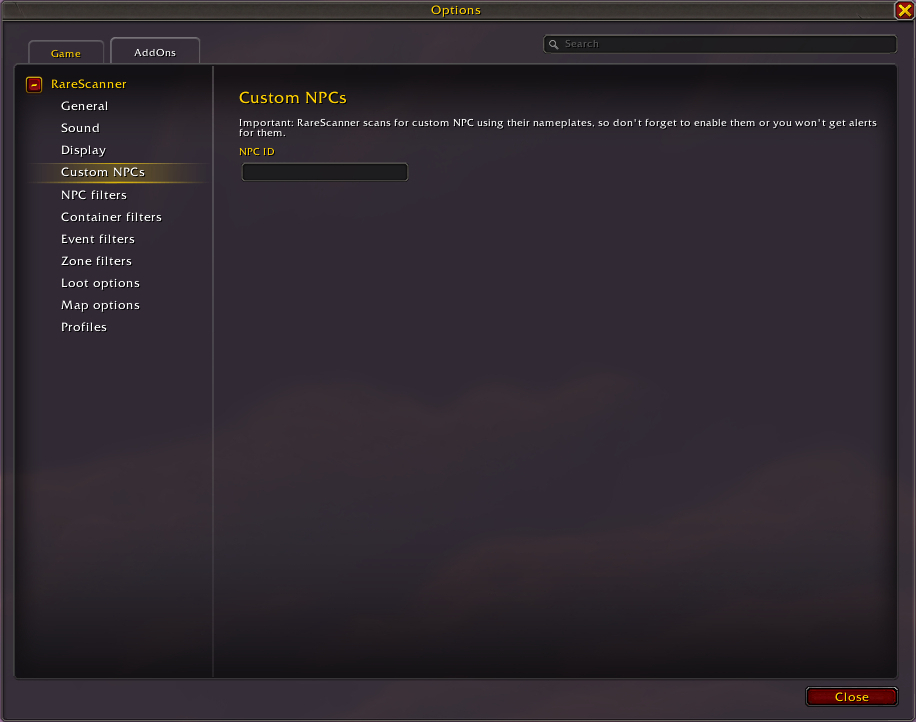
The Custom NPCs page of the RareScanner options menu has a single text box where you can enter an ID number for an NPC you want to track. Doing so will add them to a list of NPCs where you can set their zone, coordinates, loot, and other information.
The NPC filters page of the RareScanner options menu has settings for filtering what NPCs will trigger alerts when detected.
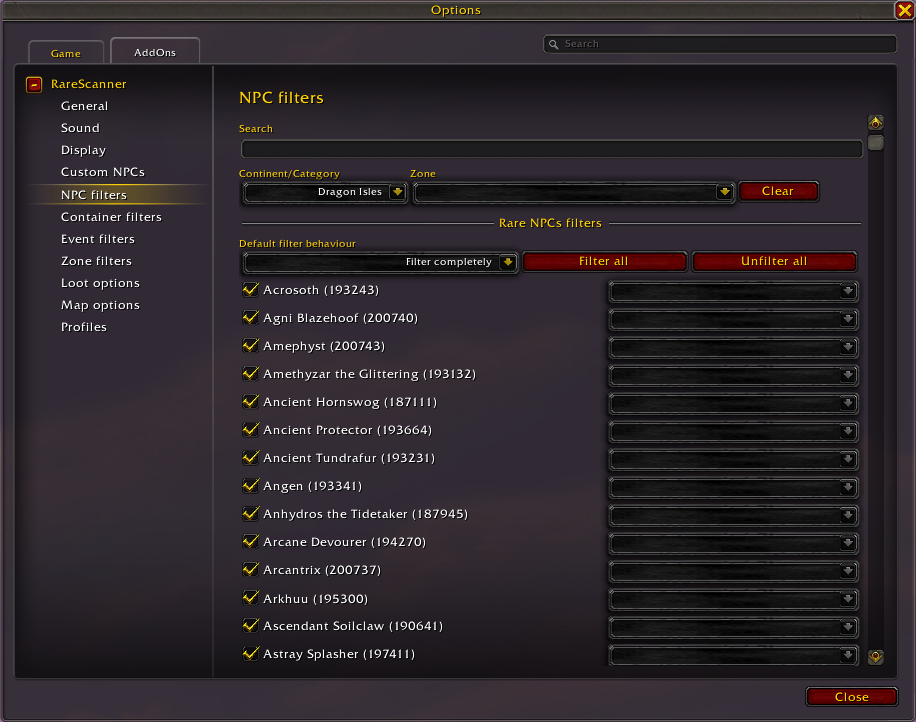
- There is a text box at the top of the page where you can search for a particular NPC by name.
- You can view the NPCs for a continent/category and also narrow it down further by zone using the dropdown menus.
- You can select the default filter behavior using a dropdown menu. NPCs can be filtered completely or only in the world map or only from alerts.
- Individual NPCs can be filtered by unchecking their checkboxes in the list.
The Container filters page of the RareScanner options menu has settings for filtering what containers will trigger alerts when detected.
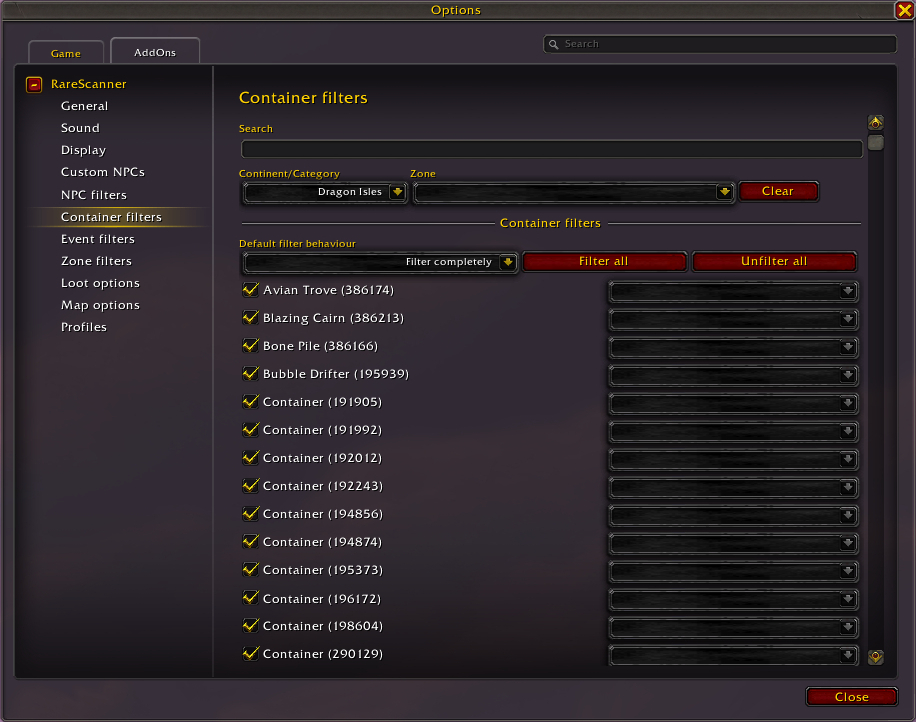
- There is a text box at the top of the page where you can search for a particular container by name.
- You can view the containers for a continent/category and also narrow it down further by zone using the dropdown menus.
- You can select the default filter behavior using a dropdown menu. Containers can be filtered completely or only in the world map or only from alerts.
- Individual containers can be filtered by unchecking their checkboxes in the list.
The Events filters page of the RareScanner options menu has settings for filtering what events will trigger alerts when detected.
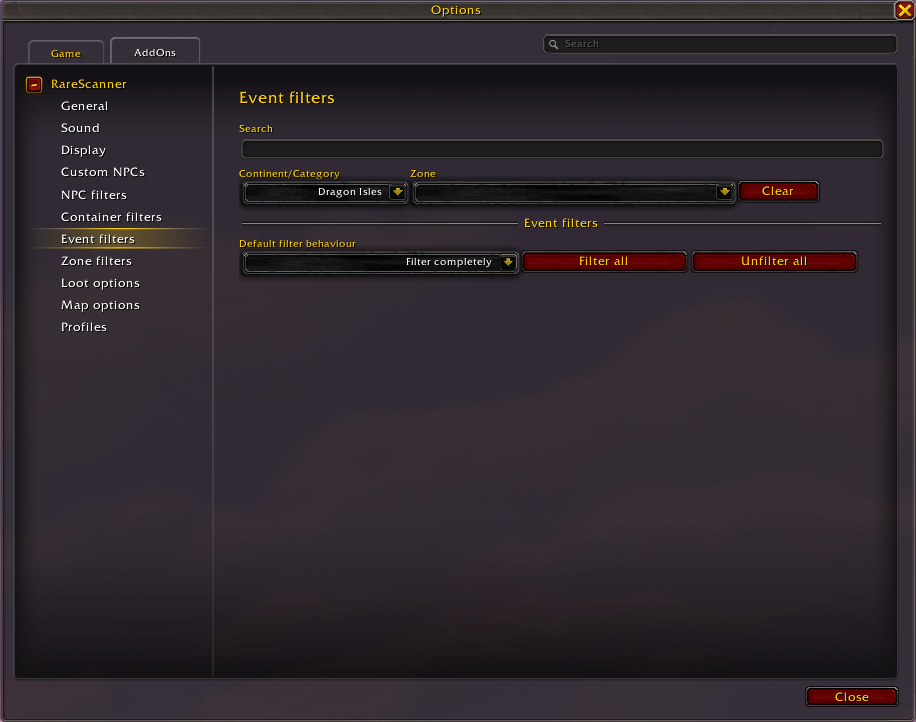
- There is a text box at the top of the page where you can search for a particular event by name.
- You can view the events for a continent/category and also narrow it down further by zone using the dropdown menus.
- You can select the default filter behavior using a dropdown menu. Events can be filtered completely or only in the world map or only from alerts.
- Individual events can be filtered by unchecking their checkboxes in the list.
The Zone filters page of the RareScanner options menu has settings for filtering what zones will include alerts when an entity is detected.

- There is a checkbox at the top of the page to enable filters only in the world map. This will allow zones that are filtered on this page to display alerts for detected entities without showing icons on the world map.
- There is a text box at the top of the page where you can search for a particular zone by name.
- You can view the zones for a continent/category using the dropdown menu.
- You can toggle all zones for a category at once with the toggle filters button.
- Individual zones can be filtered by unchecking their checkboxes in the zone list.
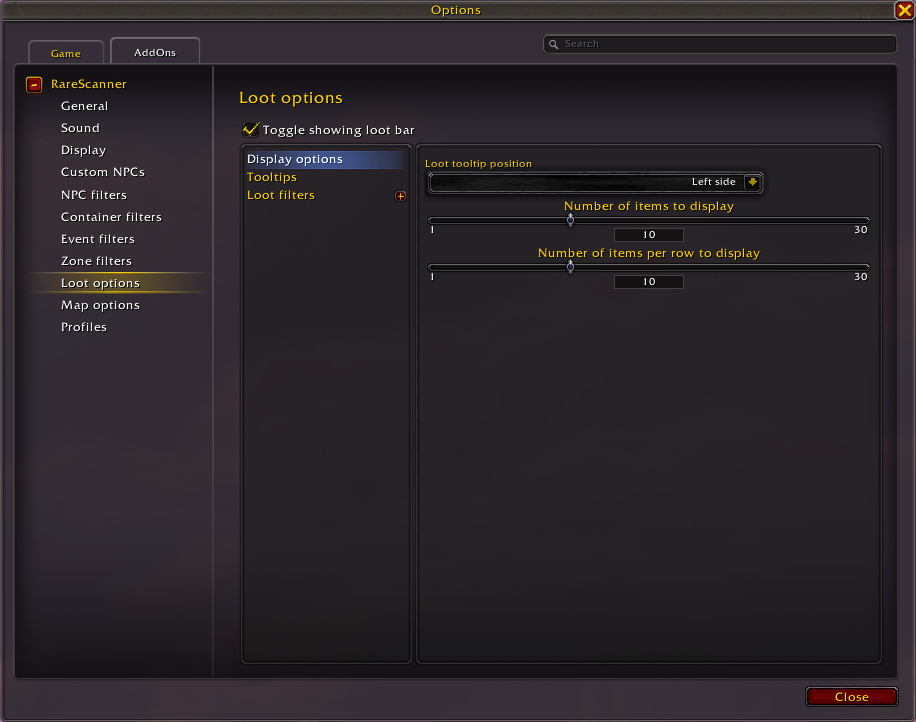
The Loot options page of the RareScanner options menu has settings related to the loot icons that appear along with an alert.
At the top of the page is a checkbox to toggle the loot icons. If this is unchecked, the icons will now show up at all.
The Display options section lets you control the position of the tooltip that appears when you hover over the loot icons, and the number of items to display in the loot bar as well as how many per row.
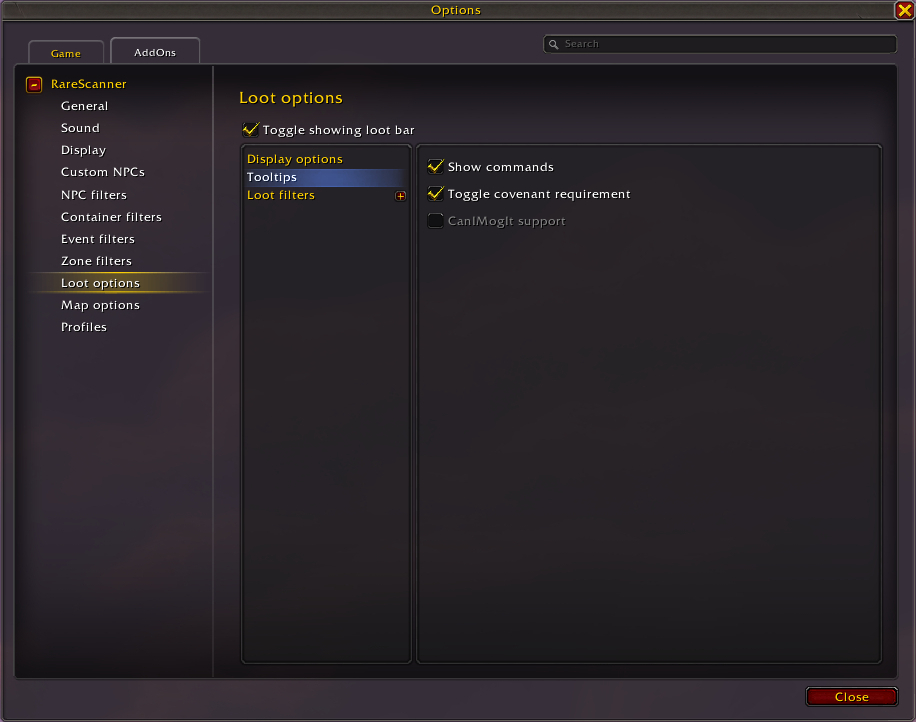
The Tooltips section has a checkbox to show commands that can be used on the icon in its tooltip. There is also an option to toggle covenant requirement for Shadowlands items. CanIMogIt support is also available here if that addon is installed.
The Loot filters section has a few sub-sections where you can filter what kind of loot will appear in the loot bar. We’ll go through each section below.
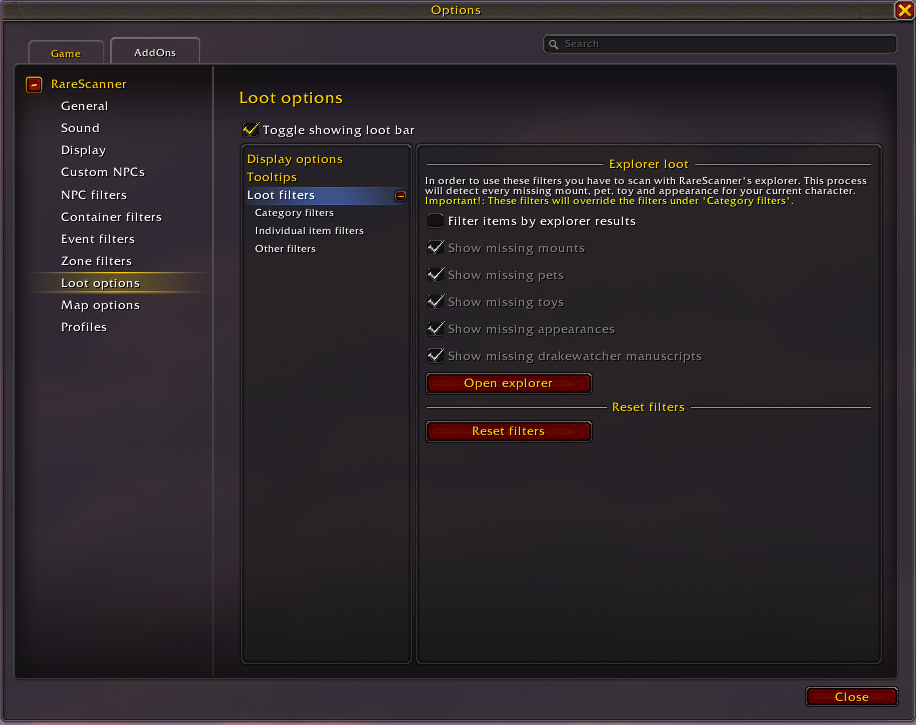
Loot filters:
- There is a checkbox to filter items by explorer results. This will filter out items you have already collected.
- There are checkboxes to show missing items for each item type in your collections. These will be applied if the checkbox above is checked.
- You can open the explorer window with a button on this page.
- You can use the reset filters button to restore these filters to their defaults.

Category filters:
- Use the main category dropdown menu to select a category to view below.
- Use the toggle filters button to check or uncheck all of the buttons below at once.
- Use the subcategory checkboxes to filter specific types of items.
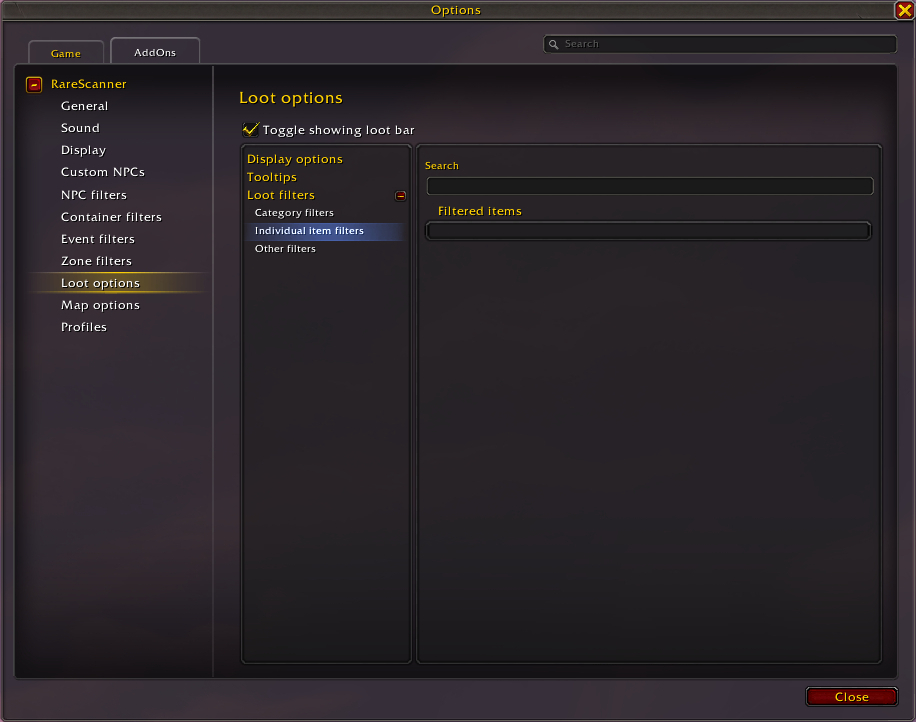
Individual item filters:
- When you Alt-Shift left-click an item’s icon in the loot bar, it will appear on this page. You can then uncheck the box beside it to unfilter it.
- If you have added several items to the filters listed on this page, you can search through them using the text box at the top.
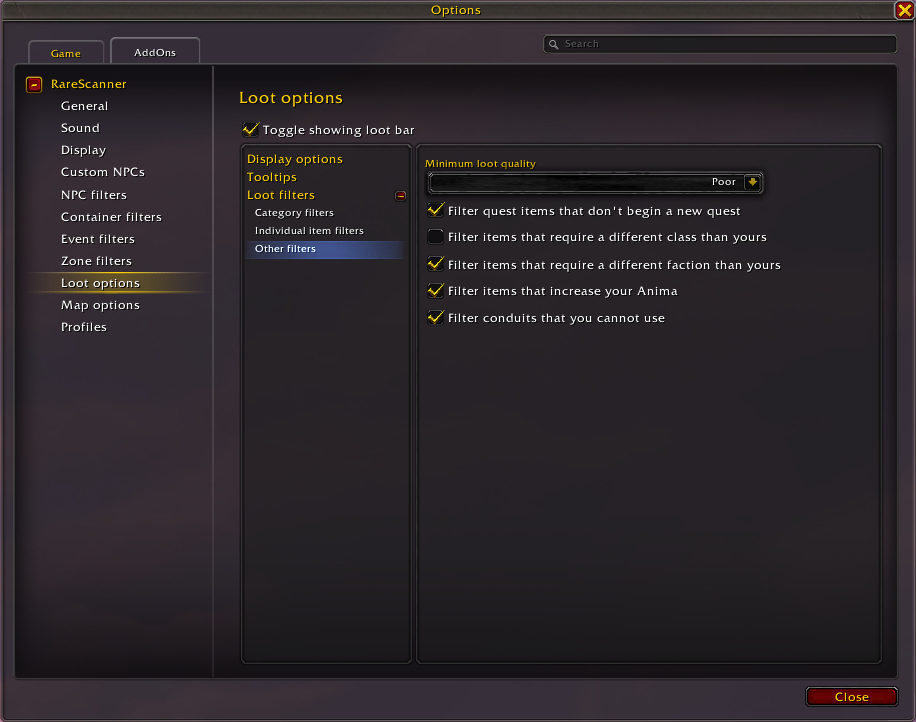
Other filters:
- Use the dropdown menu at the top of this page to select the minimum loot quality for items to display in the loot bar. Icons for lower loot quality items will not be displayed.
- Use the checkboxes on this page to select other special item types to filter. Most of these checkboxes filter items that you have no use for.
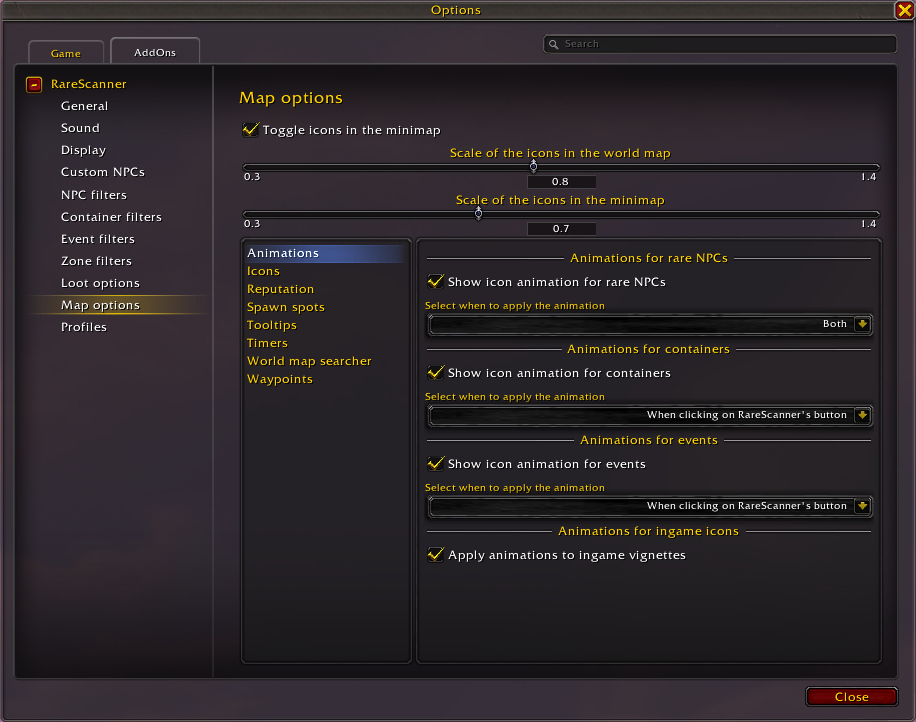
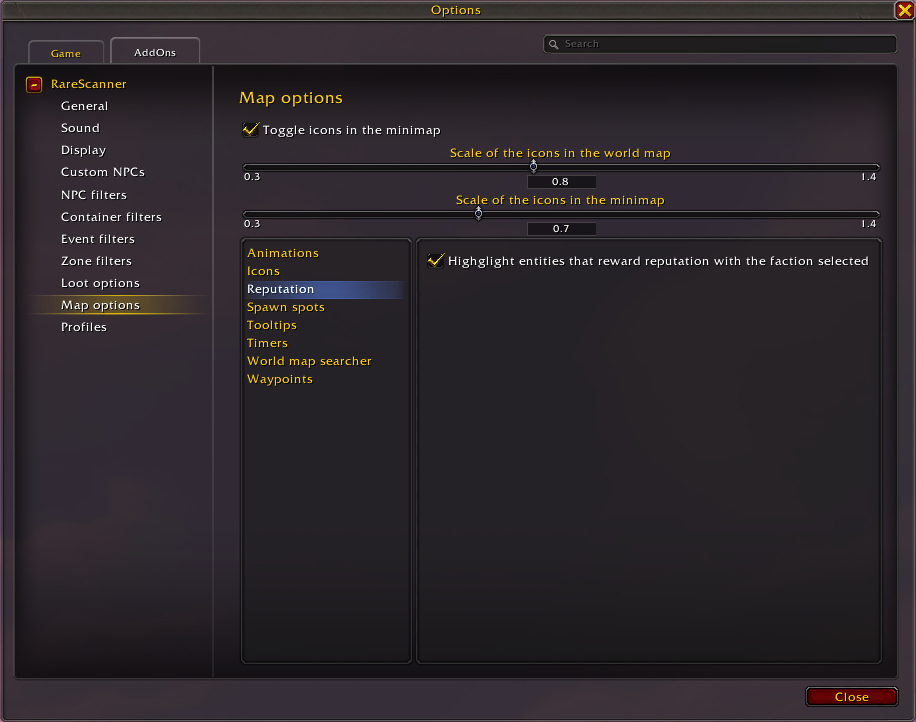
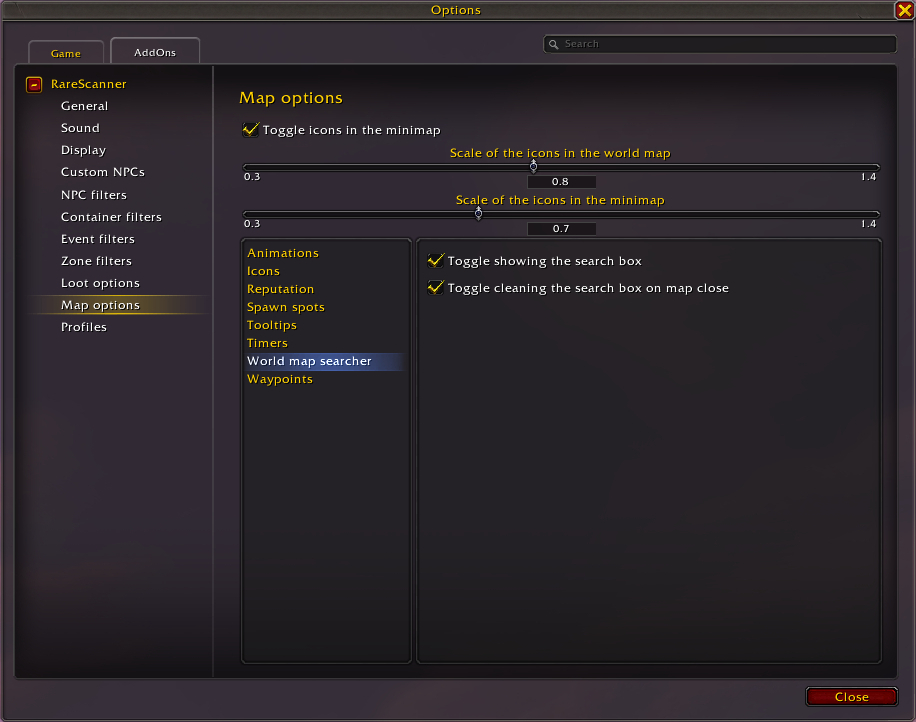
The Map options page of the RareScanner options menu has settings related to the icons that RareScanner adds to your map.
At the top of the page is a checkbox to toggle icons in the minimap. If this is unchecked, you will still see icons on the world map. There are also sliders to adjust the scale of the icons on both the world map and minimap.
The Animations section has checkboxes for showing icon animations on the map and dropdown menus to select when to apply the animation: when the entity is found, when clicking on the RareScanner button, or both.
The Icons section has a long list of checkboxes to toggle showing various types of icons.
The Reputation section has a single option. You can choose to Highlight entities that reward reputation with the faction selected. This only works with Dragonflight reputations that are tracked via the world map.
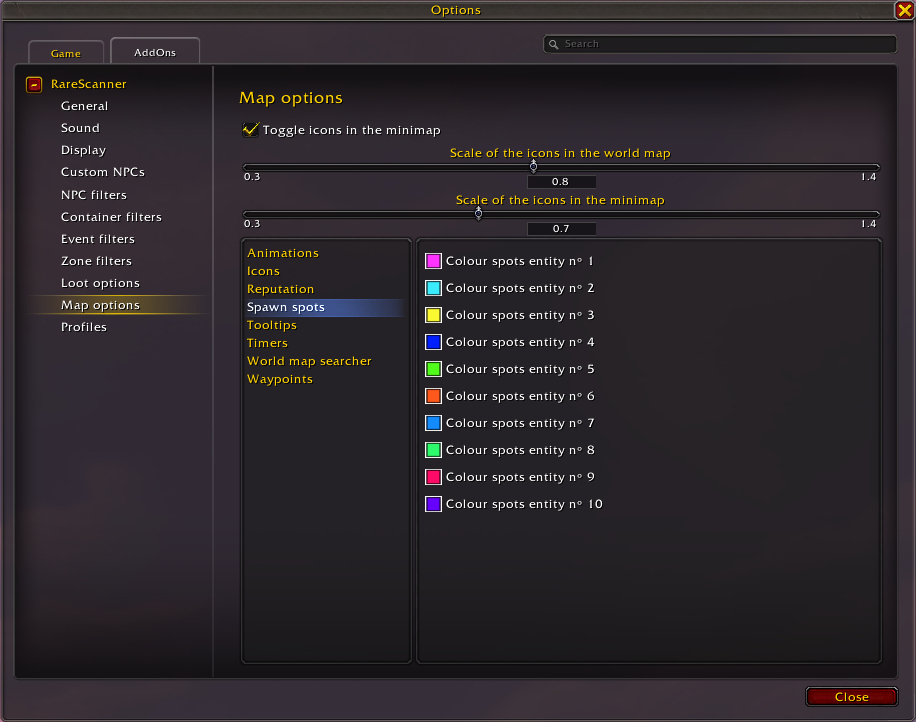
The Spawn spots section has boxes you can click to select the colors used to represent different locations where an entity can spawn.
The Tooltips section has a few different settings related to the tooltips that appear when you hover over a RareScanner icon on the map.
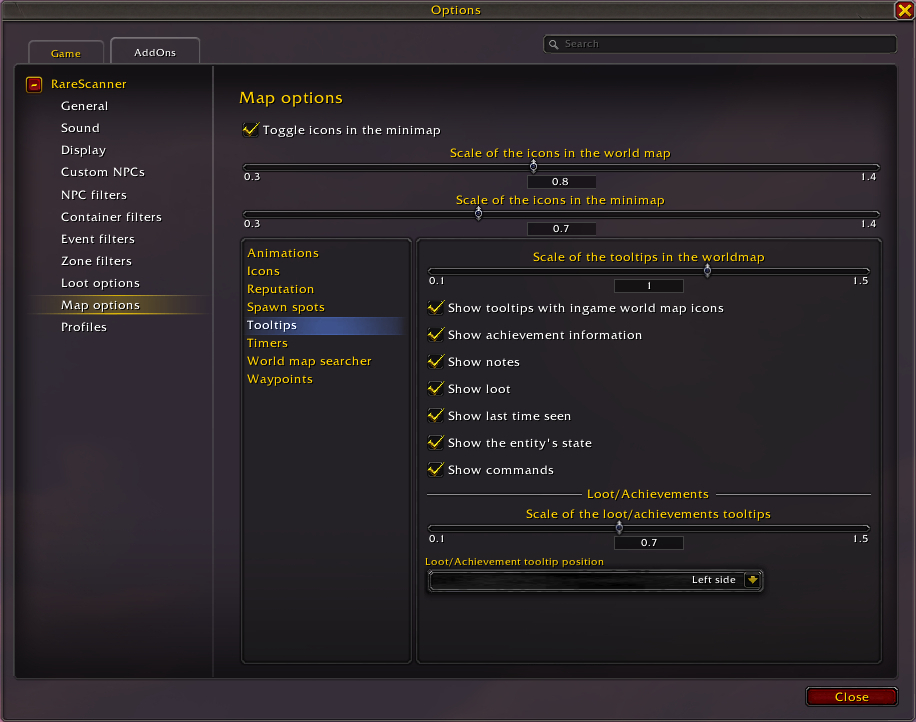
- You can adjust the scale of the tooltips in the worldmap with a slider.
- There are several checkboxes to show different components of the tooltip.
- You can select the scale of the loot/achievements tooltips with a slider.
- You can select the loot/achievement tooltip position in relation to the main tooltip with a dropdown menu.
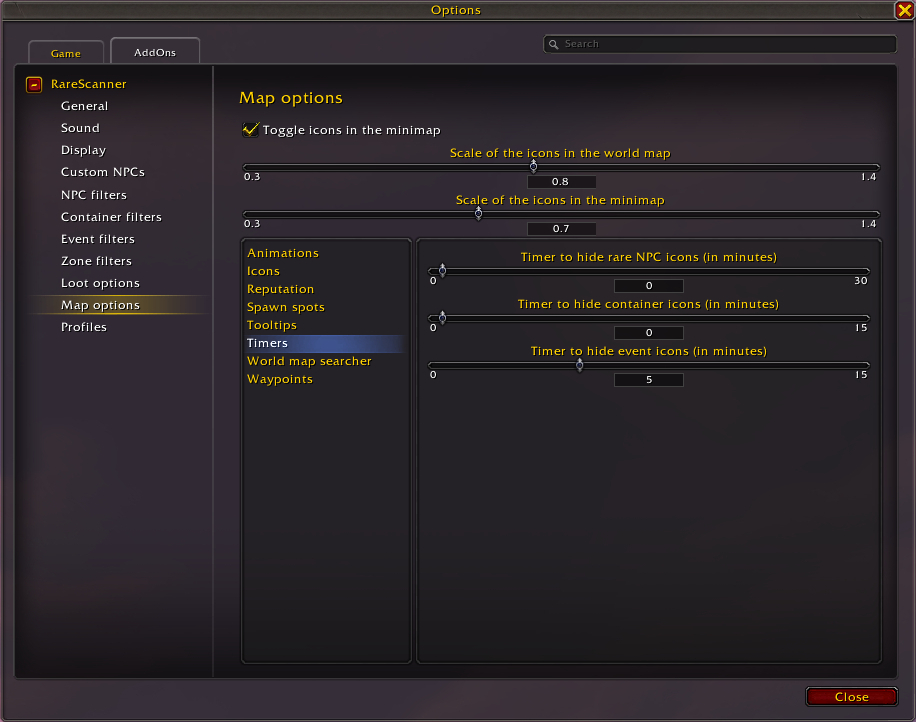
The Timers section has a few different sliders to adjust the timer to hide various icons in terms of minutes after the entity has been detected.
The World map searcher section has two checkboxes to toggle showing the search box on the world map and toggle cleaning the search box when the map is closed.
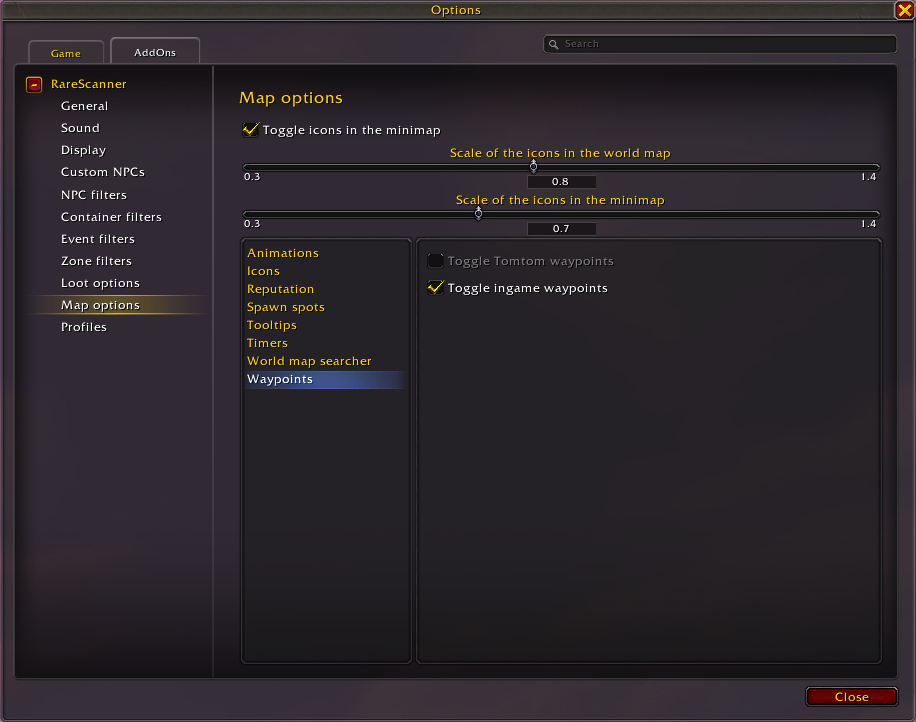
The Waypoints section has checkboxes to toggle use of the in-game waypoints or TomTom waypoints (if TomTom is installed). This will allow you to Shift left-click an icon to create a waypoint to that location.
The Profiles page of the RareScanner options menu has settings for saving and loading configurations for the addon.
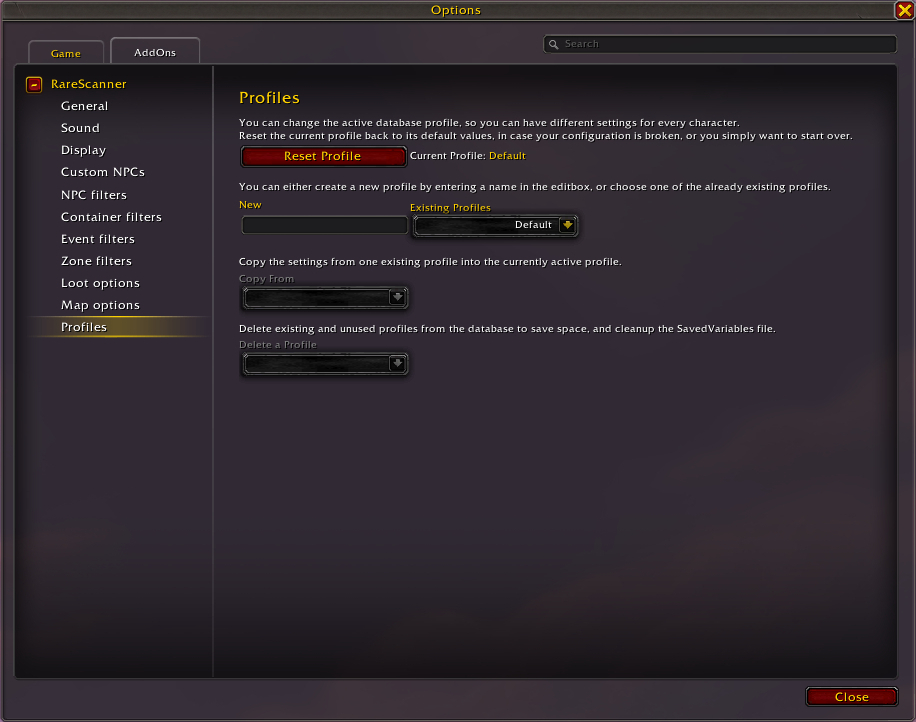
- There is a reset profile button at the top of the page that will reset all settings in your current profile back to their defaults.
- You can create a new profile by typing a name into the text box.
- An existing profile can be applied using a dropdown menu.
- You can copy settings from an existing profile into the currently active profile by selecting the profile to copy from a dropdown menu.
- You can delete a profile by selecting it from a dropdown menu.
Author

I've been playing World of Warcraft on and off since vanilla, usually as a healer or caster and often as a guild leader. I play both retail and classic. I also love RPGs, sandboxes, and sims.
Does anyone know how to get an icon to appear on the map again? I did the alt-shift-left click to filter it off the map and can’t figure out to get it back so I can track the npc.
Head to curseforge, open up your addons, right-click RareScanner and select “Delete Settings (Saved Variables)”
doesnt work :(
Is there any good way to add the new Fel Portals from Season of Discovery into RareScanner?
please help with this question
You can go to Custom NPCs in the options and click Import NPCs, delete what’s in there and paste this:
(Credit goes to maqjav on the CurseForge page!)