- Author: Shadostruct
- Date: May 22, 2025
- Updated: May 22, 2025
- Expansion: Mists of Pandaria
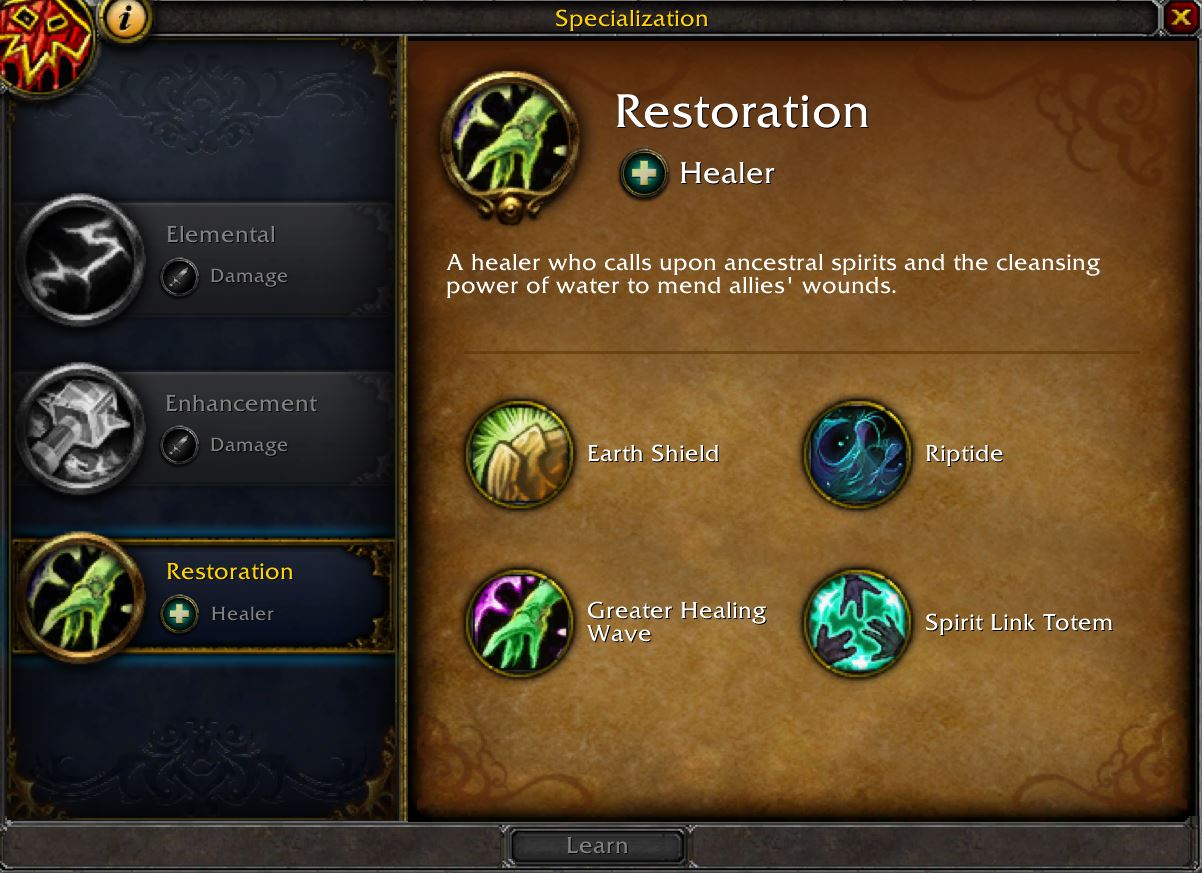
As a healer the added flexibility of MoP talent trees is going to be a great boon for you as you’ll be able to easily change your setup to fit your own playstyle and what best suits the encounter.
Talents
With healer being a less defined role that is heavily impacted by how your personal playstyle works and by the requirements of the encounter you’ll likely be swapping talents here and there. With this in mind, use Tome of the Clear Mind to hotswap talents out of combat, so you can personalize and optimize things on a fight-by-fight basis.
Below I’ve outlined a generalist build to start out with that’ll be effective in most situations, and from there you can use the information on each individual talent to make your own customizations.
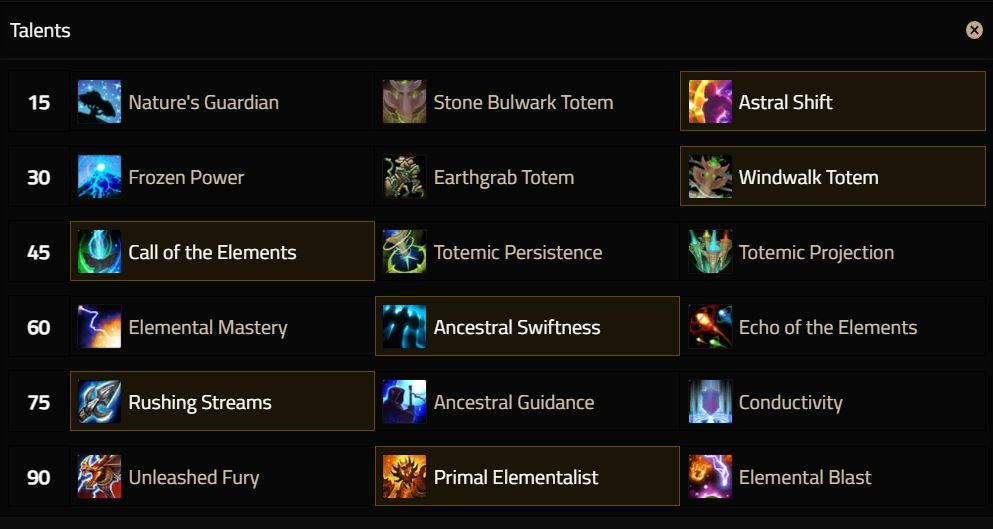
Level 15 Talents (Tier 1)
 Nature’s Guardian
This is a solid emergency proc. It has the added benefit of casting automatically when your health drops below 30%, so you don’t need to micro-manage it or have another button on your bars. The downside is if something were to one shot you, or you were to take fatal damage at 31% health you’re going to quickly be looking at a grey screen. You also can sometimes trigger this during moments where you’ll likely be fine, and then not have it for moments where you need a defensive to keep you up. Stone Bulwark Totem
While not recommended over the other two in most situations, there is a scenario where you’ll be taking a predictable amount of low-mid damage over a longer period of time where this totem can work. That said, those situations are not the usual and this talent is going to underperform in areas outside of that niche.- Astral Shift
A flat 40% damage reduction is a solid defensive option. The downside is the buff only lasts 6 seconds and it’s on a 1.5 minute cooldown, meaning you need to be careful with how you use the button. Generally having an idea of the fight beforehand and knowing when to press it in advance will give this defensive the best outcome.
Level 30 Talents (Tier 2)
- Frozen Power
With this only being a soft CC, single target, and attached to a shock spell that isn’t used often, I wouldn’t recommend this in any situation, really. - Earthgrab Totem
A much more effective replacement for your Earthbind Totem that provides AoE CC and great kiting power. Very powerful, although situational. - Windwalk Totem
This iteration of the totem is a lot more niche than you might assume as it does not provide any form of movement speed increase. Instead, this provides immunity to any movement-impairing effects in a 40 yard range for 6 seconds. The good news is you don’t need to predict these debuffs in advance as an immunity will cleanse any current movement-impairing effects within the radius immediately.
Level 45 Talents (Tier 3)
- Call of the Elements
This is going to be your go-to as Restoration. Not only is this going to offer you a reset on several utility totems at your disposal, its most important use for you is going to be the ability to recast your Healing Stream Totem before the 30-second cooldown is up. With so many buffs to the healing this totem does from various passives, glyphs, and talents this is actually a significant increase to throughput. - Totemic Persistence
For Restoration, specifically, this can have use where you’d want to have your Healing Stream Totem down at the same time as your Healing Tide Totem or Mana Tide Totem. While this is viable, it’s definitely a bit more niche. - Totemic Projection
While this is overall not going to beat out the usefulness of Call of the Elements, it at least has some minor use if you want Capacitor Totem to be useful without having to enter melee range of mobs. You can also reposition totems like your Healing Stream Totem if your raid has to move away from where it’s currently placed.
Level 60 Talents (Tier 4)
- Elemental Mastery
This is a massive Haste boost, akin to Heroism/Bloodlust, that will let you hit certain thresholds by itself to squeeze out more ticks from your heal-over-time abilities. While the cooldown is somewhat short you’re not going to be using this every time it comes up, meaning it does lose some efficiency. That said it does pair well with Blood Fury or Synapse Springs for a massive temporary throughput bump. - Ancestral Swiftness
This is going to be your standard choice as it gives you two strong benefits. One is a passive 5% Spell Haste buff that is considerable and will get you well on your way to hitting certain Haste thresholds you’d want to aim for. The other is the active ability on a rather short cooldown that turns one spell with a cast time of less than 10 seconds into an instant-cast. Pairing this with something like Greater Healing Wave will give you a nice instant-cast burst heal to add to your toolkit. - Echo of the Elements
While this might sound attractive on-paper the downsides are too major to overlook. It’s not recommended to take this talent in almost all situations as it’s unpredictable, will often just overheal the target you threw a heal at, and doesn’t even affect spells like your totems.
Level 75 Talents (Tier 5)
- Rushing Streams
This is the standard option for Restoration as it takes a passive smart-healing entity and amplifies its power considerably. You’re going to make plenty of use from this over the course of a fight as Healing Stream Totem has a 15-second duration with a 30-second cooldown (with Call of the Elements giving you at least one free reset during a fight). Combining this with the Glyph of Healing Stream Totem makes it even more potent. Keep the totem down as often as the cooldown is up! - Ancestral Guidance
This can be a powerful raid cooldown that’ll help with heavy burst healing for its duration. As it smart-targets the lowest health allies it’ll be more about just slamming out heals and getting a considerable chunk more throughput than you normally would. The major downsides to this are that to make use of it is going to cost a lot of mana as you spam cast large heals for its duration, and it can only be used a handful of times during an encounter. - Conductivity
While this can be used in situations where the whole raid is grouped for an extended period of time to keep your Healing Rain at maximum uptime, it’s definitely the most awkward and most niche of the three talents in this tier. This isn’t recommended in most situations, although there are some edge scenarios where it may be efficient.
Level 90 Talents (Tier 6)
- Unleashed Fury
This is mainly going to only give you a boost to your single-target heals. The Unleashed Fury buff from this talent is going to increase your next single-target heal by 50% (a buff cast on yourself). Whereas the buff cast on a player you target with Unleash Elements while having Earthliving Weapon up is going to be Unleash Life – a separate increase to a single-target heal cast on that specific target. While these buffs do stack, buffing a singular heal on a singular person is rarely going to be useful enough to consider this talent. - Primal Elementalist
This might seem an odd choice for a Restoration Shaman, but there’s a hidden clause here that actually makes it quite a good cooldown. This will amp up both your Fire Elemental Totem and Earth Elemental Totem to make the elementals a much more powerful version of themselves, as well as give them status as a pet. That last part is important as both of these elementals have an ability you can command them to cast on yourself called Empower (Fire) or Reinforce (Earth). This will last the duration that the elemental is active and gives you a 10% increase to healing for both spells, a 5% increase to damage for Empower, and a 20% damage reduction buff for Reinforce. - Elemental Blast
This is generally not recommended in most situations as the stat you get from casting this is random, it takes up precious time to cast, and you’ll need to upkeep this throughout a fight to make the best use of it. If you’re mainly going to be able to DPS while off-healing this could be viable, but otherwise it just doesn’t offer enough for a Restoration Shaman.
Glyphs
With the removal of Prime Glyphs you have 3 Major Glyphs to choose from that affect gameplay in a more subtle way and 3 Minor Glyphs that are mostly cosmetic or personal preference.
Major Glyphs
Good Throughput Options
- Glyph of Healing Stream Totem
If you’re taking the Rushing Streams talent this is essentially mandatory as just about every fight will have some sort of elemental damage going out that people will benefit from. It may not be an obvious effect, but it being passive on multiple targets and with high uptime will provide a ton of value over the course of a whole fight. - Glyph of Healing Wave
You’ll be using Healing Wave quite a lot at the start as it’s extremely mana efficient, and this will allow you to heal others with a longer cast while also not neglecting your own healthbar. - Glyph of Telluric Currents
Whenever you don’t need to heal you should be attempting to fit in some Lightning Bolts anyways, and this will make your mana pool a lot sturdier for doing so. Very useful before you get enough Spirit to sustain yourself without it or on fights that really require you to pump out healing. - Glyph of Riptide
This removes the cooldown of Riptide but reduces the initial burst of healing it provided by 75%. If your mana pool is stable you can use this to blanket a good chunk of your raid in HoTs, and it’ll also make your Chain Heal more potent as it gets a heal boost if your primary target has a Riptide HoT currently active on them. - Glyph of Fire Elemental Totem
Best when used in combination with the Primal Elementalist talent. This is very strong, but not entirely required as, keep in mind, you have two elementals that provide similar effects which without this equals out to two separate 1-minute buffs for yourself. That said, if you want this buff to be up more often for shorter durations during a fight, this glyph is what you’ll want. - Glyph of Chaining
With this glyph Chain Heal is now going to have a 2-second cooldown, but jump between targets who are potentially twice as far. This is going to be useful in larger raids or raids where people are going to be spread out over a larger area to make your Chain Heal more effective. - Glyph of Cleansing Waters
This will make it so that negative ailments you dispel on group members will now also come with a bonus heal of 4% of their life. While this does increase our healing, and it is nice to have a safety net little heal while we use a GCD to cleanse, it’s so small that it’s rarely going to be useful.
Good Defensive Options
- Glyph of Flame Shock
Seeing as your Flame Shock should have 100% uptime on at least one target, this is a small, but consistent, self-heal that’ll add up over the course of a fight. Downside is you’ll need to remember to keep your shock up on at least one target as much as you can to make full use of it. - Glyph of Ghost Wolf
Makes your Ghost Wolf form more resilient to slows. Situationally useful.
Good Utility Options
- Glyph of Capacitor Totem
Very straight-forward. Reduces the charge-time of Capacitor Totem by a couple of seconds. Useful when AoE stuns are going to be in-demand and you want it to be a more reactive ability. - Glyph of Frost Shock
Increases the duration of the slow from Frost Shock. Useful if you need a little extra oomph for kiting something in a fight. - Glyph of Spiritwalker’s Grace
An extra 5 seconds duration isn’t anything to sneeze at. When you press your Spiritwalker’s Grace, an extra few casts getting snapped off will be a welcome addition. - Glyph of Hex
This is pretty straightforward as it’ll reduce the cooldown of our Hex CC spell by 10-seconds. If you’re assigned to CC-ing targets with Hex, or might even need to keep more than one target locked down this could be useful.
Minor Glyphs
Minor glyphs are mainly going to come down to personal preference, but I’ll list a few that are convenient enough to take notice of.
About the Author