- Author: Luxrah
- Date: May 6, 2025
- Updated: May 6, 2025
- Expansion: Mists of Pandaria
As a healer, the Restoration Druid has less of a set rotation and more of a priority system. You’ll be performing triage with your healing abilities while using your cooldowns to maximize your output and minimize your mana usage, and perhaps even weaving in a little damage where you can.
Important Mechanics
Before we get into your spell priority, there are a couple of key features of Restoration Druids that should be understood for optimizing your spell choices.
Symbiosis
Symbiosis is an unique ability for Druids that allows you to exchange a spell with another character. You get one ability from that character’s spellbook and they get one from yours. This lasts for an hour and persists through either character’s death, although if your characters are too far apart it will cancel the effect. You can’t use this spell on another Druid and only one Druid can have it on a target.
Here is what you get from your target and what they get from you when you use this spell as a Restoration Druid:
Class | You Receive | Target Receives (Based on their role) |
|---|---|---|
Who you choose to give your Symbiosis to will depend on the fight and your group. Some groups will coordinate their Druids’ Symbiosis buffs while others will leave it to you.
As far as what you gain from the exchange, a Shaman is usually a good choice, since Spiritwalker’s Grace can allow you to cast Tranquility while moving. For personal defense, getting Ice Block from a Mage can be a life saver. In some fights, getting Leap of Faith from a Priest can be clutch too.
In terms of which targets will benefit the most on their end, tanks can often make good use of the defensive cooldowns you give them. You can also give your group an extra battle rez by giving a Holy Paladin your Rebirth. For extra raid healing, there’s also the option to give Tranquility to a Shadow Priest.
Harmony
Your Mastery: Harmony incentivizes you to weave in direct heals and not rely exclusively on spamming Rejuvenation and other heal-over-time spells. The more Mastery you have, the stronger your direct heals will be, and casting one will also buff your HoTs for 20 seconds. In most situations you’ll want to use a direct heal at least every 20 seconds to maintain the buff.
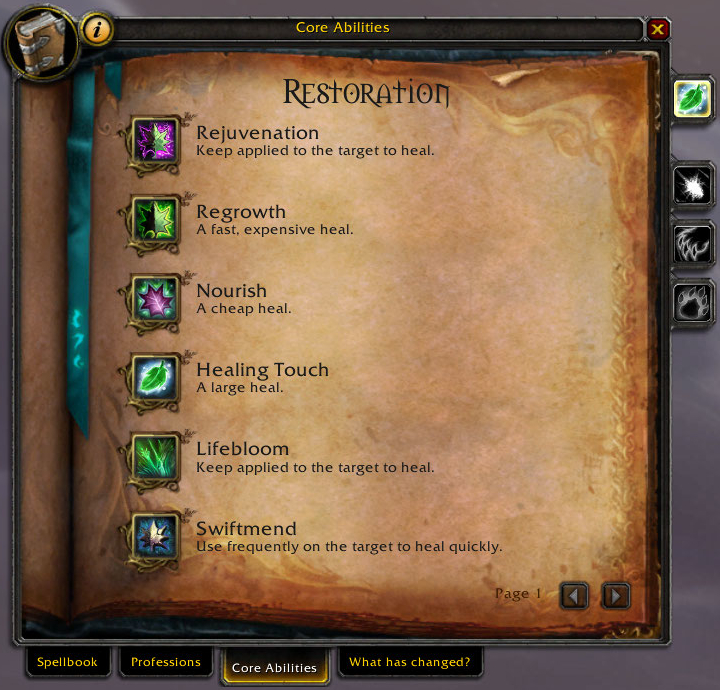
Direct heals that trigger the buff are:
- Healing Touch
- Nourish
- Regrowth (initial heal)
- Swiftmend
- Wild Mushroom: Bloom
Spell Priority
- Use Lifebloom on the tank (or another priority target) to apply 3 stacks of the HoT.
- You will typically refresh this HoT with Regrowth, Healing Touch, or Nourish, but you should refresh it manually if needed.
- Use Swiftmend on a target with an active Rejuvenation or Regrowth HoT in the following circumstances:
- If the target needs immediate healing.
- If you don’t have Glyph of Efflorescence, use it to place your Efflorescence in the target’s location ahead of heavy AoE damage.
- On cooldown to maintain your Harmony buff.
- Use Regrowth on a target who needs immediate healing if Swiftmend is on cooldown or the target doesn’t have the necessary HoTs.
- Use Wild Growth on cooldown if at least 3 targets need healing.
- Use Wild Mushroom to keep a mushroom active near allies who will need healing.
- With Glyph of Efflorescence, this will also place your Efflorescence circle on the ground in the location of your current Wild Mushroom, so be sure that the placement is optimal and don’t hesitate to move it as your group moves.
- Use Genesis to catch up when heavy AoE healing is needed if you have Rejuvenation active on multiple targets.
- Be mindful that this will accelerate your Rejuvenations and they will need to be reapplied sooner if you want to maintain them.
- You can use this to build up your Wild Mushroom ahead of using Wild Mushroom: Bloom.
- Use Wild Mushroom: Bloom when a burst of AoE healing is needed, ideally after your Wild Mushroom has absorbed a lot from Rejuvenation.
- Use Cenarion Ward on cooldown on the tank (or another priority target) if you have the talent.
- Use Force of Nature on cooldown if you have the talent and its healing is needed.
- Use Rejuvenation in the following circumstances:
- To apply/maintain the HoT on the tank(s) or other priority targets.
- On targets who need healing when you are moving.
- On targets who are taking steady ticking damage, such as from a DoT.
- To blanket the raid ahead of heavy damage going out.
- Use Healing Touch on a target who is missing a lot of health.
- If you have Glyph of Regrowth, you should use Regrowth instead of Healing Touch.
- Use Nourish to top off a target if there isn’t more urgent healing to be done and/or to refresh Lifebloom.
- Use Moonfire to apply and maintain the DoT to an enemy when healing isn’t needed.
- Use Wrath to deal some damage when healing isn’t needed.
Catweaving
If you’re exclusively looking to deal some damage, Cat Form is actually the way to go as a Resto Druid. Shapeshifting costs you less mana than even a single Wrath cast, and none of your cat abilities cost you any mana at all, which lets you save all of your mana for when you need to heal again. However, it will cost you a global cooldown to shapeshift, and you’ll need to be in melee range to do any damage. You won’t be Hit-capped either, as Nature’s Focus doesn’t apply to these abilities, but Heart of the Wild can compensate for this somewhat if you have the talent. You also benefit from Killer Instinct and Primal Fury.
- Use Rake to apply and maintain the bleed.
- Use Ferocious Bite when you have 5 combo points.
- Use Swipe to build combo points when you are fighting more than one target.
- Use Mangle to build combo points against a single target.
Important Cooldowns
In addition to your core healing spells, you have a number of abilities with longer cooldowns that you’ll want to utilize in opportune moments.
Healing & Defensive Cooldowns
- Barkskin
Reduces your damage taken by 20%. Also prevents spellcasting delays, and can be used while you are under crowd control effects. This is a great personal defensive on a relatively short 45-second cooldown and you should use it liberally. - Bear Form
You won’t be able to heal in this form, so you won’t use it very much, but don’t forget you have it. Just being in Bear Form gives you a massive bonus to your armor and Stamina which can help you survive heavy damage. - Frenzied Regeneration (requires Bear Form)
You definitely won’t be able to use this much since it requires being in Bear Form and generating 60 Rage before you can use it. Still, it’s there if you find yourself forced to tank some adds or something. - Heart of the Wild (Talent)
The main appeal of this talent is its passive 6% increase to your Intellect, but it also has an active component on a very long 6-minute cooldown. When activated, it triggers several effects for 45 seconds, none of which are directly relevant to healing. It makes your Bear Form beefier, your Cat Form more vicious, and increases your damage and chance to hit with spells while also making all of your damaging spells free to cast. So when you use this cooldown, it will be for dealing damage, especially during a burn phase. - Incarnation (Talent)
For you, this will be Incarnation: Tree of Life, which lets you transform into tree form for 30 seconds on a 3-minute cooldown. This form increases all healing you do by 15% as well as giving you a hefty 120% armor bonus. Four of your spells are also altered while you are in this form: Lifebloom can be cast on unlimited targets, Wild Growth affects an additional 2 targets, and Regrowth and Entangling Roots are both instant cast. You’ll aim to use Wild Growth on cooldown and get out as many Lifeblooms as possible while using Clearcasting procs for Regrowth. - Ironbark
Basically an external Barkskin, reducing the damage your target takes by 20% for 12 seconds, on a 1-minute cooldown. You may be asked to use it on a tank as part of a cooldown rotation. Otherwise don’t forget to use it, and use it often. - Might of Ursoc (activates Bear Form)
If you need to pop into Bear Form to survive a mechanic, this cooldown will activate it and also give you a 30% boost to your health for 20 seconds, which can make all the difference. It’s on a 3-minute cooldown. - Nature’s Swiftness
This cooldown will make your next spell instant and free to cast, also increasing its healing and duration by 50%. It can be used with Rebirth for a quick battle rez, or with some of your crowd control abilities, but typically you’ll use it for Healing Touch or Regrowth. It can be tempting to hold onto this ability for absolute emergencies, but on a 1-minute cooldown you can get a lot of use out of it over the course of a fight. You can also use this while in Bear Form or Cat Form to cast your heal without dropping the form. - Nature’s Vigil (Talent)
This is an interesting ability that you can use to help burn down enemies while still healing your allies. It increases both damage and healing by 12%, and it causes your single-target heals to do both splash damage and splash healing, as well as giving your damaging spells some splash healing. It lines up well with Incarnation: Tree of Life to give you instant Regrowths that splash as well as some buffed Lifeblooms and Wild Growths. - Renewal (Talent)
A straightforward self-heal on a 2-minute cooldown. It’s instant and costs no mana, and you can use it while shapeshifted. The most important thing is just to remember to use it if you have it. - Tranquility
Your big AoE healing cooldown. Before you use it, be sure that you will be able to stand still for the full channel. It’s on a 3-minute cooldown so you don’t want to waste it. If you pick up Spiritwalker’s Grace from a Shaman via Symbiosis, you can combine it with this spell to allow you to move freely while casting it (you can even cast Spiritwalker’s Grace after you start the channel). Often you will be asked to save this for a specific time in the fight as part of a cooldown rotation with other healers, but if not you can use it to catch up when things start to get messy.
Mana Cooldowns
- Innervate
Unlike other healers’ mana cooldowns, yours can be shared. You may even be asked to save yours for a specific target. Glyph of Innervate can give you the best of both worlds, allowing both you and your target to benefit from a reduced version of the spell – netting more total mana overall, but divided between two targets. The amount of mana that you and/or your target receive is based on your Spirit when this spell is cast, so you should try to line this up with any buffs or cooldowns that will increase your Spirit to maximize its effect. In most fights, you will be able to use it more than once if you use it early, so don’t wait until you (or your intended target) are completely out of mana.
Utility Spells
Restoration Druids have a variety of useful spells that also bear mentioning.
Crowd Control
- Cyclone
- Disorienting Roar (Talent)
- Entangling Roots
- Faerie Swarm (Talent)
- Growl (requires Bear Form)
- Hibernate
- Maim (requires Cat Form)
- Mass Entanglement (Talent)
- Mighty Bash (Talent)
- Nature’s Grasp
- Pounce (requires Cat Form)
- Typhoon (Talent)
- Ursol’s Vortex (Talent)
Movement
- Aquatic Form
- Cat Form
- Dash (activates Cat Form)
- Displacer Beast (Talent) (activates Cat Form)
- Prowl (requires Cat Form)
- Stampeding Roar (activates Bear Form)
- Swift Flight Form
- Teleport: Moonglade
- Travel Form
- Wild Charge (Talent)
Buffs
- Mark of the Wild
- Note that this doesn’t stack with Blessing of Kings, Legacy of the Emperor, or Embrace of the Shale Spider
- Symbiosis
Debuffs
- Faerie Fire/Faerie Swarm (Talent)
Dispels
Revive
About the Author
