- Author: Nevermore
- Date: May 30, 2025
- Updated: May 30, 2025
- Expansion: Mists of Pandaria
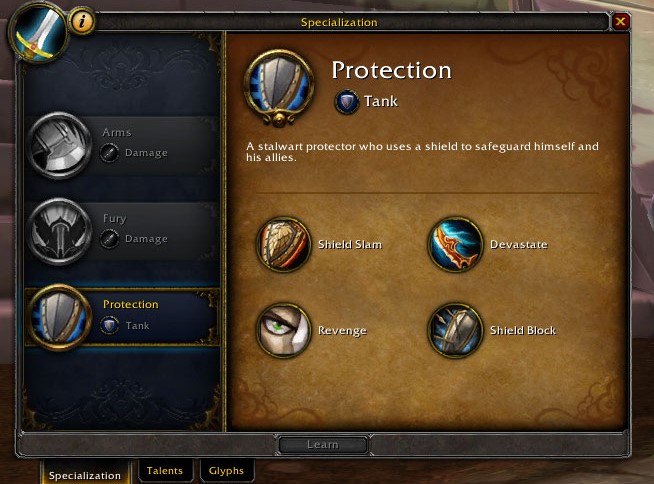
Protection Warriors in Mists of Pandaria have a versatile Talent Tree that provides them multiple choices, depending on the encounter. This versatility also shines when considering their multiple viable stat builds, allowing them to customize their playstyle based on preference.
Talent Build
Unlike other specializations with a much more straightforward path in their Talent Build, Protection Warriors can be considered truly versatile, using many different talents based on the encounter they are facing. While some options are stronger than the others and may be viewed as the “Meta” option, the reality is that the overhauled Warrior Talent Tree offers many options and ways of approaching encounters.
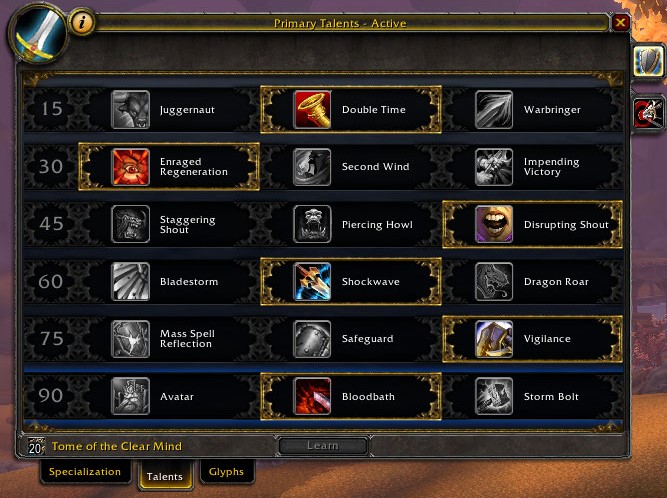
Level 15 – Tier I
- Juggernaut ❌
This talent is not viable when considering alternatives, offering a far less beneficial variant of Charge. - Double Time ✅
This is the first option from the first tier, and it is often the most used one in raid and dungeon environments where you need to pull multiple targets quickly. The extra mobility granted by Double Time is what truly makes it worthwhile! - Warbringer ✅
This is the second viable option from this tier, offering a powerful crowd control effect! While this option is widely considered strictly PvP, it also has some uses in PvE, being especially useful against foes that must be CC-chained quickly.
Level 30 – Tier II
- Enraged Regeneration ✅
Enraged Regeneration is the best talent from the second tier by far, granting you on-demand percentage healing. As it is only conditioned by its cooldown, you can always rely on it to ease the stress placed on your healers. In addition, you may double the healing received from it if you use it whenever you are enraged. - Second Wind ❌
Second Wind is viable in theory, but its activation condition makes it one of the worst options from this tier. The issue with the talent is that it only activates once you drop below 35% HP, which puts you in a dangerous scenario and quite vulnerable to many mechanics that might lead to a one-shot. - Impending Victory ✅
The other viable option from this tier, Impending Victory, provides the same healing as Enraged Regeneration without the Enrage component. Still, it delivers it instantly instead of half Instant Heal and half HoT, while also being available far more often than the other option. Its only downside is the Rage cost, which might prevent you from activating a full Shield Block or Shield Barrier in specific moments, although 10 Rage can often be neglected.
Level 45 – Tier III
- Staggering Shout ❌
Sadly, this talent is useless in PvE, as it requires a very precise scenario to be effective. Since the effect can break instantly from any damage, it is far better suited for PvP scenarios. - Piercing Howl ✅
This option is best for kiting mobs, especially in dungeon environments, as it can help you massively slow them down. This ability can also be used in raid environments, but it mostly depends on how your group clears and how the pulls are specifically happening. - Disrupting Shout ✅
This option is excellent for encounters with adds that must be silenced at all costs! You will take this option by default unless you must kite mobs and take Piercing Howl instead.
Level 60 – Tier IV
- Bladestorm ❌
This talent is generally far better suited for the other Warrior specializations. However, even Protection Warriors might find use for it, considering they can continue to Parry, Block, and Dodge during the effect. The issue is that the ability’s duration takes too many potential GCD uses, and it is often simply better to take either Shockwave or Dragon Roar. - Shockwave ✅
Known by many as an iconic Protection Warrior ability, Shockwave is considered a “Bread & Butter” ability for most tanking environments, providing a powerful and consistent stun effect, especially for AoE, along with a decent amount of damage. You will avoid taking this talent for Single-Target encounters unless the boss is susceptible to Stun effects (Dungeons). - Dragon Roar ✅
This talent is one of the best for encounters where you can’t stun the adds but want to deal as much damage as possible! You will consistently use this talent, especially in Single-Target Boss fights! Previously, this talent had synergy with Bloodbath, triggering a DoT debuff on all affected targets. However, it has been confirmed on the MoP Classic Beta that this is no longer the case.
Level 75 – Tier V
- Mass Spell Reflection ❌
The issue with this talent is its fairly low-mid range, forcing the entire group to move near the tank’s location to be fully effective. When considering the rest of the options from this tier, Mass Spell Reflection is simply situational at best and should only be used in progression runs by struggling groups. - Safeguard ✅
- While Safeguard may be considered strong, it is useless if you are the Main Tank in most encounters! The talent only works for scenarios where you are the Off-Tank and want to provide consistent Damage Reduction to the other tank. The low cooldown makes the difference, even if the Damage Reduction is weaker than Vigilance by a large margin and lasts only half its duration.
- Vigilance ✅
This talent choice is considered the strongest from the fifth tier, not only offering a powerful defensive tool for any raid member, including in the scenario where you’re the Off-Tank, but also providing you with a way of AoE Taunting!
Level 90 – Tier VI
- Avatar ✅
While primarily considered a DPS cooldown, Avatar is a great option for Single-Target and AoE encounters, even as a Tank! The ability is considerably better in encounters where Movement Reduction effects are involved. However, it comes down to personal choice and build path, as it would function substantially better on a Crit-oriented build. The main downside of the ability is its long cooldown, which makes it unfavorable for some encounters. - Bloodbath ✅
Yet another DPS-oriented talent, Bloodbath was considered the best option while interacting with Dragon Roar. As currently observed on the Beta, the ability no longer interacts with it, meaning it just acts as an additional DoT purely based on your Melee Attacks. Depending on the encounter, Bloodbath may outperform Avatar due to its low cooldown. - Storm Bolt ✅
Lastly, Storm Bolt is great for encounters where you must provide CC-chains against dangerous adds. It also performs very well in dungeon environments. Compared to the other two abilities in raw damage, it is similar to the other two options, with its crowd control part being the selling point of the ability.
Glyphs
Major Glyphs
- Glyph of Heavy Repercussions
This glyph is largely mandatory as it significantly improves your Shield Slam damage! Considering that Shield Block will be active most of the time, the bonus can be nearly maintained indefinitely. - Glyph of Unending Rage
This is yet another mandatory glyph that extends your Rage Pool, allowing you to further enhance some of your abilities and spam them more. - Glyph of Hold the Line
This glyph is a great addition if you play the Parry-oriented stat build, allowing you to enhance your Revenge by a considerable amount! - Glyph of Incite
This glyph is great for establishing initial aggro, working exceptionally well in tough encounters! - Glyph of Shield Wall
Depending on the encounter, Glyph of Shield Wall might be a lifesaver, especially against dangerous bosses! This glyph is recommended for any progression fight, especially if you struggle with gear early on. - Glyph of Death From Above
This glyph is optional, but very nice in encounters where you must have more mobility! - Glyph of Enraged Speed
Like the previous glyph, Glyph of Enraged Speed may provide ample value in encounters where mobility is desired! - Glyph of Shield Slam
Another situational yet very useful option, the Glyph of Shield Slam should be used for any encounter that requires consistent dispelling.
Minor Glyphs
- Glyph of Intimidating Shout
One of the few Minor Glyphs that provides a real gameplay change, Glyph of Intimidating Shout should be used to incorporate fear into your gameplay without the risk of creating a chain pull. - Glyph of Bloody Healing
The second glyph that grants a real change to your gameplay, Glyph of Bloody Healing, provides a very niche bonus that can be used during Solo Play, allowing you to benefit from increased Bandage Healing while Deep Wounds is active. - The rest of the glyphs provide a pure cosmetic upgrade, meaning it comes down to personal preference!
About the Author

Nevermore
Hey there folks, I am Nevermore and have been deeply passionate about WoW for more than a decade. Whether we talk about the hidden mysteries of Azeroth or the otherworldly Outland, my journey brought me here to share the things that I have experienced with you all.